Onboarding to Lake Compute Private beta
To request access, fill out the Lake Compute signup form. Lake Compute is in active development and likely to change. Breaking changes may occur, documentation may be incomplete, technical support may be limited, and no service-level agreement covers it during beta. Refer to Private beta limitations before you plan real work around it.
Set up MDLS
MDLS is Fivetran's managed data lake product, including a hosted Iceberg catalog and compute service (Lake Compute). To start using Lake Compute, you need a Fivetran account and an MDLS instance.
1. Create a Fivetran account (if you don't already have one)
A Fivetran account itself is free to create and use indefinitely, even after any trial period ends, as long as you don't create connectors — billing only applies to connectors, and there is not yet any billing for MDLS or Lake Compute usage. If you also want to try connectors, you get a 14-day full-feature trial.
2. Create an MDLS destination (if you don't already have one)
Follow the Managed Data Lake Service setup guide for AWS on Fivetran's docs site.
- Provide an S3 bucket in the
us-east-1region to reduce latency and egress costs. - Make sure the bucket name and prefix don't contain any of these characters:
['#', '%', '^', '{', '}', '[', ']', '"', '?', '|', '', ' ']. - After you create the MDLS destination, Fivetran provides the required
External ID(also known asgroup_id). Pass this along with Fivetran's AWS account (834469178297) to the IAM trust policy.
3. Enable Lake Compute and generate a token
Before you enable Lake Compute, click Save & Test on your MDLS destination and confirm every test passes. Only enable Lake Compute and generate a token after the MDLS connection tests are all green. You don't need to generate a token as part of the MDLS connection setup itself.
On the destination page for your MDLS instance, go to the Compute tab and turn on Enable Lake Compute.
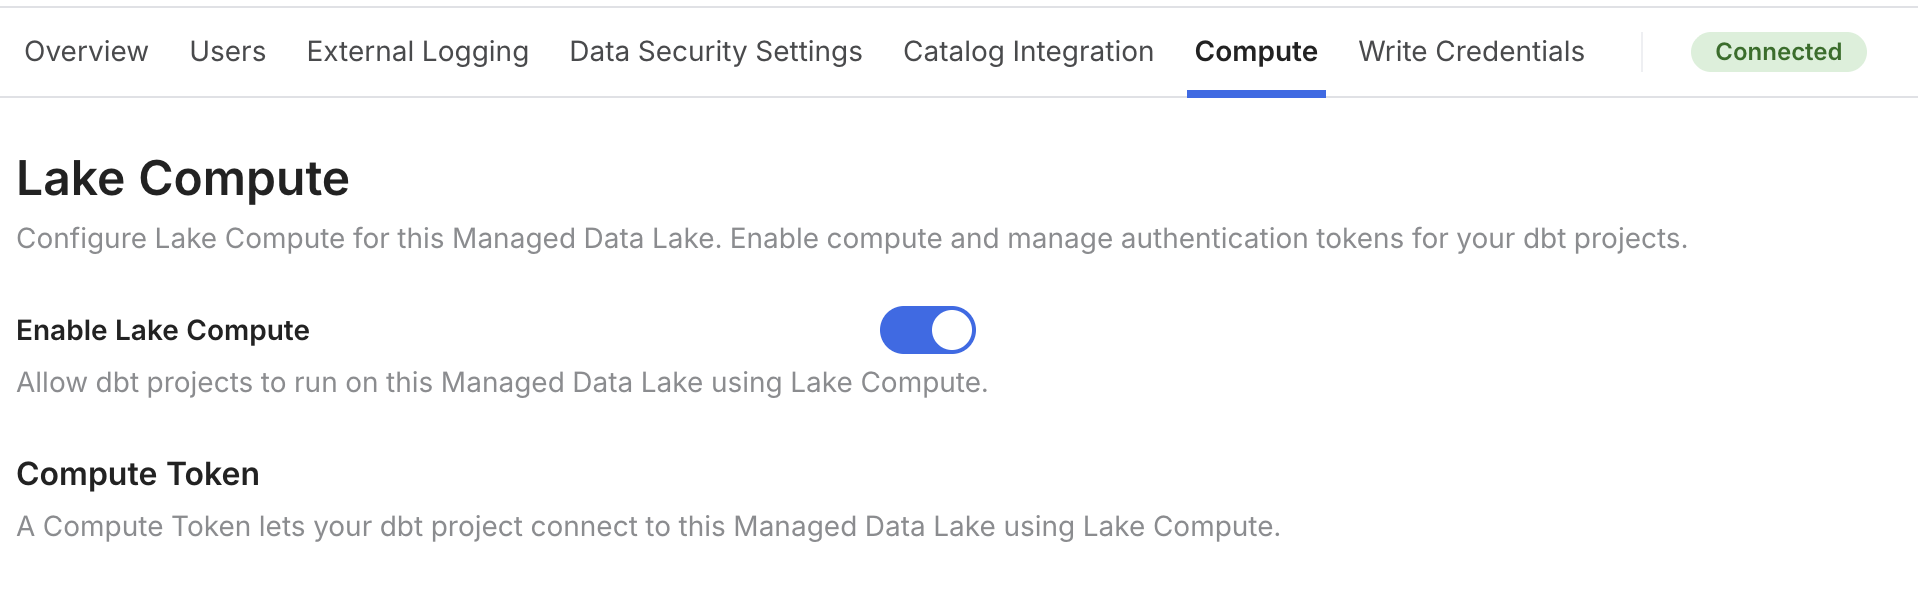 Enable Lake Compute
Then generate a token (user-scoped or service account). Save this token in a password manager, because you need it for your dbt connection profile.
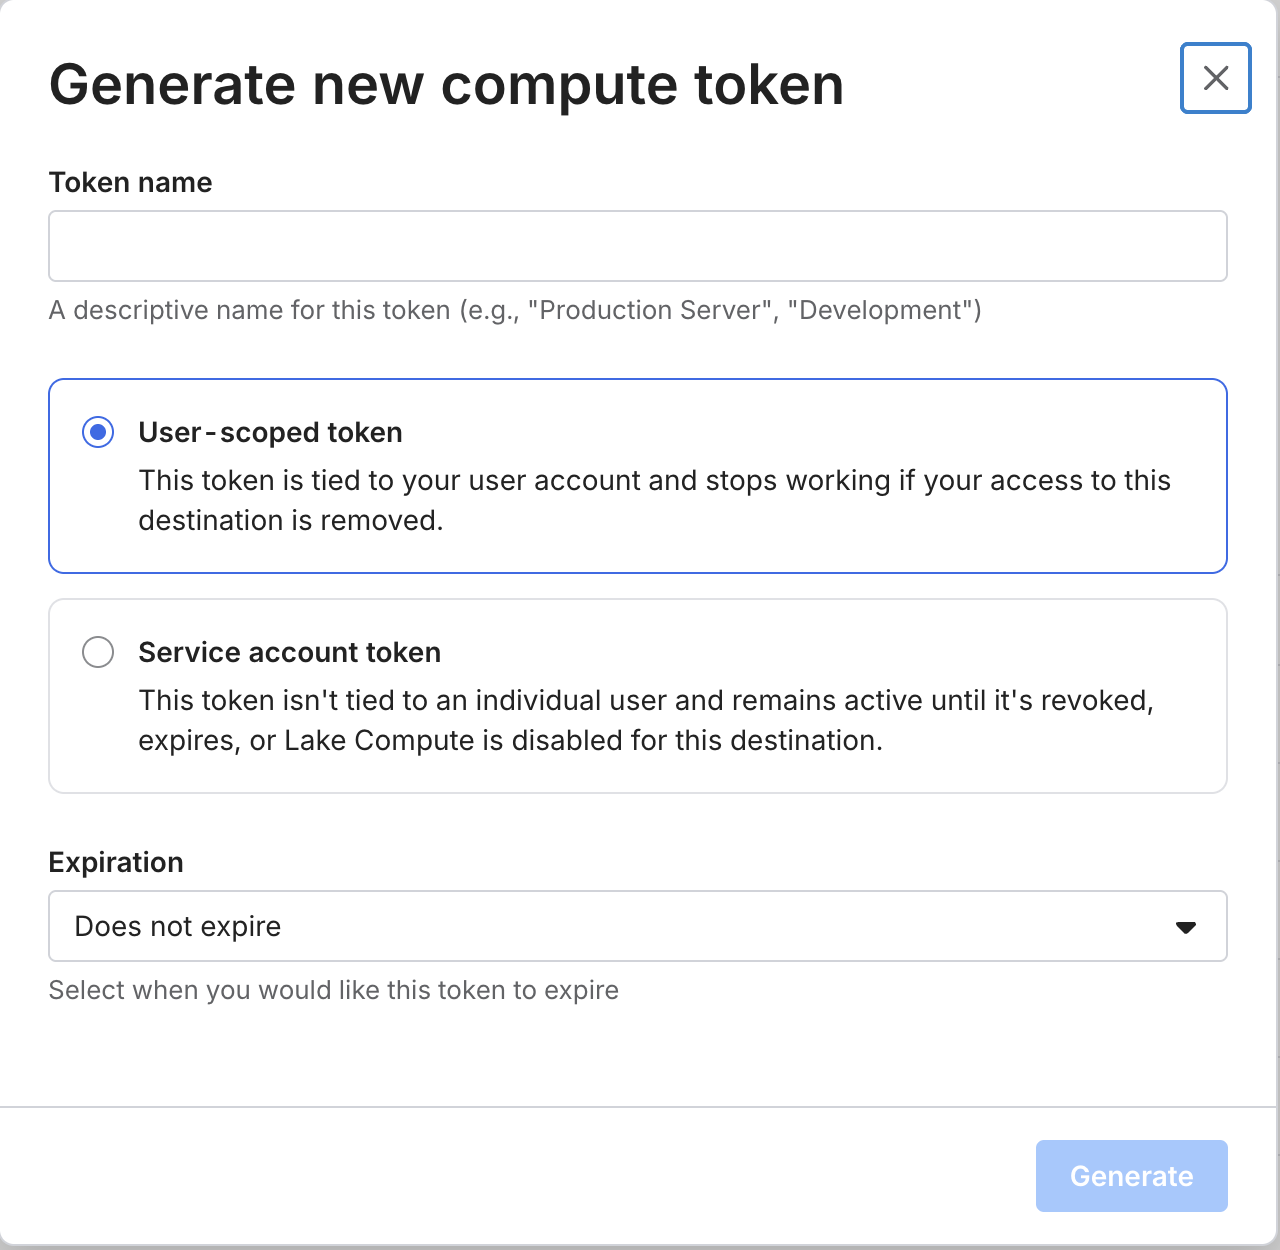 Generate a Lake Compute token
Configure Snowflake
These steps require ACCOUNTADMIN permissions.
Supported authentication methods
Lake Compute supports the following authentication methods:
sso(withauthenticator: externalbrowserfor local development)keypair(withprivate_key)self_signed_jwtworkload_identity
These are the only methods currently supported. The following authentication methods can create a Snowflake PAT, but Lake Compute doesn't support them yet — coming soon:
user/passworduser/passwordwith MFA- OAuth
Lake Compute uses your Snowflake connection profile to generate a token that can access Iceberg tables in Snowflake Horizon. This token has the exact same access as the user/role specified in your Snowflake connection profile. By default, this is a personal access token (PAT) that lasts for 1 month; you can configure a different pat_duration if required by your organization's security policies.
To use keypair authentication, follow Snowflake's guide to key-pair authentication and key-pair rotation to create a Privacy Enhanced Mail (PEM) private-public key pair for your user, then set the public key on the user:
ALTER USER USER_NAME SET RSA_PUBLIC_KEY='PUBLIC_KEY_BODY';
Replace USER_NAME with the Snowflake user dbt connects as, and PUBLIC_KEY_BODY with the body of the public key you generated. Save the private key somewhere so you can specify it in your profiles.yml later.
Lake Compute connects to Snowflake in one of two ways:
- Option 1 (PAT) — compatible with any of the methods above. Lake Compute creates a Snowflake personal access token (PAT) using your connection profile, which requires a network policy (see Allow Lake Compute's egress through a network policy below).
- Option 2 (JWT) — compatible with
keypair(private key) authentication. Lake Compute authenticates directly with a JWT instead of creating a PAT, so you don't need a network policy.
self_signed_jwt looks similar to keypair by name, but it still creates a PAT under the hood — it just caches that PAT locally so it can be reused across runs. It follows Option 1, not Option 2, and still needs a network policy.
Create a Snowflake catalog integration for MDLS
Create a catalog integration in Snowflake, using the pre-generated SQL in the Fivetran UI under Catalog integration > Snowflake. Make the following changes to that SQL:
| Old value | New value |
|---|---|
OAUTH_CLIENT_ID / OAUTH_CLIENT_SECRET | Enter your existing credentials, or click Regenerate client secret if you've forgotten them. |
Lake Compute uses the MDLS catalog integration to propagate Iceberg table metadata from MDLS to Snowflake after building each model. Therefore, you need to grant usage on integration CATALOG_INTEGRATION_NAME to role ROLE_NAME for all roles that are running dbt with Lake Compute.
Allow Lake Compute's egress through a network policy (PAT only)
Snowflake requires a network policy to be in effect before it creates a PAT, even if your account doesn't otherwise enforce one. If you're using Option 2 (keypair JWT authentication), Lake Compute never creates a PAT, and you can skip this section entirely.
First, check whether your account or your user already has a network policy assigned:
SHOW PARAMETERS LIKE 'NETWORK_POLICY' IN ACCOUNT;
SHOW PARAMETERS LIKE 'NETWORK_POLICY' IN USER USER_NAME;
- If neither returns a policy: Snowflake doesn't restrict egress by default, and no further action is needed — skip the rest of this section.
- If either returns a policy: continue below. In Snowflake, a network policy attached to a user replaces the account-level policy for that user rather than supplementing it, so your existing policy already accounts for your own IP or VPN range — you only need to add Lake Compute's egress IPs to it.
- Create a network rule with Lake Compute's egress IPs:
CREATE NETWORK RULE lakecompute_ipv4
  TYPE = IPV4
  MODE = INGRESS
  VALUE_LIST = (
    '34.85.252.27/32',
    '35.197.105.90/32',
    '3.239.194.48/29', -- AWS us-east-1
    '35.80.36.104/29' -- AWS us-west-2
  );
- Add
lakecompute_ipv4to your existing policy's allowed rule list.ALTER NETWORK POLICY ... SET ALLOWED_NETWORK_RULE_LISTreplaces the entire list, so include your existing rule(s) as well as the new one. ReplaceEXISTING_POLICY_NAMEwith your account's or user's existing policy, andEXISTING_RULE_NAMEwith the rule(s) already on that policy (check withDESC NETWORK POLICY EXISTING_POLICY_NAME;):
ALTER NETWORK POLICY EXISTING_POLICY_NAME SET ALLOWED_NETWORK_RULE_LIST = (
  'EXISTING_RULE_NAME',
  'lakecompute_ipv4'
);
Only security administrators (that is, users with the SECURITYADMIN role) or higher, or a role with the global CREATE NETWORK POLICY privilege, can create network rules or modify network policies.
Some accounts also restrict which authentication methods a user or account can use. If your account blocks PAT authentication, you need an authentication policy that explicitly permits it before Snowflake creates a PAT for Lake Compute.
Set up your connection profile
You can use Lake Compute in one of two ways:
- As a "sidecar" for an existing data warehouse, like Snowflake. Lake Compute reads upstream models out of the data warehouse's managed Iceberg catalog, like Snowflake Horizon.
- As your default adapter, with Lake Compute for compute and Fivetran MDLS for storage.
Before you continue, update to the latest dbt client: dbt system update --version VERSION. Lake Compute support depends on a recent dbt v2 release.
Opt in to multi-adapter invocations
dbt gates Lake Compute behind an experimental opt-in. Set this before you run anything, for either of the two patterns above:
export DBT_ENGINE_EXPERIMENTAL_MULTI_ADAPTER=true
The variable gates type: lakecompute in profiles.yml, the adapter config on a node, and the --adapter flag. While it's off, dbt fails at parse time with a message naming the variable rather than falling back to your default adapter, and DBT_ALLOW_EXPERIMENTAL_ADAPTERS won't substitute for it. Refer to Required environment variable for the full behavior.
Add it to your terminal profile so it persists across sessions.
Local profiles.yml
Use Lake Compute as a "sidecar"
Replace YOUR_ACCOUNT with your Snowflake account identifier, DATABASE_NAME and SCHEMA_NAME with the database and schema dbt writes to, and LAKE_COMPUTE_TOKEN with the token you generated in step 3:
my_profile:
  target: default
  outputs:
    default:
      - name: snowflake
        type: snowflake
        default: true
        account: YOUR_ACCOUNT
        database: DATABASE_NAME
        schema: SCHEMA_NAME
        ...
      - name: lakecompute
        type: lakecompute
        method: fivetran
        fivetran_credential: LAKE_COMPUTE_TOKEN
        # database + schema are inherited from default adapter config
With this profile, Lake Compute:
- Uses the default Snowflake adapter config to create a PAT to Snowflake's managed catalog, Horizon
- Reads all upstream Iceberg tables from the Horizon catalog
- Writes models as Iceberg tables to MDLS, and propagates them to the Horizon catalog, using the
databaseandschemafrom the default Snowflake adapter config as the default write location
Use Lake Compute as your default adapter
In this pattern, your entire project runs on Lake Compute, and Lake Compute materializes every model as an Iceberg table in your MDLS catalog instance. Replace MDLS_INSTANCE_NAME with your MDLS instance name, SCHEMA_NAME with the schema dbt writes to, and LAKE_COMPUTE_TOKEN with the token you generated in step 3:
# new spec
my_profile:
  target: default
  outputs:
    default:
      - name: lakecompute
        type: lakecompute
        method: fivetran
        fivetran_credential: LAKE_COMPUTE_TOKEN
        # database + schema are required when lakecompute is default
        database: MDLS_INSTANCE_NAME
        schema: SCHEMA_NAME
This means:
- Every model in the project is configured
compute: 'lakecompute'by default. - Every model also gets
materialized: tableandtable_format: 'iceberg'as defaults.
dbt platform
Use Lake Compute as a "sidecar"
As a temporary workaround during private beta, you can set Lake Compute configurations using Extended Attributes, by adding a key named lakecompute:
lakecompute:
  method: fivetran
  token: "{{ env_var('DBT_LAKE_COMPUTE_TOKEN') }}"
Then within your environment variables, set:
DBT_ENGINE_EXPERIMENTAL_MULTI_ADAPTER:trueDBT_LAKE_COMPUTE_TOKEN: the token you generated in step 3
Verify your setup
Run dbt debug to confirm your profile is configured correctly. Normally, debug just makes sure that you can connect to your data platform, but for Lake Compute it is more involved with the goal of giving you actionable feedback should something be misconfigured. A failure can indicate potential issues with credentials, a malformed profile, a missing database/schema (see above), or a network policy blocking egress (see Allow Lake Compute's egress through a network policy).
Here's what it does at a high-level:
- This parses
profiles.ymlanddbt_project.yml - tests authentication against every configured adapter in output — including
lakecompute— with both a write test and a read-back test. - Tests "propagation" that a table written to MDLS has a corresponding table created on the Horizon catalog so that downstream Snowflake nodes may
refit.
Configure models to run on Lake Compute
Use Lake Compute as a "sidecar"
Given a dbt DAG of model_a -> model_b -> model_c, you can configure:
model_ato run on Snowflake and materialize an Iceberg table in Snowflake Horizon, using Snowflake-managed storagemodel_bto run on Lake Computemodel_cto run on Snowflake
-- models/model_a.sql
{{ config(
    table_format = 'iceberg',
    materialized = 'table'
) }}

select 1 as id
-- models/model_b.sql
{{ config(
    adapter = 'lakecompute'
) }}

select * from {{ ref('model_a') }}
-- models/model_c.sql
select * from {{ ref('model_b') }}
Use Lake Compute as your default adapter
All your models run on Lake Compute by default and write to Iceberg tables in MDLS. Also check for existing materialized: view configs — Lake Compute doesn't support views (see Private beta limitations), so switch any views to table or ephemeral before converting a project over.
For an existing project, convert models over in two steps rather than all at once:
- Identify the model you want to run on Lake Compute and its direct upstream dependencies.
- Add
{{ config(materialized='table', table_format='iceberg') }}to the target model and its upstream dependencies. Run the project and verify it works. Any runtime errors at this stage are due to Iceberg/Snowflake type incompatibilities and require casting. - On the target model, add
{{ config(adapter='lakecompute') }}and look for any Snowflake-specific functions. If you find any, rewrite the query using the corresponding DuckDB function. Run the project again to verify.
Was this page helpful?
This site is protected by reCAPTCHA and the Google Privacy Policy and Terms of Service apply.