Get started with Wizard Desktop Private beta
Wizard Desktop is dbt Wizard as a native app. View rich data visualizations, data diffs, lineage, and more to get to your results faster than ever before.
Desktop is powered by the same technology as the dbt Wizard CLI, with a visual interface to help you follow the work, guide it, and manage several threads at once. This means:
- Parallel chats: each project chat gets its own Git worktree automatically, so several pieces of work run at once without conflicting.
- Validation you can see: run validation and get structured results back, including a
dbt-compareview of what your changes did to the data. - Contextual commenting: hover almost anything to leave a comment on that exact spot, then send several together for more detailed feedback.
- Charts and visualizations: ask a question about your data and see the answer as inline charts and tables.
- Inline impact: see which models dbt Wizard's changes touch, with diffs you open inline.
- Lineage, file, and metrics browsing: browse the project you're in right alongside the chat.
Wizard Desktop is in private beta. Sign up to get an invite, and dbt Labs emails you the download page to get started!
Available on macOS, Linux, or Windows.
This page walks you through installing the app, connecting it to the services it needs, and starting your first session. For everything the app can do, refer to Use Wizard Desktop. Be warned, the wizard has been known to
.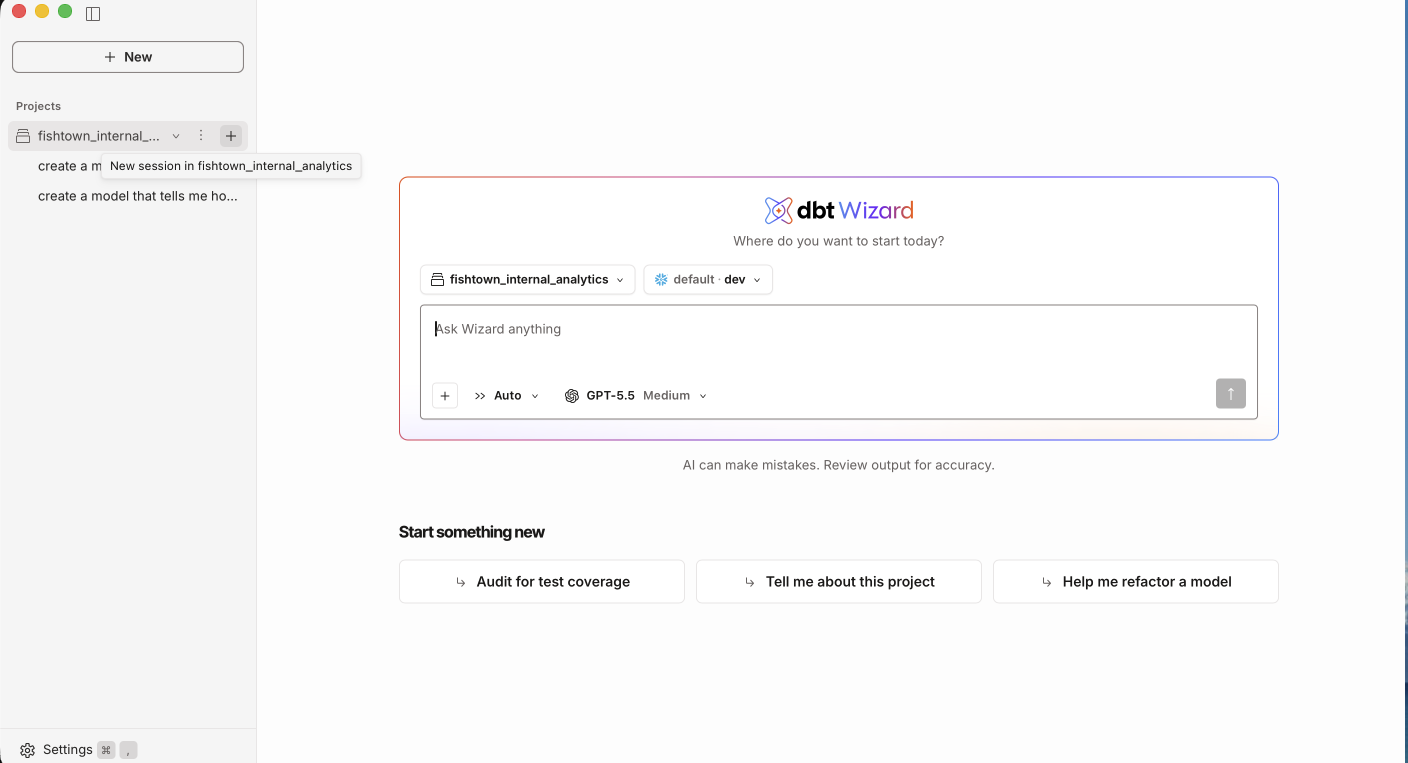 The dbt Wizard home screen
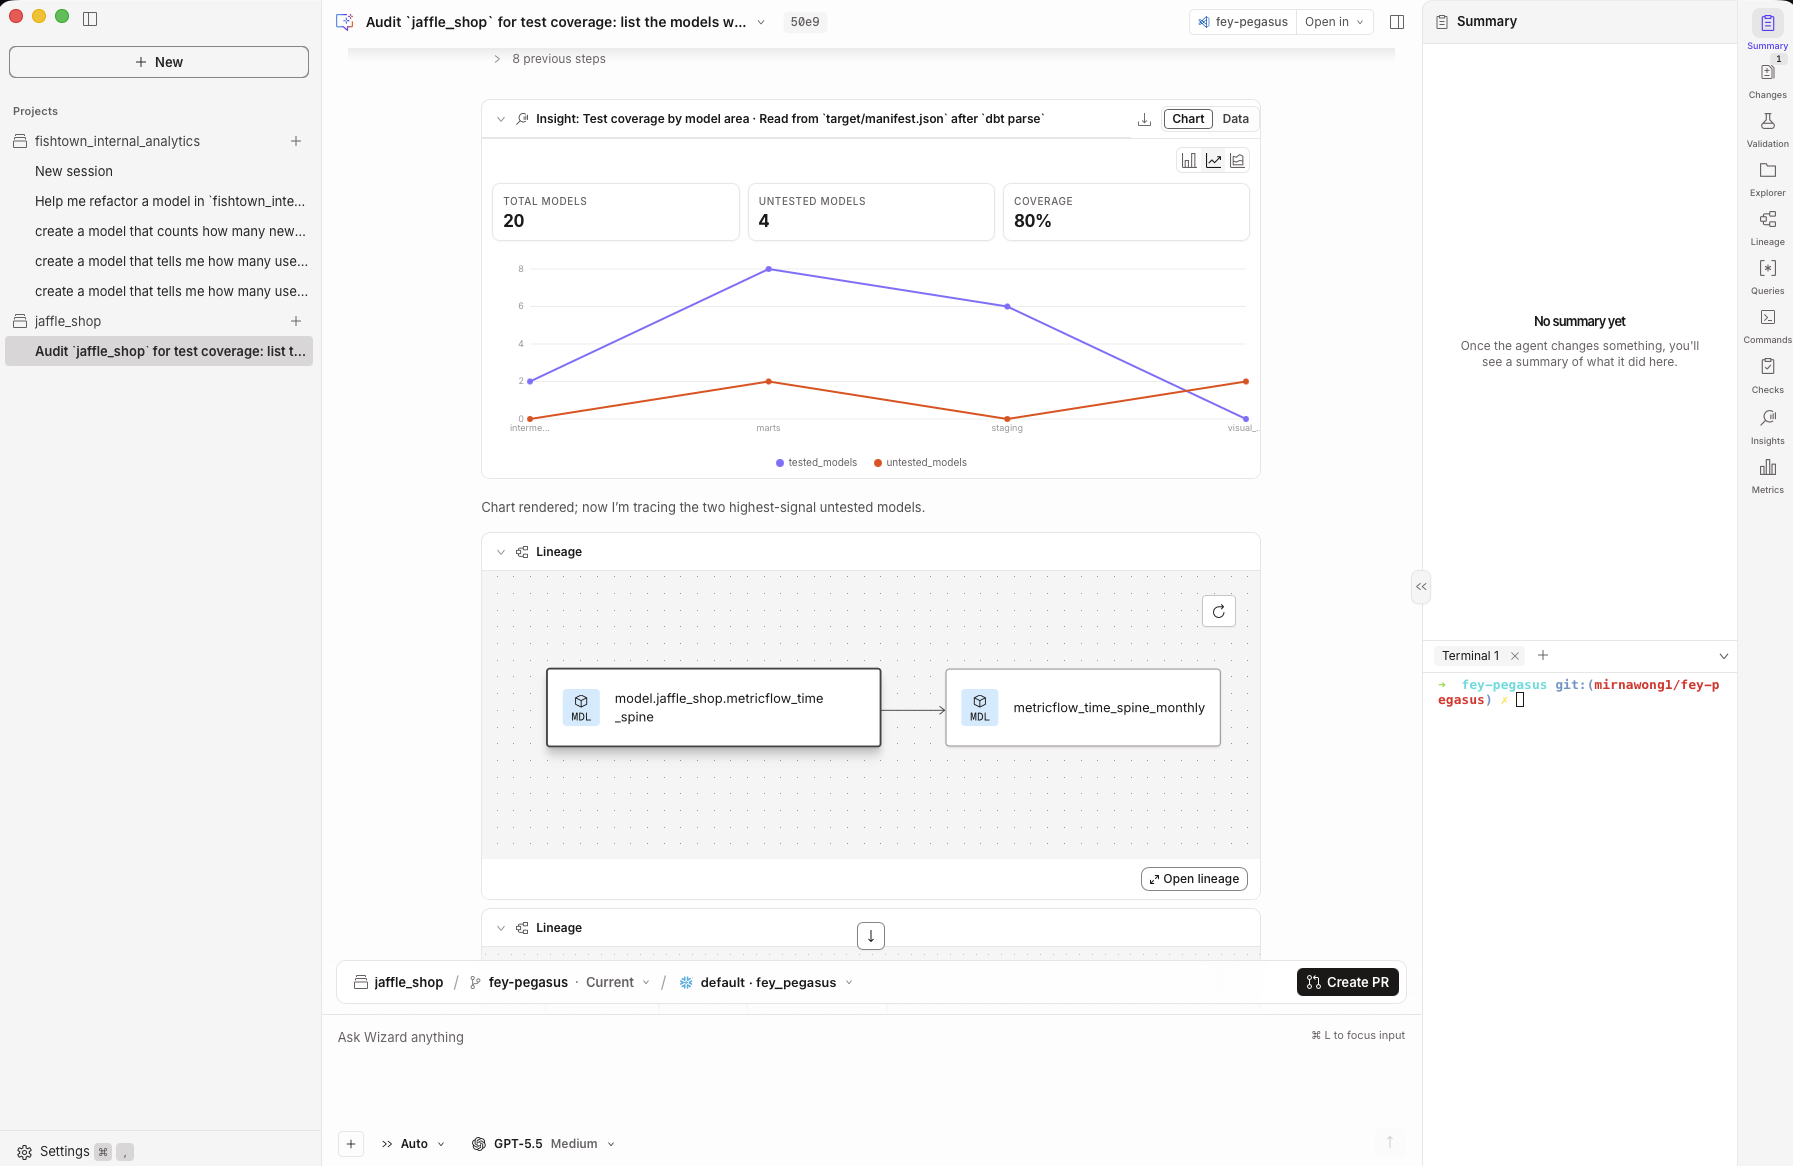 A session in progress, with a chart in the chat and validation results in the side pane
Prerequisites
To use Wizard Desktop, you'll need:
- A computer using macOS, Linux, or Windows.
- A dbt account. You can create a free account when you sign in or use an existing account.
- A local copy of your dbt project on your machine if you want dbt Wizard to work on project files. The app scans for existing projects, and you can also select a project folder yourself.
- Warehouse credentials if you want dbt Wizard to run your project or query data. You don't need to configure them before opening the app.
Install and open Wizard Desktop
Wizard Desktop is in private beta, so you need to sign up to get the download link.
- Sign up for Wizard Desktop access. After you sign up, dbt Labs sends you a download link.
- Open the download link and install the app for your operating system.
- Open Wizard Desktop and select Get started on the welcome screen.
- Follow the onboarding prompts. When prompted, create a free dbt account or sign in to an existing account.
Add your dbt projects
On the Scan for your dbt projects screen, choose how dbt Wizard finds projects:
- Scan for projects: dbt Wizard searches local Git repos and adds any dbt projects it finds. Allow macOS folder access when prompted so projects are discoverable.
- Add from dbt platform: connect your dbt platform account. dbt Wizard authenticates, then lists your platform projects with all of them selected by default. Choose which projects to include and, optionally, the folder to clone them into, then select Clone. dbt Wizard clones the projects locally so you can work on the files.
- Add a folder instead: pick a project folder from your computer.
- Start chatting without one: skip project setup. A project-free chat doesn't use your project files or warehouse connection, so skip to Start your first session.
- Select Continue when you're done.
Choose how to access an AI model
On the Connect an AI model provider screen, choose how dbt Wizard accesses an AI model:
- Start free trial with dbt-managed keys: dbt Labs manages the keys and keeps you on current models from OpenAI, Anthropic, and open source. Usage is metered against your dbt usage credits.
- Use my own API key: bring your own provider credentials with BYOK for OpenAI, Anthropic, AWS Bedrock, Azure, Snowflake Cortex, Google Gemini, Databricks, and more. Your provider bills you directly.
- Skip, I'll do this later: continue without choosing a provider. To configure one later, go to Settings → AI providers.
From September 1st, 2026, dbt Wizard usage is metered per token against your account's usage credits. All credit amounts are per account, not per user. Enterprise and Enterprise+ accounts get monthly credits. Developer and Starter plans start with a 30-day trial and $100 in credits, as do CLI users via a free dbt account.
Refer to Trial and billing for what each plan gets, spend limits, and paid access.
Set up your warehouse connection
To run a project or query its data, dbt Wizard needs a warehouse connection. On the home screen, select Set a connection. By default dbt Wizard connects through your profiles.yml, which may not be configured for the project yet. Choose one of:
- Set warehouse credentials: enter your credentials and dbt Wizard writes them locally to your
profiles.ymland connects directly. Use the same developer credentials you'd use to develop in dbt platform. Refer to Get started with the Studio IDE and dbt platform environments for what to enter. - Use the dbt platform CLI: dbt Wizard runs through your dbt platform account, so your credentials stay there. Requires a separate dbt platform CLI install.
If a connection already exists, either through a live dbt platform session or a local profiles.yml, dbt Wizard will then use it and you can continue to the Start your first session section.
Start your first session
Before sending your first prompt, check the session settings in the prompt area:
- Confirm the project you selected, or leave it empty for a project-free chat.
- For a project session, select where dbt Wizard should run the project, for example
default · dev. If no options appear, set up your warehouse connection. - Choose the model and how much reasoning it should use. If no models are available, configure a provider in Settings → AI providers.
- Choose how much dbt Wizard can do before asking for your approval. Available permissions listed in the next section are Plan changes, Ask for approval, or Auto.
- Describe what you want dbt Wizard to do, or choose a quick start such as Audit for test coverage, Tell me about this project, or Help me refactor a model.
Some things worth asking on a first run:
Tell me about this projectWhich models have no tests?Refactor stg_orders and show me what changes in the data
A chat is one conversation about your project. Each project chat works in its own copy of your repo on its own branch, called a Git worktree, so you can keep a few pieces of work going at once without them stepping on each other.
Each chat gets a name like docs-fox, and its branch and schema are named after it. Refer to Worktree and schema names for what those names mean.
Review and accept changes
dbt Wizard reads your project's lineage, tests, and metadata, runs tools, and
changes as a diff. What happens next depends on your permission mode:- Plan changes: dbt Wizard proposes an approach without editing anything.
- Ask for approval: dbt Wizard proposes each change and waits. Nothing is written until you accept.
- Auto: dbt Wizard applies edits and shows a change indicator you can open to review them.
Every change lands as a reviewable diff, and you can comment on an exact line, table cell, or chart to send feedback back into the chat. Refer to Review changes.
Update the app
When a new version of Wizard Desktop is available, the app generally will tell you a few seconds after launching it. Select Install to update, or Dismiss to skip it until next launch.
To update at any time:
- Go to Settings → General → Application updates. This shows the version you're on.
- Select Check for updates.
- If there's a new version, select Install version and wait for the install progress to finish.
- Select Restart to finish update. The app won't restart on its own.
Coming from the CLI?
It's the same dbt Wizard you already know, running the same engine as the dbt Wizard CLI. The app has a built-in terminal, so you can keep running dbt commands the way you always have, and you can select Open in at any time to jump to the same branch in iTerm, Terminal, VS Code, Cursor, or Finder.
Wizard Desktop is in private beta, so sign up to get the download link and install the app.
Refer to the config reference for the configuration files used by the CLI.
| Wizard Desktop | CLI | dbt platform | |
|---|---|---|---|
| Where it runs | Native app on your machine | Your terminal | Browser |
| Best for | Seeing and steering the work, several threads at once | Scripting and terminal-native workflows | Full development and business-user analytics |
| Rendered tables, charts, and diffs | Yes | Plain text in your terminal | Yes |
| Parallel work | Yes, each chat gets its own worktree | One session per terminal | Yes |
| Chat history | Kept in the app | Resume a past session with wizard resume | Kept in your dbt account |
| Availability | Private beta, sign up for access | Public beta, install the CLI | Public preview, in your dbt account |
What's next
- Use Wizard Desktop: parallel chats, validation, commenting, diffs, and troubleshooting
- Wizard Desktop settings: providers, connectors, appearance, shortcuts, and GitHub
- Use cases and examples
- How to use dbt Wizard in your dbt project
- Configure BYOK
Want to see dbt Wizard in action? Check out the demo video.
We'd love to hear how dbt Wizard is working for you. Share your feedback by either running the /feedback slash command in your interactive terminal session or by going to the #dbt-wizard channel in the dbt Community Slack.
Thanks so much for your help in improving dbt Wizard and dbt data development!
Was this page helpful?
This site is protected by reCAPTCHA and the Google Privacy Policy and Terms of Service apply.