# Quickstart for dbt and Snowflake
[Back to guides](../guides.md)
dbt platform
Quickstart
Snowflake
Beginner
[Menu ]()
## Introduction
In this quickstart guide, you'll learn how to use dbt with Snowflake. It will show you how to:
* Create a new Snowflake SQL file.
* Load sample data into your Snowflake account.
* Connect dbt to Snowflake.
* Take a sample query and turn it into a model in your dbt project. A model in dbt is a select statement.
* Add sources to your dbt project. Sources allow you to name and describe the raw data already loaded into Snowflake.
* Add tests to your models.
* Document your models.
* Schedule a job to run.
Snowflake also provides a quickstart for you to learn how to use dbt. It makes use of a different public dataset (Knoema Economy Data Atlas) than what's shown in this guide. For more information, refer to [Accelerating Data Teams with dbt & Snowflake](https://quickstarts.snowflake.com/guide/accelerating_data_teams_with_snowflake_and_dbt_cloud_hands_on_lab/) in the Snowflake docs.
Videos for you
You can check out [dbt Fundamentals](https://learn.getdbt.com/courses/dbt-fundamentals) for free if you're interested in course learning with videos.
You can also watch the [YouTube video on dbt and Snowflake](https://www.youtube.com/watch?v=kbCkwhySV_I\&list=PL0QYlrC86xQm7CoOH6RS7hcgLnd3OQioG).
### Prerequisites
* You have a [dbt account](https://www.getdbt.com/signup/).
* You have a [trial Snowflake account](https://signup.snowflake.com/). During trial account creation, make sure to choose the **Enterprise** Snowflake edition so you have `ACCOUNTADMIN` access. For a full implementation, you should consider organizational questions when choosing a cloud provider. For more information, see [Introduction to Cloud Platforms](https://docs.snowflake.com/en/user-guide/intro-cloud-platforms.html) in the Snowflake docs. For the purposes of this setup, all cloud providers and regions will work so choose whichever you’d like.
### Related content
* Learn more with [dbt Learn courses](https://learn.getdbt.com)
* [How we configure Snowflake](https://blog.getdbt.com/how-we-configure-snowflake/)
* [CI jobs](../docs/deploy/continuous-integration.md)
* [Deploy jobs](../docs/deploy/deploy-jobs.md)
* [Job notifications](../docs/deploy/job-notifications.md)
* [Source freshness](../docs/deploy/source-freshness.md)
## Create a new Snowflake SQL file
1. Log in to your [trial Snowflake account](https://app.snowflake.com).
2. In the Snowflake UI, click the Create icon **+** in the upper left (under the Snowflake logo) to open a dropdown.
3. Select the first option, **SQL File**.
## Load data
The data used here is stored as CSV files in a public S3 bucket and the following steps will guide you through how to prepare your Snowflake account for that data and upload it.
1. Create a new virtual warehouse, two new databases (one for raw data, the other for future dbt development), and two new schemas (one for `jaffle_shop` data, the other for `stripe` data).
To do this, run these SQL commands by typing them into the Editor of your new Snowflake SQL file and clicking **Run**:
```sql
create warehouse transforming;
create database raw;
create database analytics;
create schema raw.jaffle_shop;
create schema raw.stripe;
```
2. In the `raw` database and `jaffle_shop` and `stripe` schemas, create three tables and load relevant data into them:
* First, delete all contents (empty) in the Editor of the Snowflake SQL file. Then, run this SQL command to create the `customer` table:
```sql
create table raw.jaffle_shop.customers
( id integer,
first_name varchar,
last_name varchar
);
```
* Delete all contents in the Editor, then run this command to load data into the `customer` table:
```sql
copy into raw.jaffle_shop.customers (id, first_name, last_name)
from 's3://dbt-tutorial-public/jaffle_shop_customers.csv'
file_format = (
type = 'CSV'
field_delimiter = ','
skip_header = 1
);
```
* Delete all contents in the Editor (empty), then run this command to create the `orders` table:
```sql
create table raw.jaffle_shop.orders
( id integer,
user_id integer,
order_date date,
status varchar,
_etl_loaded_at timestamp default current_timestamp
);
```
* Delete all contents in the Editor, then run this command to load data into the `orders` table:
```sql
copy into raw.jaffle_shop.orders (id, user_id, order_date, status)
from 's3://dbt-tutorial-public/jaffle_shop_orders.csv'
file_format = (
type = 'CSV'
field_delimiter = ','
skip_header = 1
);
```
* Delete all contents in the Editor (empty), then run this command to create the `payment` table:
```sql
create table raw.stripe.payment
( id integer,
orderid integer,
paymentmethod varchar,
status varchar,
amount integer,
created date,
_batched_at timestamp default current_timestamp
);
```
* Delete all contents in the Editor, then run this command to load data into the `payment` table:
```sql
copy into raw.stripe.payment (id, orderid, paymentmethod, status, amount, created)
from 's3://dbt-tutorial-public/stripe_payments.csv'
file_format = (
type = 'CSV'
field_delimiter = ','
skip_header = 1
);
```
3. Verify that the data is loaded by running these SQL queries. Confirm that you can see output for each one.
```sql
select * from raw.jaffle_shop.customers;
select * from raw.jaffle_shop.orders;
select * from raw.stripe.payment;
```
## Connect dbt to Snowflake
There are two ways to connect dbt to Snowflake. The first option is Partner Connect, which provides a streamlined setup to create your dbt account from within your new Snowflake trial account. The second option is to create your dbt account separately and build the Snowflake connection yourself (connect manually). If you want to get started quickly, dbt Labs recommends using Partner Connect. If you want to customize your setup from the very beginning and gain familiarity with the dbt setup flow, dbt Labs recommends connecting manually.
### Use Partner Connect
Using Partner Connect allows you to create a complete dbt account with your [Snowflake connection](../docs/platform/connect-data-platform/connect-snowflake.md), [a managed repository](../docs/platform/git/managed-repository.md), [environments](../docs/build/custom-schemas.md#managing-environments), and credentials.
1. On the left sidebar of the Snowflake UI, go to **Admin > Partner Connect**. Find the dbt tile under the **Data Integration** section or search for dbt in the search bar. Click the tile to connect to dbt.
[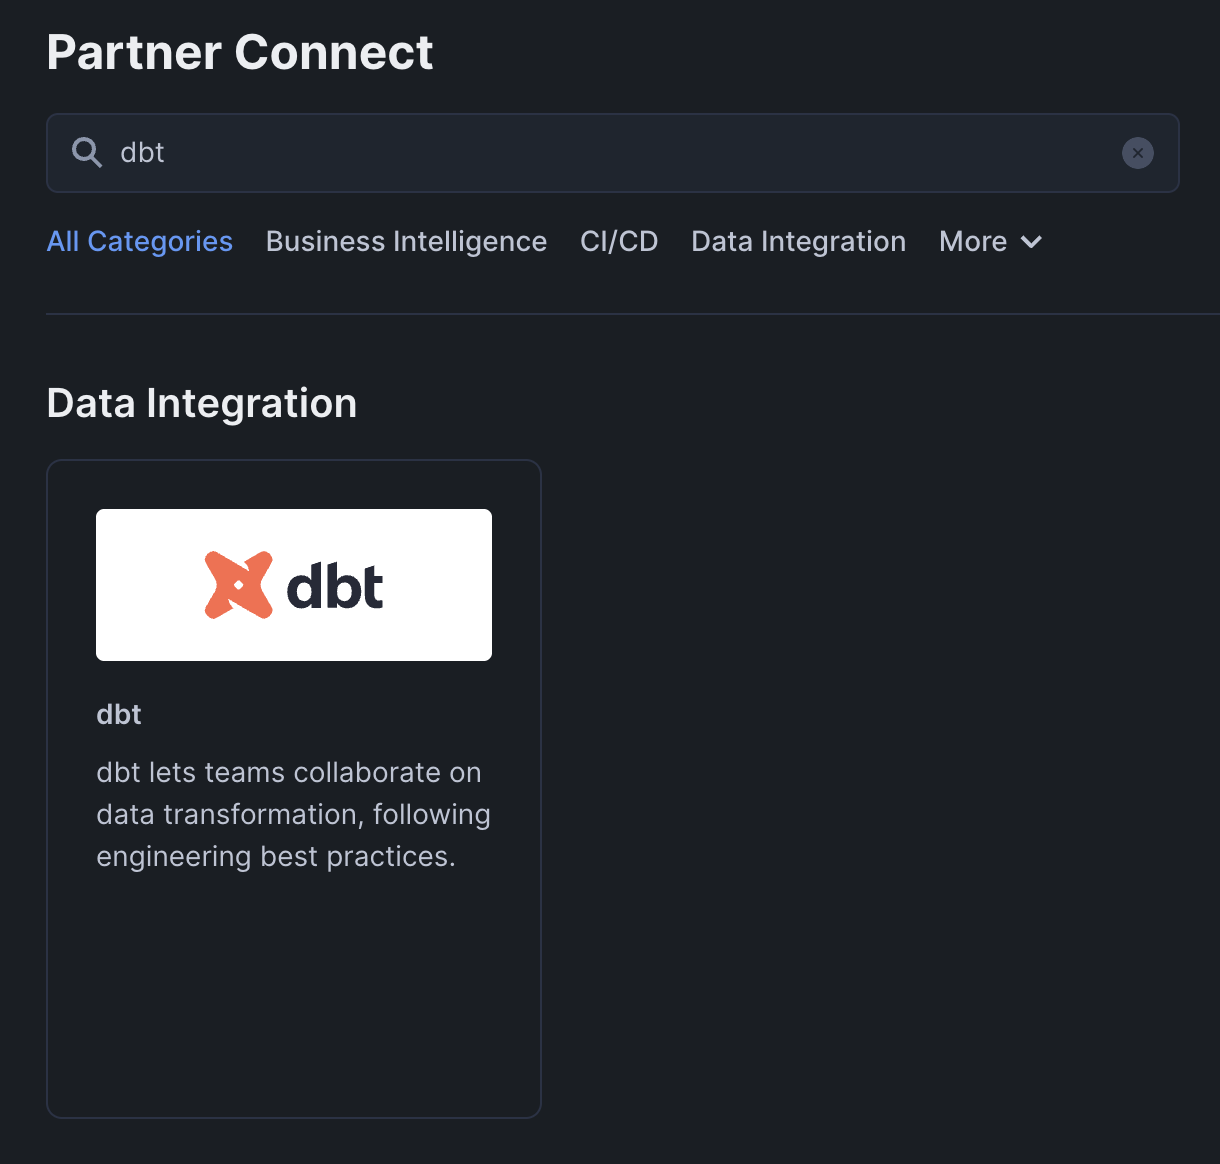](#)Snowflake Partner Connect Box
If you’re using the classic version of the Snowflake UI, you can click the **Partner Connect** button in the top bar of your account. From there, click on the dbt tile to open up the connect box.
[](#)Snowflake Classic UI - Partner Connect
2. In the **Connect to dbt** popup, find the **Optional Grant** option and select the **RAW** and **ANALYTICS** databases. This will grant access for your new dbt user role to each database. Then, click **Connect**.
[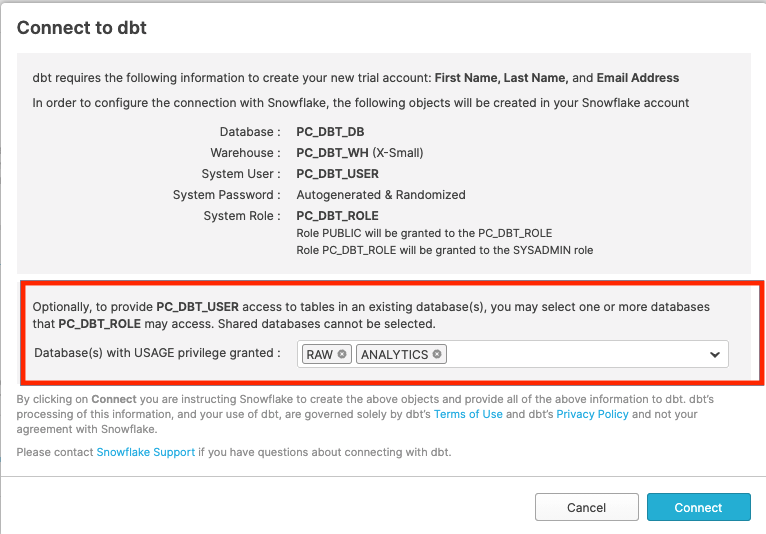](#)Snowflake Classic UI - Connection Box
[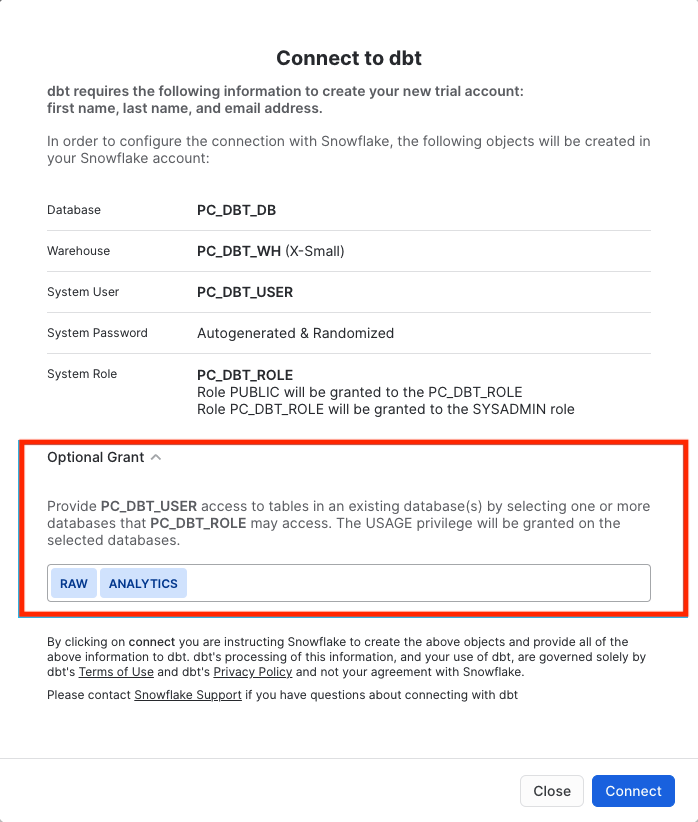](#)Snowflake New UI - Connection Box
3. Click **Activate** when a popup appears:
[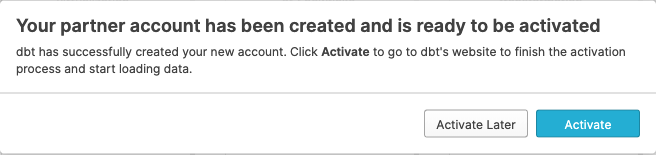](#)Snowflake Classic UI - Actviation Window
[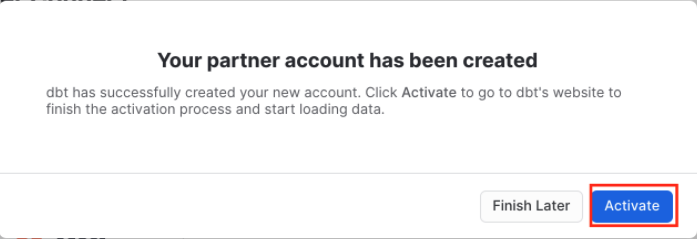](#)Snowflake New UI - Activation Window
4. After the new tab loads, you will see a form. If you already created a dbt account, you will be asked to provide an account name. If you haven't created account, you will be asked to provide an account name and password.
5. After you have filled out the form and clicked **Complete Registration**, you will be logged into dbt automatically.
6. Go to the left side menu and click your account name, then select **Account settings**, choose the "Partner Connect Trial" project, and select **snowflake** in the overview table. Select edit and update the fields **Database** and **Warehouse** to be `analytics` and `transforming`, respectively.
[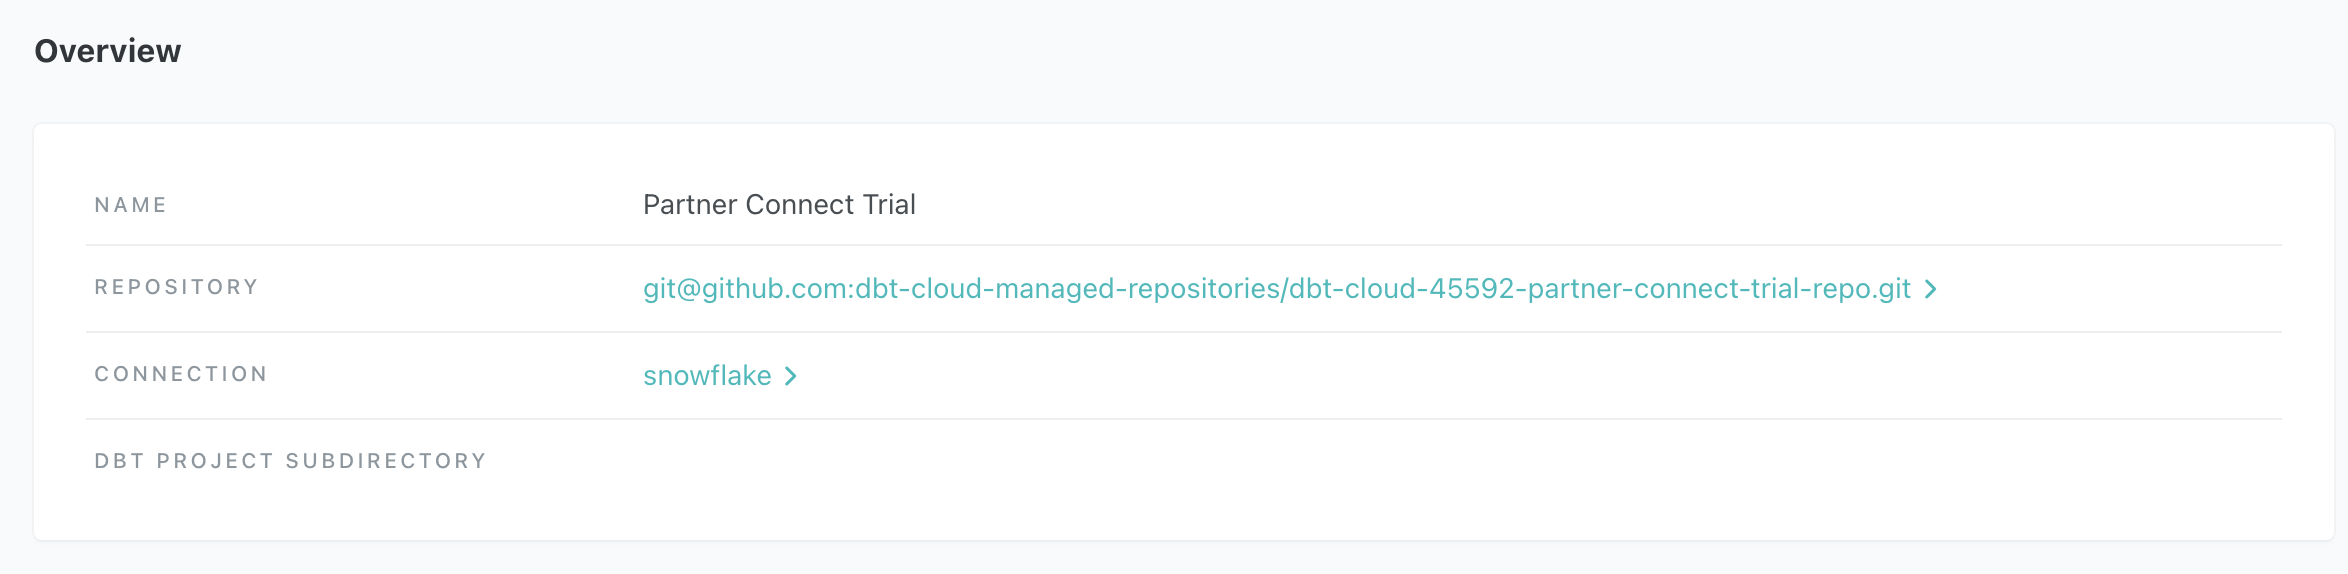](#)dbt - Snowflake Project Overview
[](#)dbt - Update Database and Warehouse
### Connect manually
1. Create a new project in dbt. Navigate to **Account settings** (by clicking on your account name in the left side menu), and click **+ New Project**.
2. Enter a project name and click **Continue**.
3. In the **Configure your development environment** section, click the **Connection** dropdown menu and select **Add new connection**. This directs you to the connection configuration settings.
4. In the **Type** section, select **Snowflake**.
[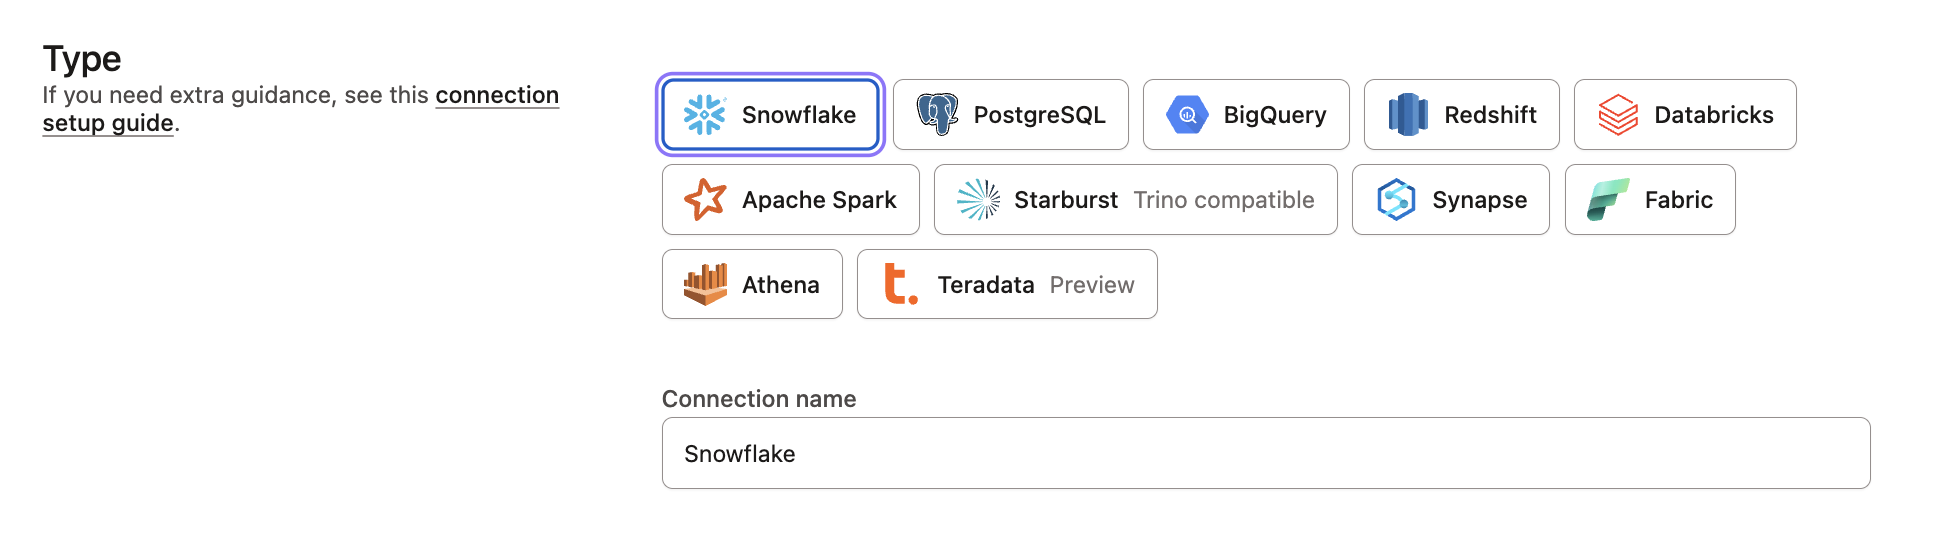](#)dbt - Choose Snowflake Connection
5. Enter your **Settings** for Snowflake with:
* **Account** — Find your account by using the Snowflake trial account URL and removing `snowflakecomputing.com`. The order of your account information will vary by Snowflake version. For example, Snowflake's Classic console URL might look like: `oq65696.west-us-2.azure.snowflakecomputing.com`. The AppUI or Snowsight URL might look more like: `snowflakecomputing.com/west-us-2.azure/oq65696`. In both examples, your account will be: `oq65696.west-us-2.azure`. For more information, see [Account Identifiers](https://docs.snowflake.com/en/user-guide/admin-account-identifier.html) in the Snowflake docs.
✅ `db5261993` or `db5261993.east-us-2.azure`
❌ `db5261993.eu-central-1.snowflakecomputing.com`
* **Role** — Leave blank for now. You can update this to a default Snowflake role later.
* **Database** — `analytics`. This tells dbt to create new models in the analytics database.
* **Warehouse** — `transforming`. This tells dbt to use the transforming warehouse that was created earlier.
[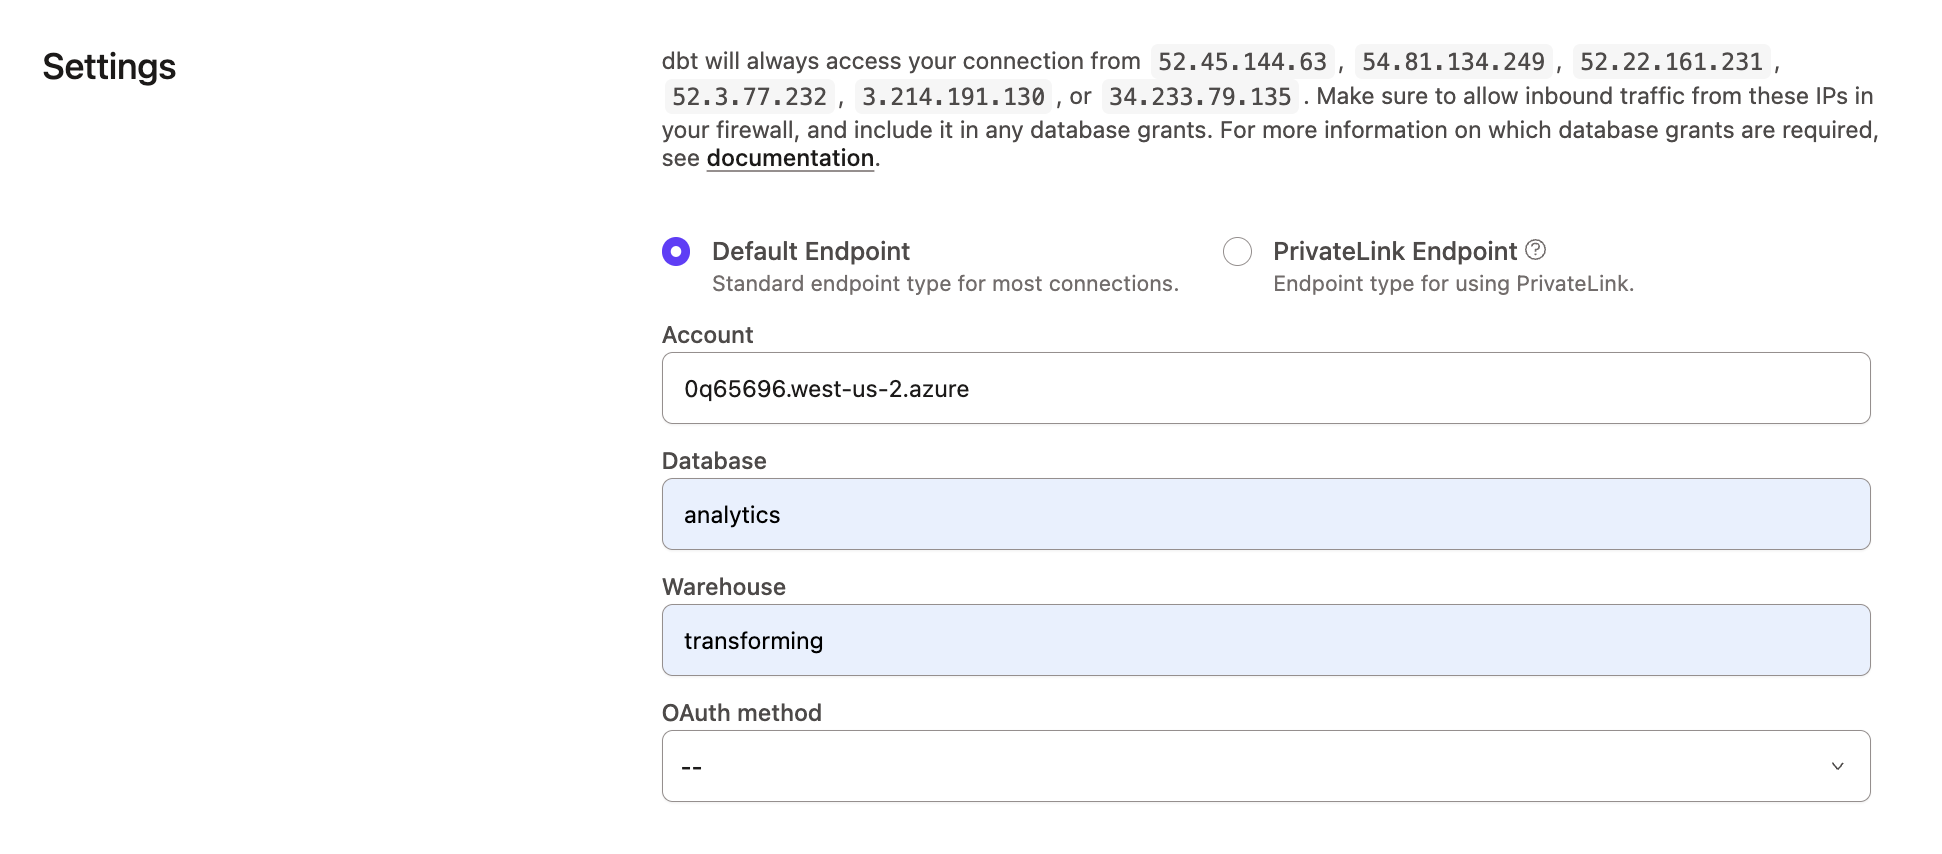](#)dbt - Snowflake Account Settings
6. Click **Save**.
7. Set up your personal user credentials by going to **Your profile** > **Credentials**.
8. Select your project that uses the Snowflake connection.
9. Click the **configure your development environment and add a connection** link. This directs you to a page where you can enter your personal user credentials.
10. Enter your **User credentials** for Snowflake with:
* **Username** — The username you created for Snowflake. The username is not your email address and is usually your first and last name together in one word.
* **Password** — The password you set when creating your Snowflake account.
* **Schema** — You’ll notice that the schema name has been auto created for you. By convention, this is `dbt_`. This is the schema connected directly to your development environment, and it's where your models will be built when running dbt within the Studio IDE.
* **Target name** — Leave as the default.
* **Threads** — Leave as 4. This is the number of simultaneous connects that dbt will make to build models concurrently.
[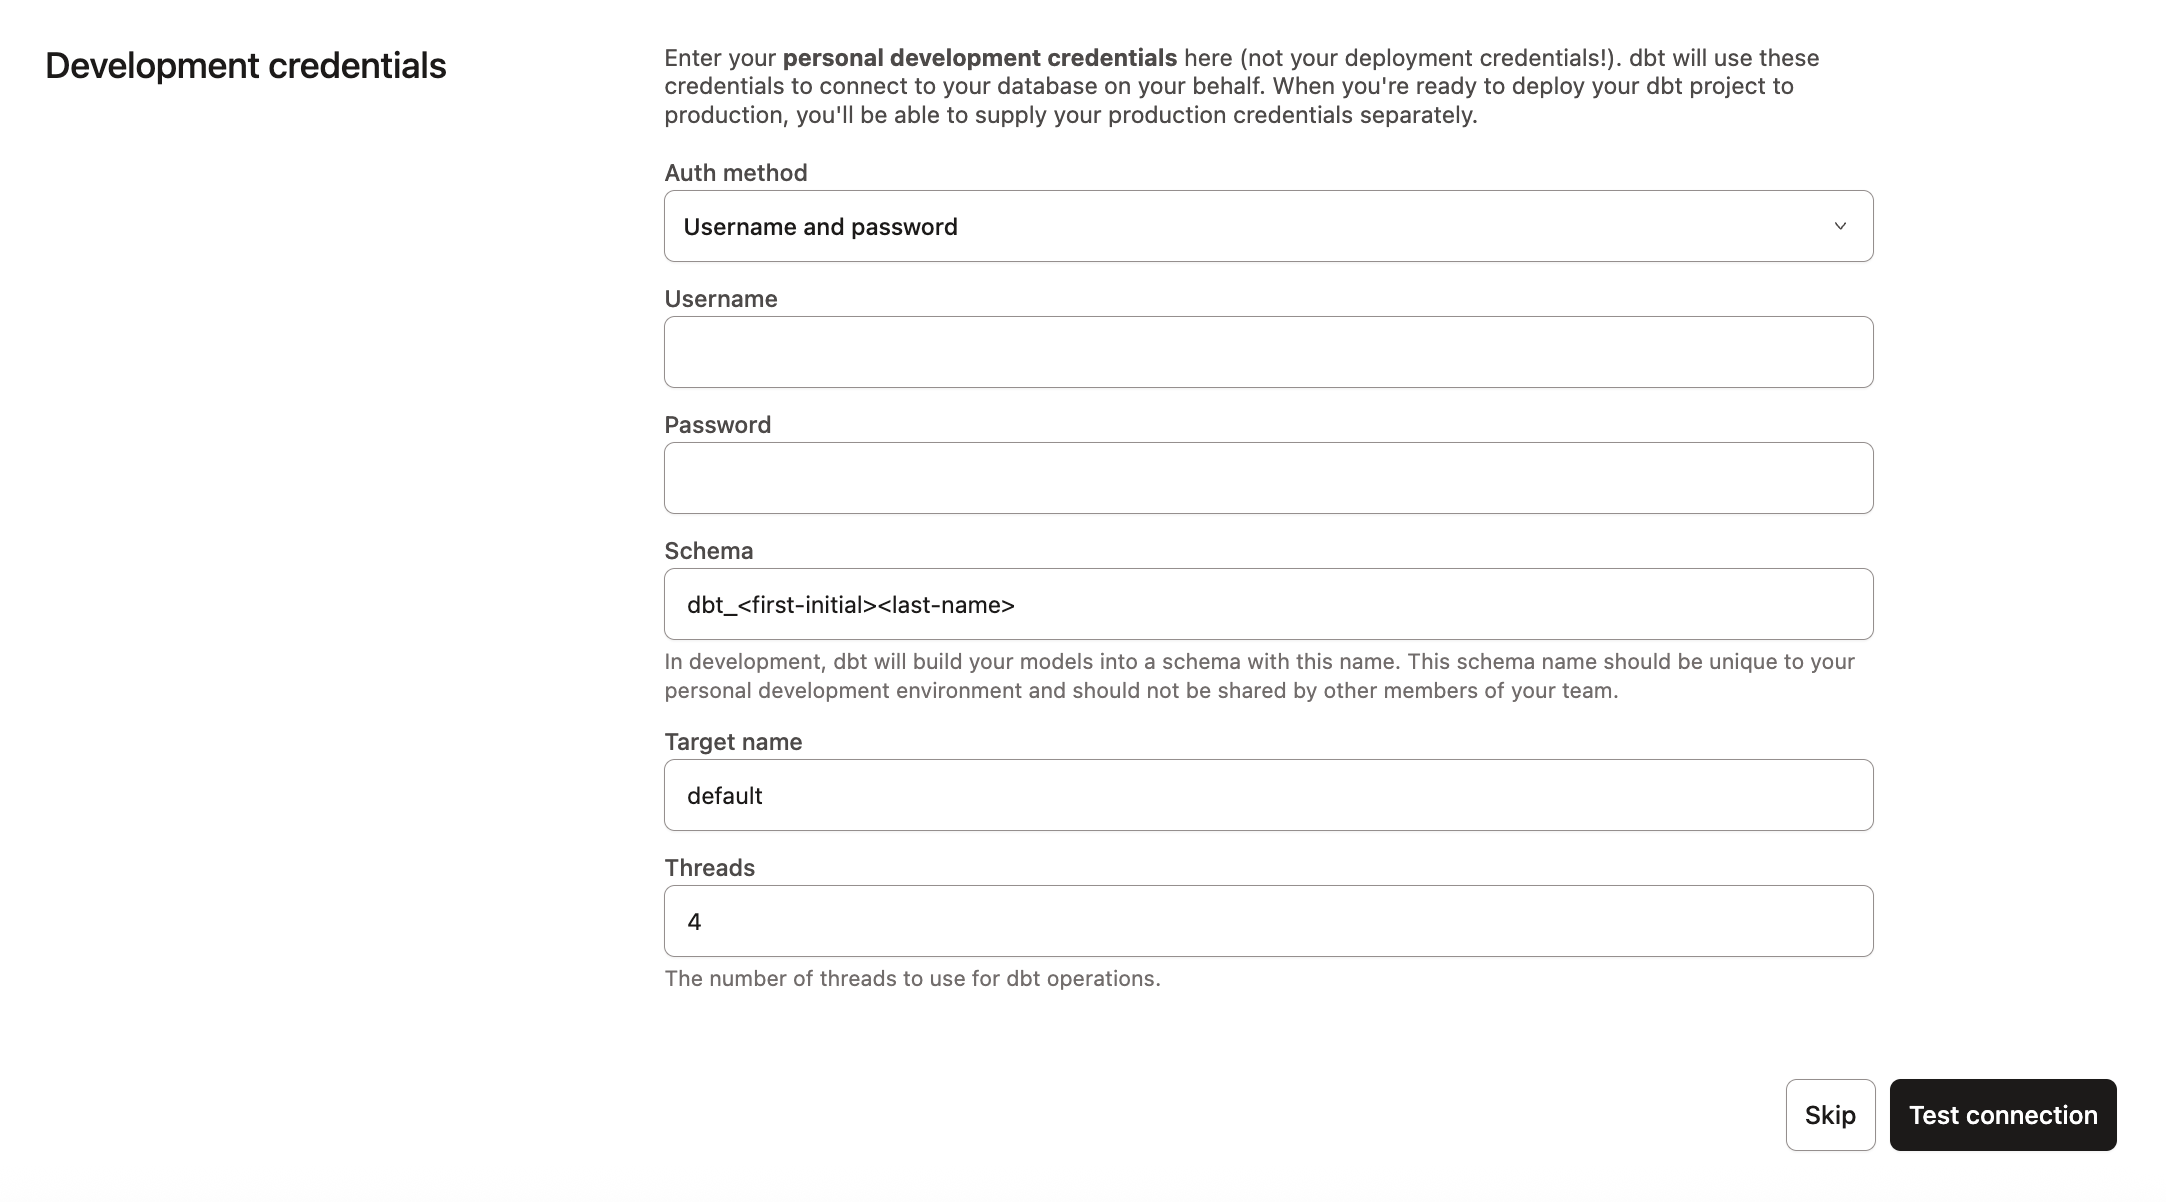](#)dbt - Snowflake User credentials
11. Click **Test connection**. This verifies that dbt can access your Snowflake account.
12. If the test succeeded, click **Save** to complete the configuration. If it failed, you may need to check your Snowflake settings and credentials.
## Set up a dbt managed repository
If you used Partner Connect, you can skip to [initializing your dbt project](#initialize-your-dbt-project-and-start-developing) as the Partner Connect provides you with a managed repository. Otherwise, you will need to create your repository connection.
When you develop in dbt, you can leverage [Git](../docs/platform/git/git-version-control.md) to version control your code.
To connect to a repository, you can either set up a dbt-hosted [managed repository](../docs/platform/git/managed-repository.md) or directly connect to a [supported git provider](../docs/platform/git/connect-github.md). Managed repositories are a great way to trial dbt without needing to create a new repository. In the long run, it's better to connect to a supported git provider to use features like automation and [continuous integration](../docs/deploy/continuous-integration.md).
To set up a managed repository:
1. Under "Setup a repository", select **Managed**.
2. Type a name for your repo such as `bbaggins-dbt-quickstart`
3. Click **Create**. It will take a few seconds for your repository to be created and imported.
4. Once you see the "Successfully imported repository," click **Continue**.
## Initialize your dbt project and start developing
Now that you have a repository configured, you can initialize your project and start development in dbt:
1. Click **Start developing in the Studio IDE**. It might take a few minutes for your project to spin up for the first time as it establishes your git connection, clones your repo, and tests the connection to the warehouse.
2. Above the file tree to the left, click **Initialize your project**. This builds out your folder structure with example models.
3. Make your initial commit by clicking **Commit and sync**. Use the commit message `initial commit`. This creates the first commit to your managed repo and allows you to open a branch where you can add new dbt code.
4. You can now directly query data from your warehouse and execute `dbt run`. You can try this out now:
* Click **+ Create new file**, add this query to the new file, and click **Save as** to save the new file:
```sql
select * from raw.jaffle_shop.customers
```
* In the command line bar at the bottom, enter `dbt run` and click **Enter**. You should see a `dbt run succeeded` message.
info
If you receive an insufficient privileges error on Snowflake at this point, it may be because your Snowflake role doesn't have permission to access the raw source data, to build target tables and views, or both.
To troubleshoot, use a role with sufficient privileges (like `ACCOUNTADMIN`) and run the following commands in Snowflake.
**Note**: Replace `snowflake_role_name` with the role you intend to use. If you launched dbt with Snowflake Partner Connect, use `pc_dbt_role` as the role.
```text
grant all on database raw to role snowflake_role_name;
grant all on database analytics to role snowflake_role_name;
grant all on schema raw.jaffle_shop to role snowflake_role_name;
grant all on schema raw.stripe to role snowflake_role_name;
grant all on all tables in database raw to role snowflake_role_name;
grant all on future tables in database raw to role snowflake_role_name;
```
## Build your first model
You have two options for working with files in the Studio IDE:
* Create a new branch (recommended) — Create a new branch to edit and commit your changes. Navigate to **Version Control** on the left sidebar and click **Create branch**.
* Edit in the protected primary branch — If you prefer to edit, format, or lint files and execute dbt commands directly in your primary git branch. The Studio IDE prevents commits to the protected branch, so you will be prompted to commit your changes to a new branch.
Name the new branch `add-customers-model`.
1. Click the **...** next to the `models` directory, then select **Create file**.
2. Name the file `customers.sql`, then click **Create**.
3. Copy the following query into the file and click **Save**.
```sql
with customers as (
select
id as customer_id,
first_name,
last_name
from raw.jaffle_shop.customers
),
orders as (
select
id as order_id,
user_id as customer_id,
order_date,
status
from raw.jaffle_shop.orders
),
customer_orders as (
select
customer_id,
min(order_date) as first_order_date,
max(order_date) as most_recent_order_date,
count(order_id) as number_of_orders
from orders
group by 1
),
final as (
select
customers.customer_id,
customers.first_name,
customers.last_name,
customer_orders.first_order_date,
customer_orders.most_recent_order_date,
coalesce(customer_orders.number_of_orders, 0) as number_of_orders
from customers
left join customer_orders using (customer_id)
)
select * from final
```
4. Enter `dbt run` in the command prompt at the bottom of the screen. You should get a successful run and see the three models.
Later, you can connect your business intelligence (BI) tools to these views and tables so they only read cleaned-up data rather than raw data.
## Change the way your model is materialized
One of the most powerful features of dbt is that you can change the way a model is materialized in your warehouse, simply by changing a configuration value. You can change things between tables and views by changing a keyword rather than writing the data definition language (DDL) to do this behind the scenes.
By default, everything gets created as a view. You can override that at the directory level so everything in that directory will materialize to a different materialization.
1. Edit your `dbt_project.yml` file.
* Update your project `name` to:
dbt\_project.yml
```yaml
name: 'jaffle_shop'
```
* Configure `jaffle_shop` so everything in it will be materialized as a table; and configure `example` so everything in it will be materialized as a view. Update your `models` config in the project YAML file to:
dbt\_project.yml
```yaml
models:
jaffle_shop:
+materialized: table
example:
+materialized: view
```
* Click **Save**.
2. Enter the `dbt run` command. Your `customers` model should now be built as a table!
info
To do this, dbt had to first run a `drop view` statement (or API call on BigQuery), then a `create table as` statement.
3. Edit `models/customers.sql` to override the `dbt_project.yml` for the `customers` model only by adding the following snippet to the top, and click **Save**:
models/customers.sql
```sql
{{
config(
materialized='view'
)
}}
with customers as (
select
id as customer_id
...
)
```
4. Enter the `dbt run` command. Your model, `customers`, should now build as a view.
* BigQuery users need to run `dbt run --full-refresh` instead of `dbt run` to full apply materialization changes.
5. Enter the `dbt run --full-refresh` command for this to take effect in your warehouse.
### FAQs
What materializations are available in dbt?
dbt ships with five built-in materializations: `view`, `table`, `incremental`, `ephemeral`, and `materialized_view`. Check out the documentation on [materializations](../docs/build/materializations.md) for more information on each of these options.
You can also create your own [custom materializations](./create-new-materializations.md). This is an advanced feature of dbt.
Which materialization should I use for my model?
Start out with views, and then change models to tables when required for performance reasons (i.e. downstream queries have slowed).
Check out the [docs on materializations](../docs/build/materializations.md) for advice on when to use each materialization.
What model configurations exist?
You can also configure:
* [tags](../reference/resource-configs/tags.md) to support easy categorization and graph selection
* [custom schemas](../reference/resource-properties/schema.md) to split your models across multiple schemas
* [aliases](../reference/resource-configs/alias.md) if your view/table name should differ from the filename
* Snippets of SQL to run at the start or end of a model, known as [hooks](../docs/build/hooks-operations.md)
* Warehouse-specific configurations for performance (e.g. `sort` and `dist` keys on Redshift, `partitions` on BigQuery)
Check out the docs on [model configurations](../reference/model-configs.md) to learn more.
## Delete the example models
You can now delete the files that dbt created when you initialized the project:
1. Delete the `models/example/` directory.
2. Delete the `example:` key from your `dbt_project.yml` file, and any configurations that are listed under it.
dbt\_project.yml
```yaml
# before
models:
jaffle_shop:
+materialized: table
example:
+materialized: view
```
dbt\_project.yml
```yaml
# after
models:
jaffle_shop:
+materialized: table
```
3. Save your changes.
#### FAQs
How do I remove deleted models from my data warehouse?
If you delete a model from your dbt project, dbt does not automatically drop the relation from your schema. This means that you can end up with extra objects in schemas that dbt creates, which can be confusing to other users.
(This can also happen when you switch a model from being a view or table, to ephemeral)
When you remove models from your dbt project, you should manually drop the related relations from your schema.
I got an "unused model configurations" error message, what does this mean?
You might have forgotten to nest your configurations under your project name, or you might be trying to apply configurations to a directory that doesn't exist.
Check out this [article](https://discourse.getdbt.com/t/faq-i-got-an-unused-model-configurations-error-message-what-does-this-mean/112) to understand more.
## Build models on top of other models
As a best practice in SQL, you should separate logic that cleans up your data from logic that transforms your data. You have already started doing this in the existing query by using common table expressions (CTEs).
Now you can experiment by separating the logic out into separate models and using the [ref](../reference/dbt-jinja-functions/ref.md) function to build models on top of other models:
[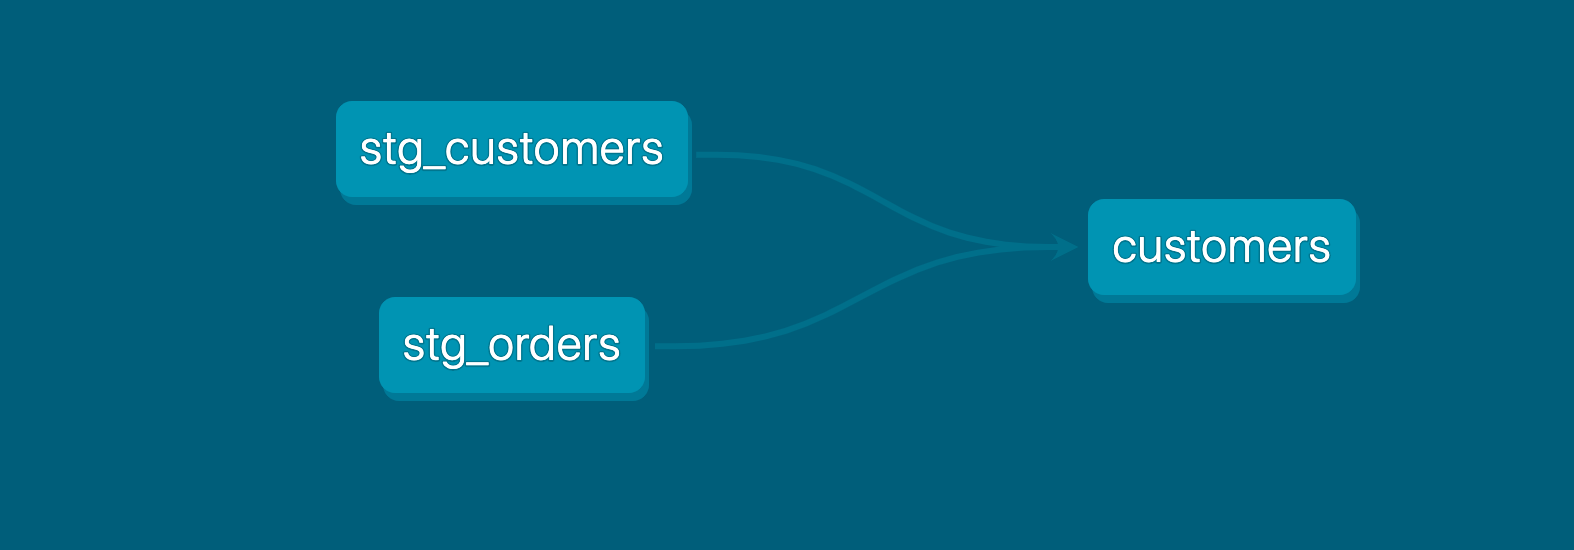](#)The DAG we want for our dbt project
1. Create a new SQL file, `models/stg_customers.sql`, with the SQL from the `customers` CTE in our original query.
2. Create a second new SQL file, `models/stg_orders.sql`, with the SQL from the `orders` CTE in our original query.
models/stg\_customers.sql
```sql
select
id as customer_id,
first_name,
last_name
from raw.jaffle_shop.customers
```
models/stg\_orders.sql
```sql
select
id as order_id,
user_id as customer_id,
order_date,
status
from raw.jaffle_shop.orders
```
3. Edit the SQL in your `models/customers.sql` file as follows:
models/customers.sql
```sql
with customers as (
select * from {{ ref('stg_customers') }}
),
orders as (
select * from {{ ref('stg_orders') }}
),
customer_orders as (
select
customer_id,
min(order_date) as first_order_date,
max(order_date) as most_recent_order_date,
count(order_id) as number_of_orders
from orders
group by 1
),
final as (
select
customers.customer_id,
customers.first_name,
customers.last_name,
customer_orders.first_order_date,
customer_orders.most_recent_order_date,
coalesce(customer_orders.number_of_orders, 0) as number_of_orders
from customers
left join customer_orders using (customer_id)
)
select * from final
```
4. Execute `dbt run`.
This time, when you performed a `dbt run`, separate views/tables were created for `stg_customers`, `stg_orders` and `customers`. dbt inferred the order to run these models. Because `customers` depends on `stg_customers` and `stg_orders`, dbt builds `customers` last. You do not need to explicitly define these dependencies.
#### FAQs
How do I run one model at a time?
To run one model, use the `--select` flag (or `-s` flag), followed by the name of the model:
```shell
$ dbt run --select customers
```
Check out the [model selection syntax documentation](../reference/node-selection/syntax.md) for more operators and examples.
Do ref-able resource names need to be unique?
Within one project: yes! To build dependencies between resources (such as models, seeds, and snapshots), you need to use the `ref` function, and pass in the resource name as an argument. dbt uses that resource name to uniquely resolve the `ref` to a specific resource. As a result, these resource names need to be unique, *even if they are in distinct folders*.
A resource in one project can have the same name as a resource in another project (installed as a dependency). dbt uses the project name to uniquely identify each resource. We call this "namespacing." If you `ref` a resource with a duplicated name, it will resolve to the resource within the same namespace (package or project), or raise an error because of an ambiguous reference. Use [two-argument `ref`](../reference/dbt-jinja-functions/ref.md#ref-project-specific-models) to disambiguate references by specifying the namespace.
Those resource will still need to land in distinct locations in the data warehouse. Read the docs on [custom aliases](../docs/build/custom-aliases.md) and [custom schemas](../docs/build/custom-schemas.md) for details on how to achieve this.
As I create more models, how should I keep my project organized? What should I name my models?
There's no one best way to structure a project! Every organization is unique.
If you're just getting started, check out how we (dbt Labs) [structure our dbt projects](../best-practices/how-we-structure/1-guide-overview.md).
## Build models on top of sources
Sources make it possible to name and describe the data loaded into your warehouse by your extract and load tools. By declaring these tables as sources in dbt, you can:
* select from source tables in your models using the `{{ source() }}` function, helping define the lineage of your data
* test your assumptions about your source data
* calculate the freshness of your source data
1. Create a new YML file `models/sources.yml`.
2. Declare the sources by copying the following into the file and clicking **Save**.
models/sources.yml
```yml
sources:
- name: jaffle_shop
description: This is a replica of the Postgres database used by our app
database: raw
schema: jaffle_shop
tables:
- name: customers
description: One record per customer.
- name: orders
description: One record per order. Includes cancelled and deleted orders.
```
3. Edit the `models/stg_customers.sql` file to select from the `customers` table in the `jaffle_shop` source.
models/stg\_customers.sql
```sql
select
id as customer_id,
first_name,
last_name
from {{ source('jaffle_shop', 'customers') }}
```
4. Edit the `models/stg_orders.sql` file to select from the `orders` table in the `jaffle_shop` source.
models/stg\_orders.sql
```sql
select
id as order_id,
user_id as customer_id,
order_date,
status
from {{ source('jaffle_shop', 'orders') }}
```
5. Execute `dbt run`.
The results of your `dbt run` will be exactly the same as the previous step. Your `stg_customers` and `stg_orders` models will still query from the same raw data source in Snowflake. By using `source`, you can test and document your raw data and also understand the lineage of your sources.
## Add tests to your models
Adding [data tests](../docs/build/data-tests.md) to a project helps validate that your models are working correctly.
To add data tests to your project:
1. Create a new YAML file in the `models` directory, named `models/schema.yml`
2. Add the following contents to the file:
models/schema.yml
```yaml
version: 2
models:
- name: customers
columns:
- name: customer_id
data_tests:
- unique
- not_null
- name: stg_customers
columns:
- name: customer_id
data_tests:
- unique
- not_null
- name: stg_orders
columns:
- name: order_id
data_tests:
- unique
- not_null
- name: status
data_tests:
- accepted_values:
arguments: # available in v1.10.5 and higher. Older versions can set the as the top-level property.
values: ['placed', 'shipped', 'completed', 'return_pending', 'returned']
- name: customer_id
data_tests:
- not_null
- relationships:
arguments:
to: ref('stg_customers')
field: customer_id
```
3. Run `dbt test`, and confirm that all your tests passed.
When you run `dbt test`, dbt iterates through your YAML files, and constructs a query for each test. Each query will return the number of records that fail the test. If this number is 0, then the test is successful.
#### FAQs
What tests are available for me to use in dbt? Can I add my own custom tests?
Out of the box, dbt ships with the following data tests:
* `unique`
* `not_null`
* `accepted_values`
* `relationships` (for example, referential integrity)
You can also write your own [custom generic tests](../docs/build/data-tests.md#generic-data-tests).
Some additional generic tests have been open-sourced in the [dbt-utils package](https://github.com/dbt-labs/dbt-utils#generic-tests). Check out the docs on [packages](../docs/build/packages.md) to learn how to make these tests available in your project.
How do I test one model at a time?
Running tests on one model looks very similar to running a model: use the `--select` flag (or `-s` flag), followed by the name of the model:
```shell
dbt test --select customers
```
Check out the [model selection syntax documentation](../reference/node-selection/syntax.md) for full syntax, and [test selection examples](../reference/node-selection/test-selection-examples.md) in particular.
One of my tests failed, how can I debug it?
To debug a failing test, find the SQL that dbt ran by:
* dbt:
* Within the test output, click on the failed test, and then select "Details".
* dbt Core:
* Open the file path returned as part of the error message.
* Navigate to the `target/compiled/schema_tests` directory for all compiled test queries.
Copy the SQL into a query editor (in dbt, you can paste it into a new `Statement`), and run the query to find the records that failed.
Does my test file need to be named \`schema.yml\`?
No! You can name this file whatever you want (including `whatever_you_want.yml`), so long as:
* The file is in your `models/` directory¹
* The file has `.yml` extension
Check out the [docs](../reference/configs-and-properties.md) for more information.
¹If you're declaring properties for seeds, snapshots, or macros, you can also place this file in the related directory — `seeds/`, `snapshots/` and `macros/` respectively.
Why do model and source YAML files always start with \`version: 2\`?
Once upon a time, the structure of these `.yml` files was very different (s/o to anyone who was using dbt back then!). Adding `version: 2` allowed us to make this structure more extensible.
From [dbt Core v1.5](), the top-level `version:` key is optional in all resource YAML files. If present, only `version: 2` is supported.
Also starting in v1.5, both the [`config-version: 2`](../reference/project-configs/config-version.md) and the top-level `version:` key in the `dbt_project.yml` are optional.
Resource YAML files do not currently require this config. We only support `version: 2` if it's specified. Although we do not expect to update YAML files to `version: 3` soon, having this config will make it easier for us to introduce new structures in the future
What data tests should I add to my project?
We recommend that every model has a data test on a primary key, that is, a column that is `unique` and `not_null`.
We also recommend that you test any assumptions on your source data. For example, if you believe that your payments can only be one of three payment methods, you should test that assumption regularly — a new payment method may introduce logic errors in your SQL.
In advanced dbt projects, we recommend using [sources](../docs/build/sources.md) and running these source data-integrity tests against the sources rather than models.
When should I run my data tests?
You should run your data tests whenever you are writing new code (to ensure you haven't broken any existing models by changing SQL), and whenever you run your transformations in production (to ensure that your assumptions about your source data are still valid).
## Document your models
Adding [documentation](../docs/build/documentation.md) to your project allows you to describe your models in rich detail, and share that information with your team. Here, we're going to add some basic documentation to our project.
Update your `models/schema.yml` file to include some descriptions, such as those below.
models/schema.yml
```yaml
version: 2
models:
- name: customers
description: One record per customer
columns:
- name: customer_id
description: Primary key
data_tests:
- unique
- not_null
- name: first_order_date
description: NULL when a customer has not yet placed an order.
- name: stg_customers
description: This model cleans up customer data
columns:
- name: customer_id
description: Primary key
data_tests:
- unique
- not_null
- name: stg_orders
description: This model cleans up order data
columns:
- name: order_id
description: Primary key
data_tests:
- unique
- not_null
- name: status
data_tests:
- accepted_values:
arguments: # available in v1.10.5 and higher. Older versions can set the as the top-level property.
values: ['placed', 'shipped', 'completed', 'return_pending', 'returned']
- name: customer_id
data_tests:
- not_null
- relationships:
arguments:
to: ref('stg_customers')
field: customer_id
```
### View in Catalog
[Catalog](../docs/explore/explore-projects.md) provides powerful tools to interact with your dbt projects, including documentation:
1. Run one of the following commands:
* `dbt docs generate` if you're on dbt Core
* `dbt build` if you're on the dbt Fusion engine
2. Click **Catalog** in the navigation menu to launch Catalog.
3. Catalog reflects **Production** by default. If your account has additional environments (for example, **Staging**), you can select them from the environment dropdown.
[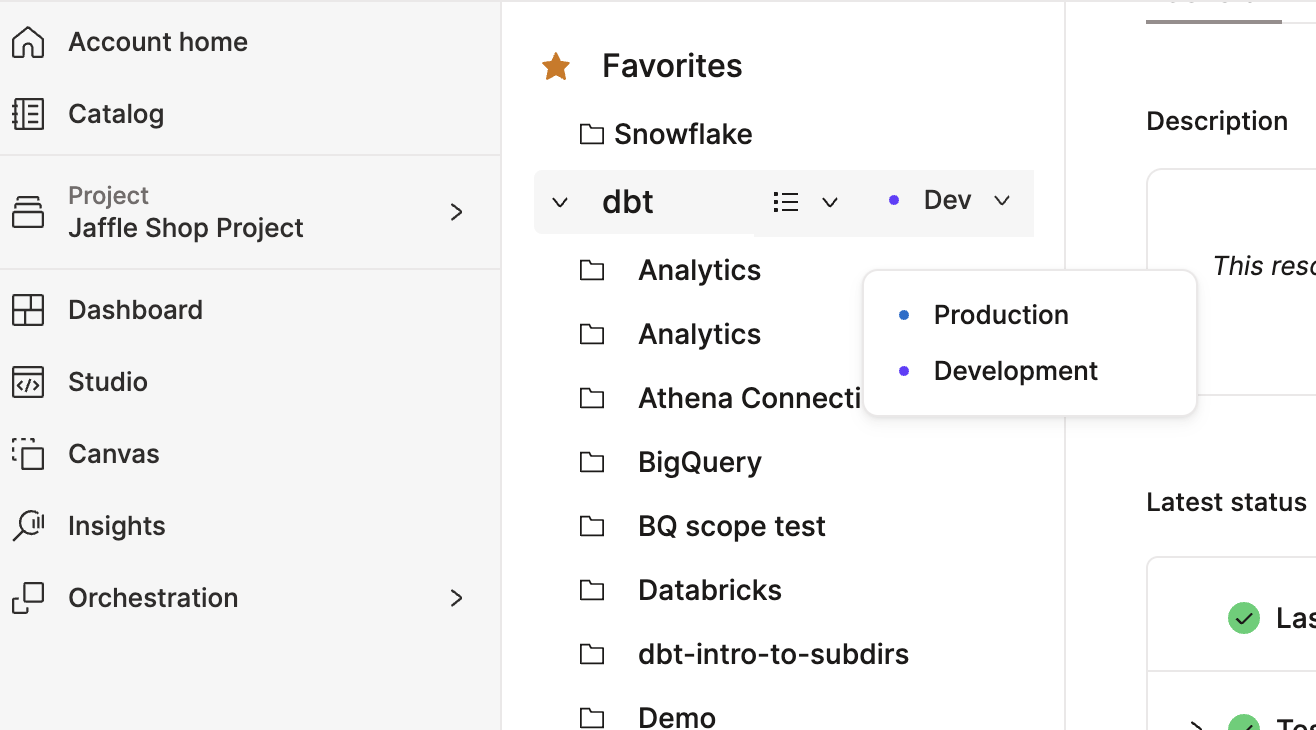](#)Select an environment in Catalog.
4. Select your project from the file tree.
5. Use the search bar or browse the resource list to find the `customers` model.
6. Click the model to view its details, including the descriptions you added.
[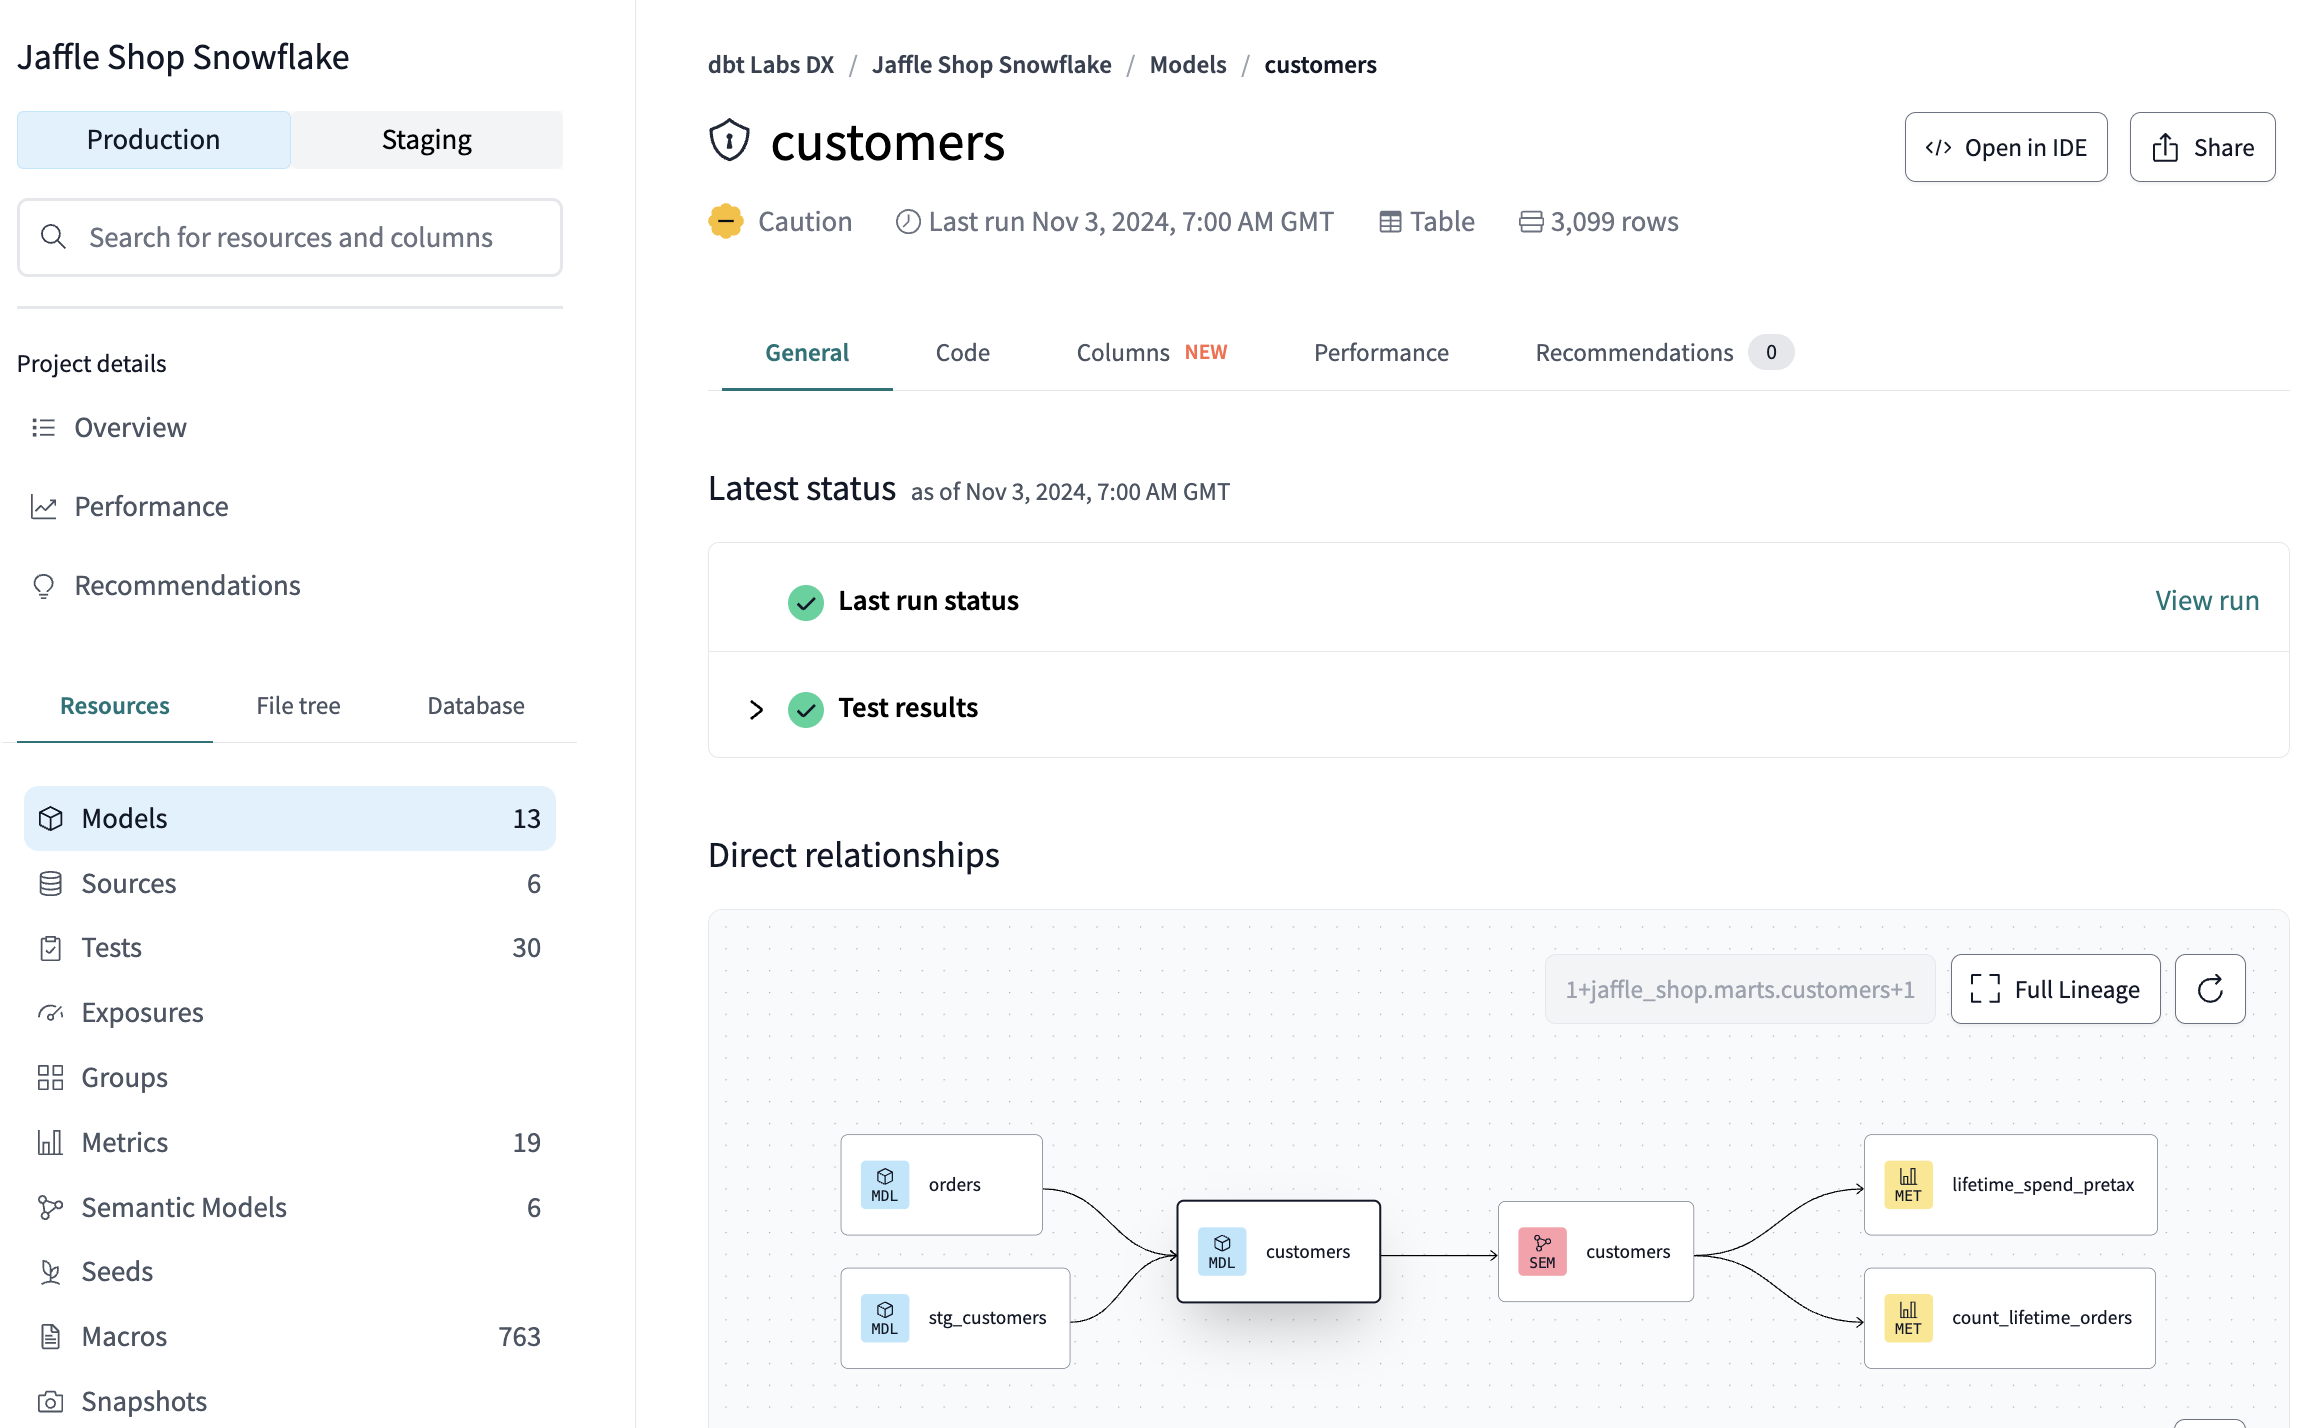](#)View your model's documentation and lineage in Catalog.
Catalog displays your model's description, column documentation, data tests, and lineage graph. You can also see which columns are missing documentation and track test coverage across your project.
### View in Studio IDE
You can view docs directly from the IDE if you're on `Latest` or another version of dbt Core. Keep in mind that this is a legacy view and doesn't offer the same level of interactivity as Catalog.
1. In the IDE, run `dbt docs generate`.
2. From the navigation bar, click the **View docs** icon located to the right of the **branch name**.
[](#)The View docs icon in the Studio IDE.
3. From **Projects**, select your project name and expand the folders.
4. Click **models** > **marts** > **customers**.
[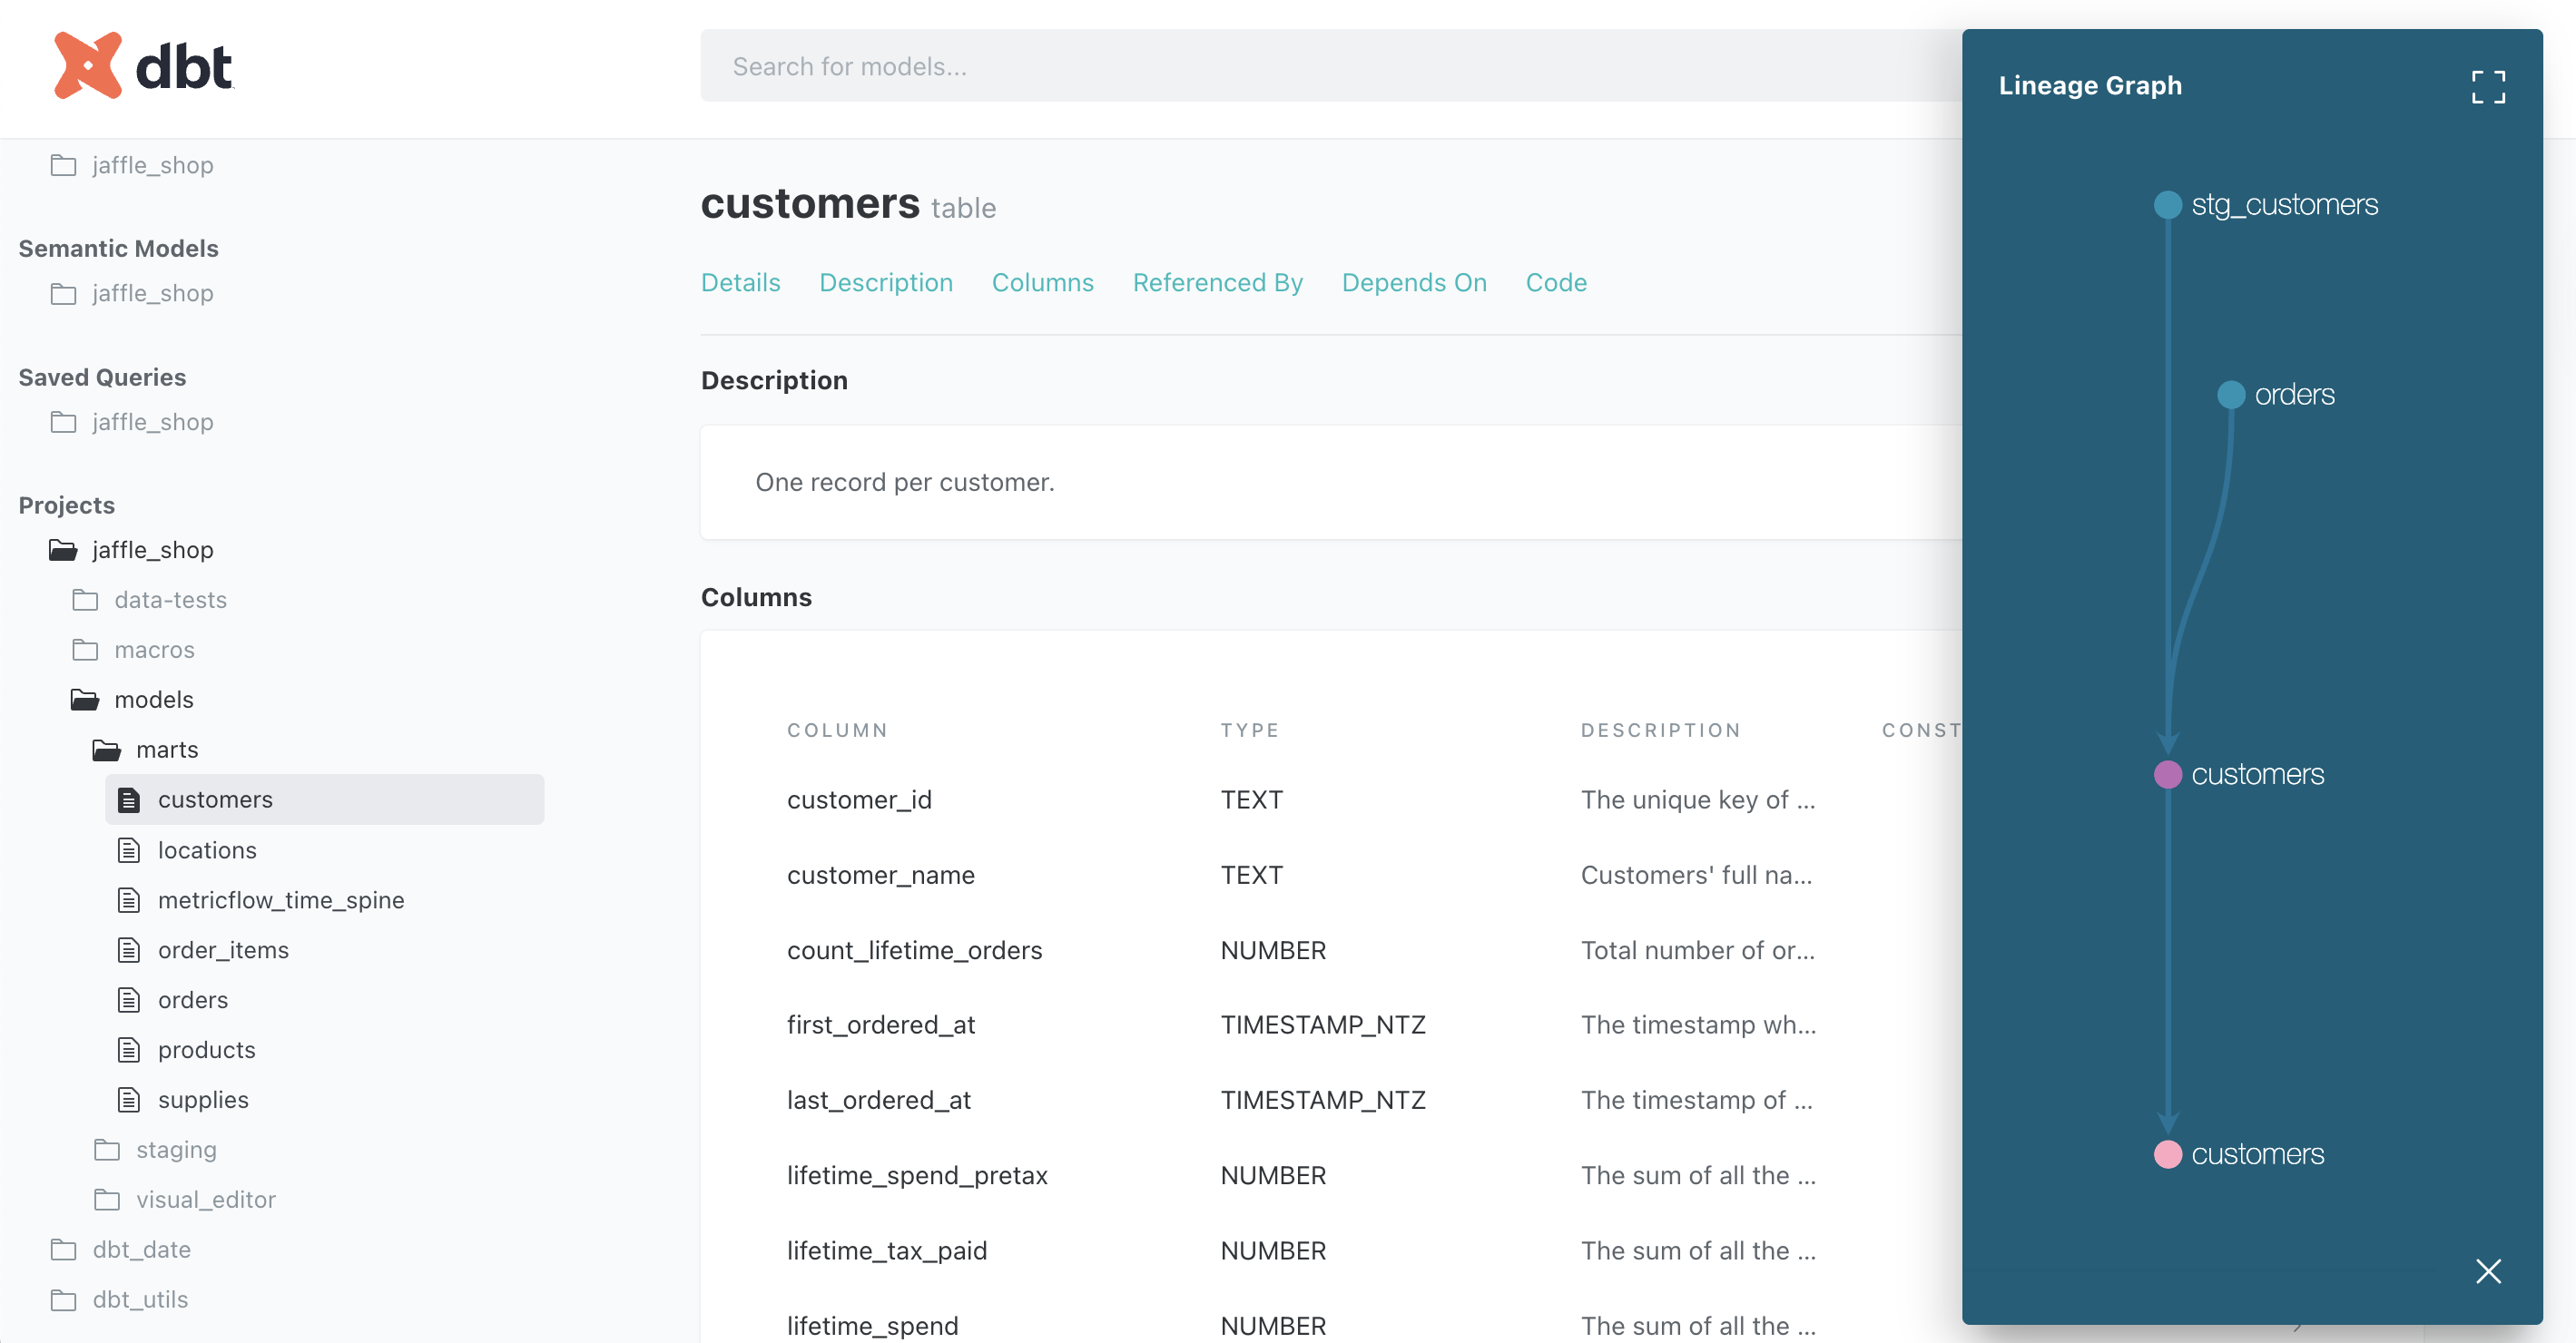](#)View your model's documentation in the legacy docs view.
#### FAQs
How do I write long-form explanations in my descriptions?
If you need more than a sentence to explain a model, you can:
1. Split your description over multiple lines using `>`. Interior line breaks are removed and Markdown can be used. This method is recommended for simple, single-paragraph descriptions:
```yml
models:
- name: customers
description: >
Lorem ipsum **dolor** sit amet, consectetur adipisicing elit, sed do eiusmod
tempor incididunt ut labore et dolore magna aliqua. Ut enim ad minim veniam,
quis nostrud exercitation ullamco laboris nisi ut aliquip ex ea commodo
consequat.
```
2. Split your description over multiple lines using `|`. Interior line breaks are maintained and Markdown can be used. This method is recommended for more complex descriptions:
```yml
models:
- name: customers
description: |
### Lorem ipsum
* dolor sit amet, consectetur adipisicing elit, sed do eiusmod
* tempor incididunt ut labore et dolore magna aliqua.
```
3. Use a [docs block](../docs/build/documentation.md#using-docs-blocks) to write the description in a separate Markdown file.
How do I access documentation in dbt Catalog?
If you're using dbt to deploy your project and have a [Starter, Enterprise, or Enterprise+ plan](https://www.getdbt.com/pricing/), you can use Catalog to view your project's [resources](../docs/build/projects.md) (such as models, tests, and metrics) and their lineage to gain a better understanding of its latest production state.
Access Catalog in dbt by clicking the **Catalog** link in the navigation. You can have up to 5 read-only users access the documentation for your project.
dbt developer plan and dbt Core users can use [dbt Docs](../docs/explore/build-and-view-your-docs.md#dbt-docs), which generates basic documentation but it doesn't offer the same speed, metadata, or visibility as Catalog.
## Commit your changes
Now that you've built your customer model, you need to commit the changes you made to the project so that the repository has your latest code.
**If you edited directly in the protected primary branch:**
1. Click the **Commit and sync git** button. This action prepares your changes for commit.
2. A modal titled **Commit to a new branch** will appear.
3. In the modal window, name your new branch `add-customers-model`. This branches off from your primary branch with your new changes.
4. Add a commit message, such as "Add customers model, tests, docs" and and commit your changes.
5. Click **Merge this branch to main** to add these changes to the main branch on your repo.
**If you created a new branch before editing:**
1. Since you already branched out of the primary protected branch, go to **Version Control** on the left.
2. Click **Commit and sync** to add a message.
3. Add a commit message, such as "Add customers model, tests, docs."
4. Click **Merge this branch to main** to add these changes to the main branch on your repo.
## Deploy dbt
Use dbt's Scheduler to deploy your production jobs confidently and build observability into your processes. You'll learn to create a deployment environment and run a job in the following steps.
### Create a deployment environment
1. From the main menu, go to **Orchestration** > **Environments**.
2. Click **Create environment**.
3. In the **Name** field, write the name of your deployment environment. For example, "Production."
4. The **dbt version** will default to the latest available. We recommend all new projects run on the latest version of dbt.
5. Under **Deployment connection**, enter the name of the dataset you want to use as the target, such as "Analytics". This will allow dbt to build and work with that dataset. For some data warehouses, the target dataset may be referred to as a "schema".
6. Click **Save**.
### Create and run a job
Jobs are a set of dbt commands that you want to run on a schedule. For example, `dbt build`.
As the `jaffle_shop` business gains more customers, and those customers create more orders, you will see more records added to your source data. Because you materialized the `customers` model as a table, you'll need to periodically rebuild your table to ensure that the data stays up-to-date. This update will happen when you run a job.
1. After creating your deployment environment, you should be directed to the page for a new environment. If not, select **Orchestration** from the main menu, then click **Jobs**.
2. Click **Create job** > **Deploy job**.
3. Provide a job name (for example, "Production run") and select the environment you just created.
4. Scroll down to the **Execution settings** section.
5. Under **Commands**, add this command as part of your job if you don't see it:
* `dbt build`
6. Select the **Generate docs on run** option to automatically [generate updated project docs](../docs/explore/build-and-view-your-docs.md) each time your job runs.
7. For this exercise, do *not* set a schedule for your project to run — while your organization's project should run regularly, there's no need to run this example project on a schedule. Scheduling a job is sometimes referred to as *deploying a project*.
8. Click **Save**, then click **Run now** to run your job.
9. Click the run and watch its progress under **Run summary**.
10. Once the run is complete, click **View Documentation** to see the docs for your project.
Congratulations 🎉! You've just deployed your first dbt project!
#### FAQs
What happens if one of my runs fails?
If you're using dbt, we recommend setting up email and Slack notifications (`Account Settings > Notifications`) for any failed runs. Then, debug these runs the same way you would debug any runs in development.
## Was this page helpful?
YesNo
[Privacy policy](https://www.getdbt.com/cloud/privacy-policy)[Create a GitHub issue](https://github.com/dbt-labs/docs.getdbt.com/issues)
This site is protected by reCAPTCHA and the Google [Privacy Policy](https://policies.google.com/privacy) and [Terms of Service](https://policies.google.com/terms) apply.