# Quickstart for the dbt Semantic Layer and Snowflake
[Back to guides](../guides.md)
Semantic Layer
Snowflake
dbt platform
Quickstart
Intermediate
[Menu ]()
## Introduction
The [Semantic Layer](../docs/use-dbt-semantic-layer/dbt-sl.md), powered by [MetricFlow](../docs/build/about-metricflow.md), simplifies the setup of key business metrics. It centralizes definitions, avoids duplicate code, and ensures easy access to metrics in downstream tools. MetricFlow helps manage company metrics easier, allowing you to define metrics in your dbt project and query them in dbt with [MetricFlow commands](../docs/build/metricflow-commands.md).
📹 Learn about the dbt Semantic Layer with on-demand video courses!
Explore our [dbt Semantic Layer on-demand course](https://learn.getdbt.com/courses/semantic-layer) to learn how to define and query metrics in your dbt project.
Additionally, dive into mini-courses for querying the dbt Semantic Layer in your favorite tools: [Tableau](https://courses.getdbt.com/courses/tableau-querying-the-semantic-layer), [Excel](https://learn.getdbt.com/courses/querying-the-semantic-layer-with-excel), [Hex](https://courses.getdbt.com/courses/hex-querying-the-semantic-layer), and [Mode](https://courses.getdbt.com/courses/mode-querying-the-semantic-layer).
This quickstart guide is designed for dbt users using Snowflake as their data platform. It focuses on building and defining metrics, setting up the Semantic Layer in a dbt project, and querying metrics in Google Sheets.
If you're on different data platforms, you can also follow this guide and will need to modify the setup for the specific platform. See the [users on different platforms](#for-users-on-different-data-platforms) section for more information.
### Prerequisites
* You need a [dbt](https://www.getdbt.com/signup/) Trial, Starter, or Enterprise-tier account for all deployments.
* Have the correct [dbt license](../docs/platform/manage-access/seats-and-users.md) and [permissions](../docs/platform/manage-access/enterprise-permissions.md) based on your plan:
More info on license and permissions
* Enterprise-tier — Developer license with Account Admin permissions. Or "Owner" with a Developer license, assigned Project Creator, Database Admin, or Admin permissions.
* Starter — "Owner" access with a Developer license.
* Trial — Automatic "Owner" access under a Starter plan trial.
* Create a [trial Snowflake account](https://signup.snowflake.com/):
* Select the Enterprise Snowflake edition with ACCOUNTADMIN access. Consider organizational questions when choosing a cloud provider, and refer to Snowflake's [Introduction to Cloud Platforms](https://docs.snowflake.com/en/user-guide/intro-cloud-platforms).
* Select a cloud provider and region. All cloud providers and regions will work so choose whichever you prefer.
* Complete the [Quickstart for dbt and Snowflake](./snowflake.md) guide.
* Basic understanding of SQL and dbt. For example, you've used dbt before or have completed the [dbt Fundamentals](https://learn.getdbt.com/courses/dbt-fundamentals) course.
### For users on different data platforms
If you're using a data platform other than Snowflake, this guide is also applicable to you. You can adapt the setup for your specific platform by following the account setup and data loading instructions detailed in the following tabs for each respective platform.
The rest of this guide applies universally across all supported platforms, ensuring you can fully leverage the Semantic Layer.
### BigQuery
Open a new tab and follow these quick steps for account setup and data loading instructions:
* [Step 2: Create a new GCP project](./bigquery.md?step=2)
* [Step 3: Create BigQuery dataset](./bigquery.md?step=3)
* [Step 4: Generate BigQuery credentials](./bigquery.md?step=4)
* [Step 5: Connect dbt to BigQuery](./bigquery.md?step=5)
### Databricks
Open a new tab and follow these quick steps for account setup and data loading instructions:
* [Step 2: Create a Databricks workspace](./databricks.md?step=2)
* [Step 3: Load data](./databricks.md?step=3)
* [Step 4: Connect dbt to Databricks](./databricks.md?step=4)
### Microsoft Fabric
Open a new tab and follow these quick steps for account setup and data loading instructions:
* [Step 2: Load data into your Microsoft Fabric warehouse](./microsoft-fabric.md?step=2)
* [Step 3: Connect dbt to Microsoft Fabric](./microsoft-fabric.md?step=3)
### Redshift
Open a new tab and follow these quick steps for account setup and data loading instructions:
* [Step 2: Create a Redshift cluster](./redshift.md?step=2)
* [Step 3: Load data](./redshift.md?step=3)
* [Step 4: Connect dbt to Redshift](./redshift.md?step=3)
### Starburst Galaxy
Open a new tab and follow these quick steps for account setup and data loading instructions:
* [Step 2: Load data to an Amazon S3 bucket](./starburst-galaxy.md?step=2)
* [Step 3: Connect Starburst Galaxy to Amazon S3 bucket data](./starburst-galaxy.md?step=3)
* [Step 4: Create tables with Starburst Galaxy](./starburst-galaxy.md?step=4)
* [Step 5: Connect dbt to Starburst Galaxy](./starburst-galaxy.md?step=5)
## Create new Snowflake SQL file and set up environment
1. Log in to your [trial Snowflake account](https://app.snowflake.com).
2. In the Snowflake UI, click the Create icon **+** in the upper left (under the Snowflake logo) to open a dropdown.
3. Select the first option, **SQL File**.
### Set up and load data into Snowflake
The data used here is stored as CSV files in a public S3 bucket and the following steps will guide you through how to prepare your Snowflake account for that data and upload it.
1. Create a new virtual warehouse, two new databases (one for raw data, the other for future dbt development), and two new schemas (one for `jaffle_shop` data, the other for `stripe` data).
To do this, run these SQL commands by typing them into the Editor of your new Snowflake SQL file and clicking **Run**:
```sql
create warehouse transforming;
create database raw;
create database analytics;
create schema raw.jaffle_shop;
create schema raw.stripe;
```
2. In the `raw` database and `jaffle_shop` and `stripe` schemas, create three tables and load relevant data into them:
* First, delete all contents (empty) in the Editor of the Snowflake SQL file. Then, run this SQL command to create the `customer` table:
```sql
create table raw.jaffle_shop.customers
( id integer,
first_name varchar,
last_name varchar
);
```
* Delete all contents in the Editor, then run this command to load data into the `customer` table:
```sql
copy into raw.jaffle_shop.customers (id, first_name, last_name)
from 's3://dbt-tutorial-public/jaffle_shop_customers.csv'
file_format = (
type = 'CSV'
field_delimiter = ','
skip_header = 1
);
```
* Delete all contents in the Editor (empty), then run this command to create the `orders` table:
```sql
create table raw.jaffle_shop.orders
( id integer,
user_id integer,
order_date date,
status varchar,
_etl_loaded_at timestamp default current_timestamp
);
```
* Delete all contents in the Editor, then run this command to load data into the `orders` table:
```sql
copy into raw.jaffle_shop.orders (id, user_id, order_date, status)
from 's3://dbt-tutorial-public/jaffle_shop_orders.csv'
file_format = (
type = 'CSV'
field_delimiter = ','
skip_header = 1
);
```
* Delete all contents in the Editor (empty), then run this command to create the `payment` table:
```sql
create table raw.stripe.payment
( id integer,
orderid integer,
paymentmethod varchar,
status varchar,
amount integer,
created date,
_batched_at timestamp default current_timestamp
);
```
* Delete all contents in the Editor, then run this command to load data into the `payment` table:
```sql
copy into raw.stripe.payment (id, orderid, paymentmethod, status, amount, created)
from 's3://dbt-tutorial-public/stripe_payments.csv'
file_format = (
type = 'CSV'
field_delimiter = ','
skip_header = 1
);
```
3. Verify that the data is loaded by running these SQL queries. Confirm that you can see output for each one.
```sql
select * from raw.jaffle_shop.customers;
select * from raw.jaffle_shop.orders;
select * from raw.stripe.payment;
```
[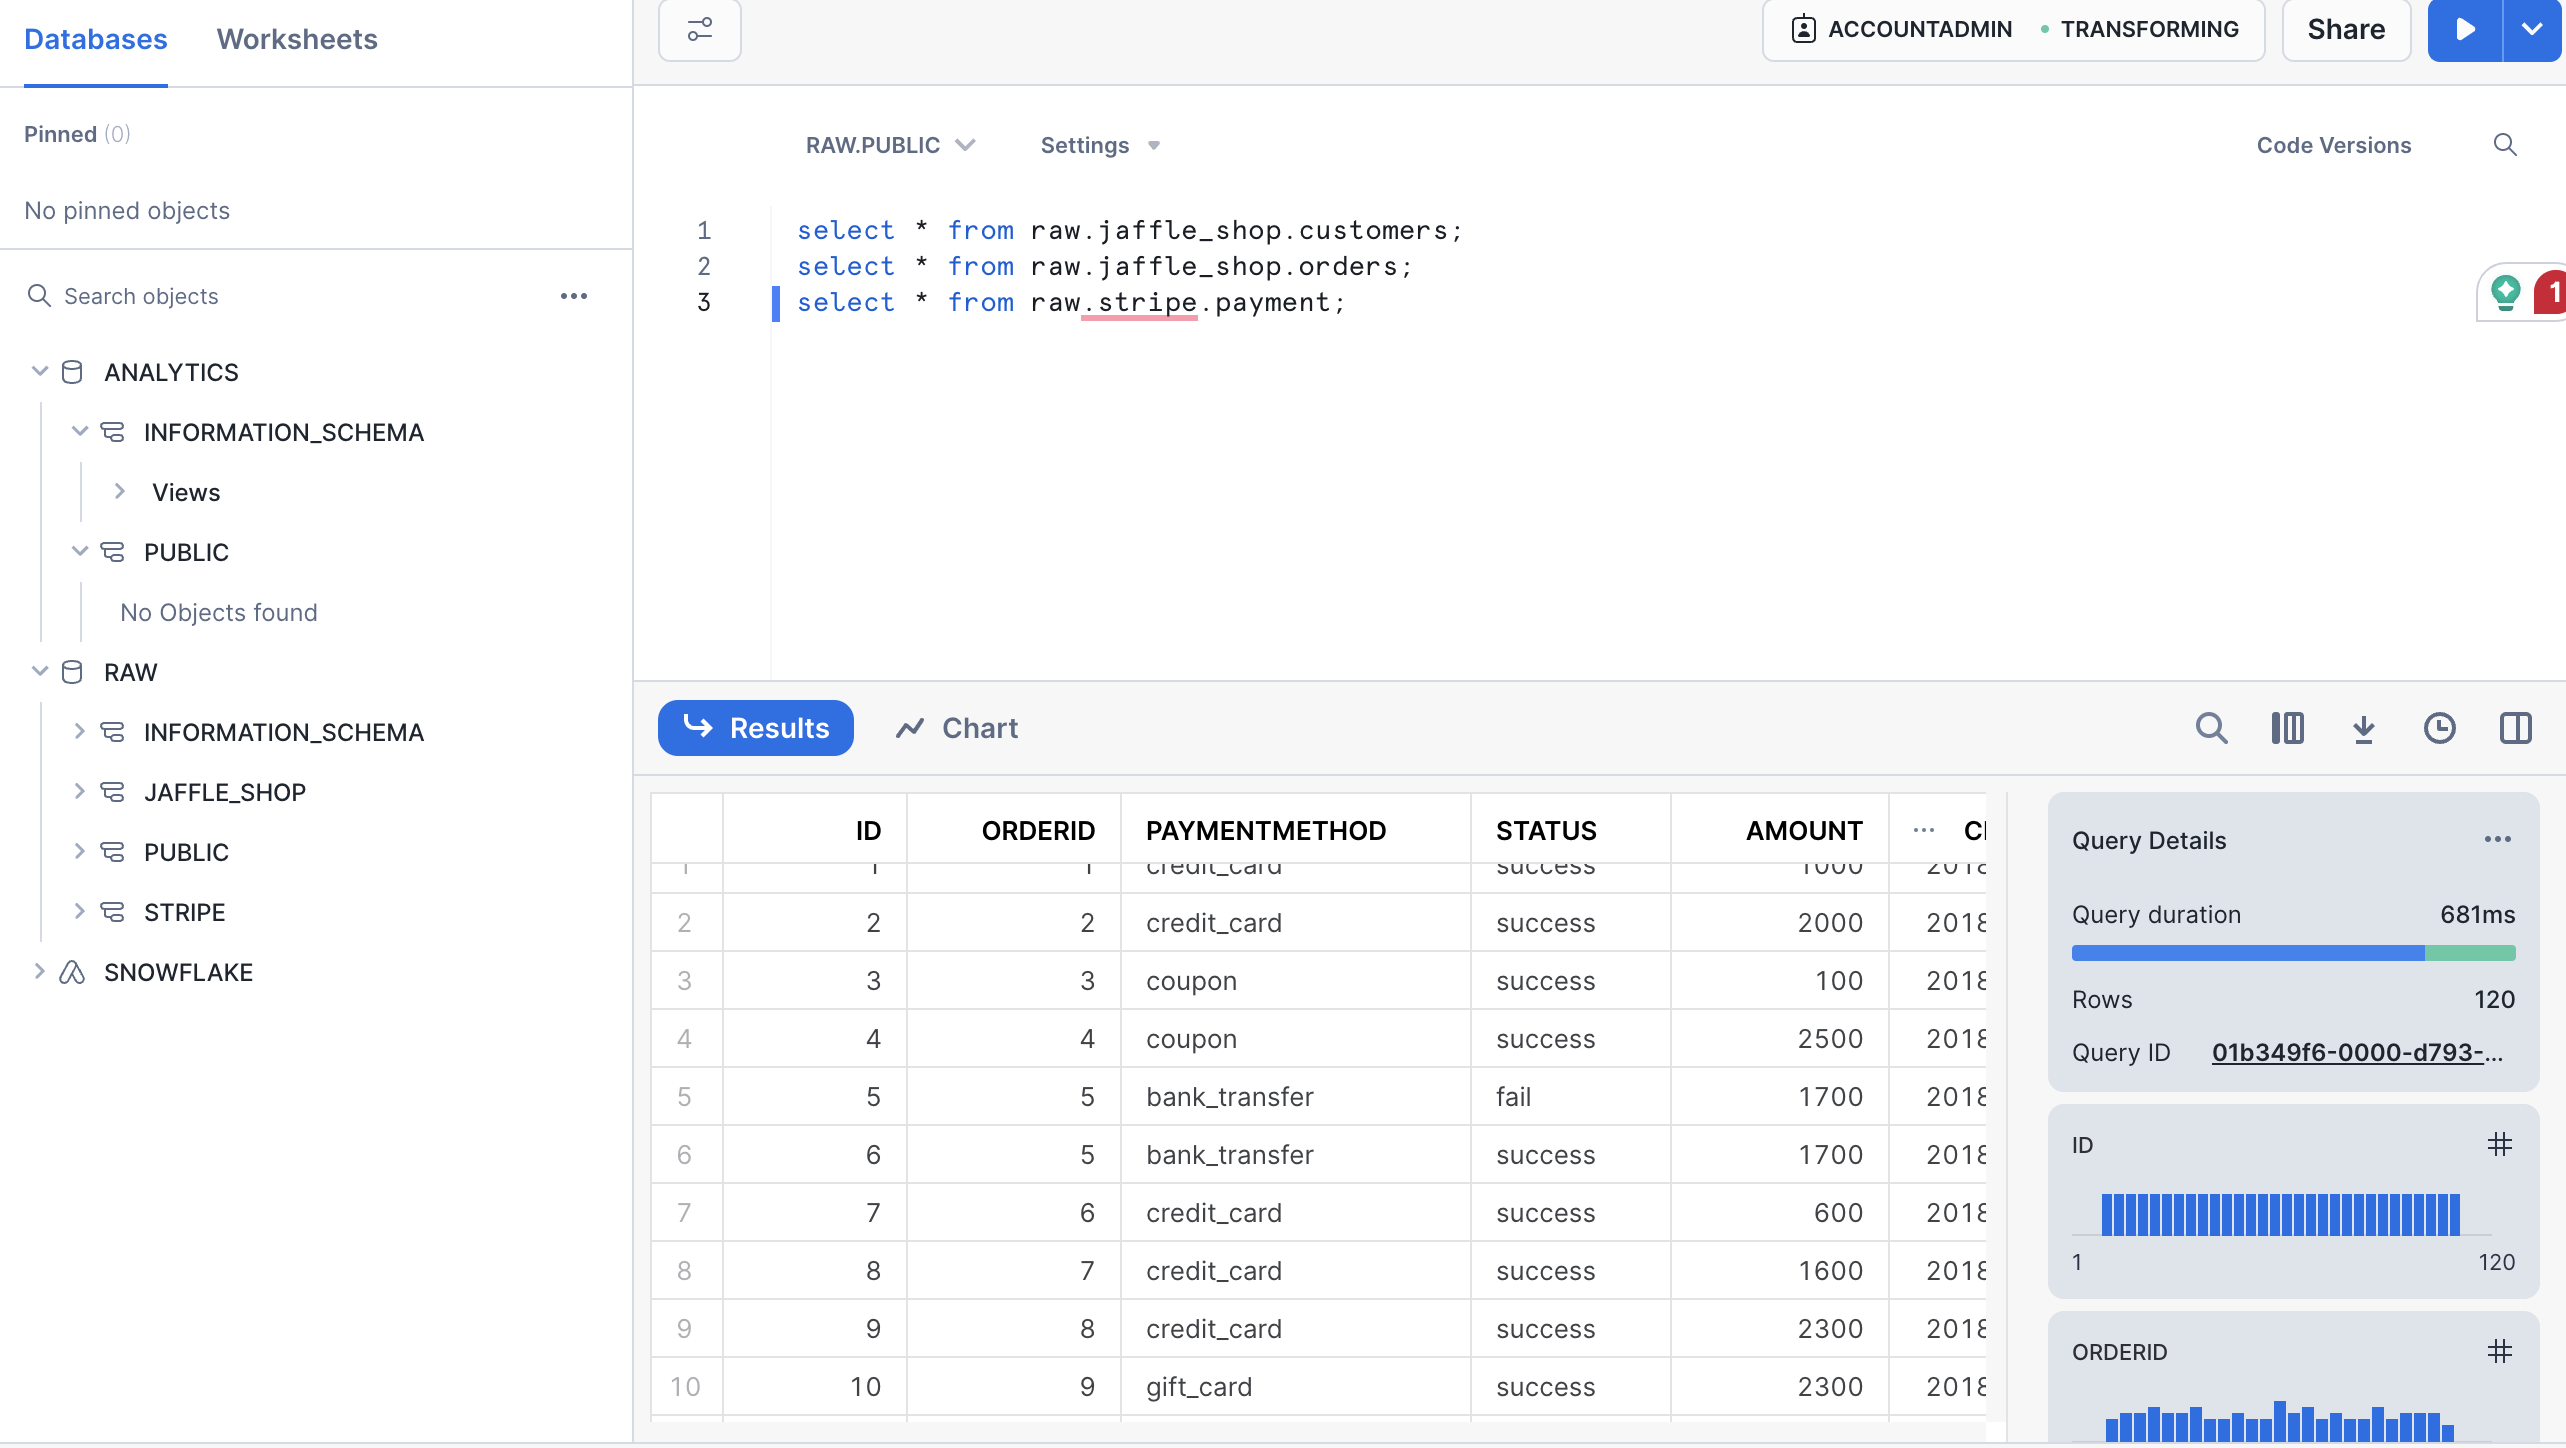](#)The image displays Snowflake's confirmation output when data loaded correctly in the Editor.
## Connect dbt to Snowflake
There are two ways to connect dbt to Snowflake. The first option is Partner Connect, which provides a streamlined setup to create your dbt account from within your new Snowflake trial account. The second option is to create your dbt account separately and build the Snowflake connection yourself (connect manually). If you want to get started quickly, dbt Labs recommends using Partner Connect. If you want to customize your setup from the very beginning and gain familiarity with the dbt setup flow, dbt Labs recommends connecting manually.
### Use Partner Connect
Using Partner Connect allows you to create a complete dbt account with your [Snowflake connection](../docs/platform/connect-data-platform/connect-snowflake.md), [a managed repository](../docs/platform/git/managed-repository.md), [environments](../docs/build/custom-schemas.md#managing-environments), and credentials.
1. On the left sidebar of the Snowflake UI, go to **Admin > Partner Connect**. Find the dbt tile under the **Data Integration** section or search for dbt in the search bar. Click the tile to connect to dbt.
[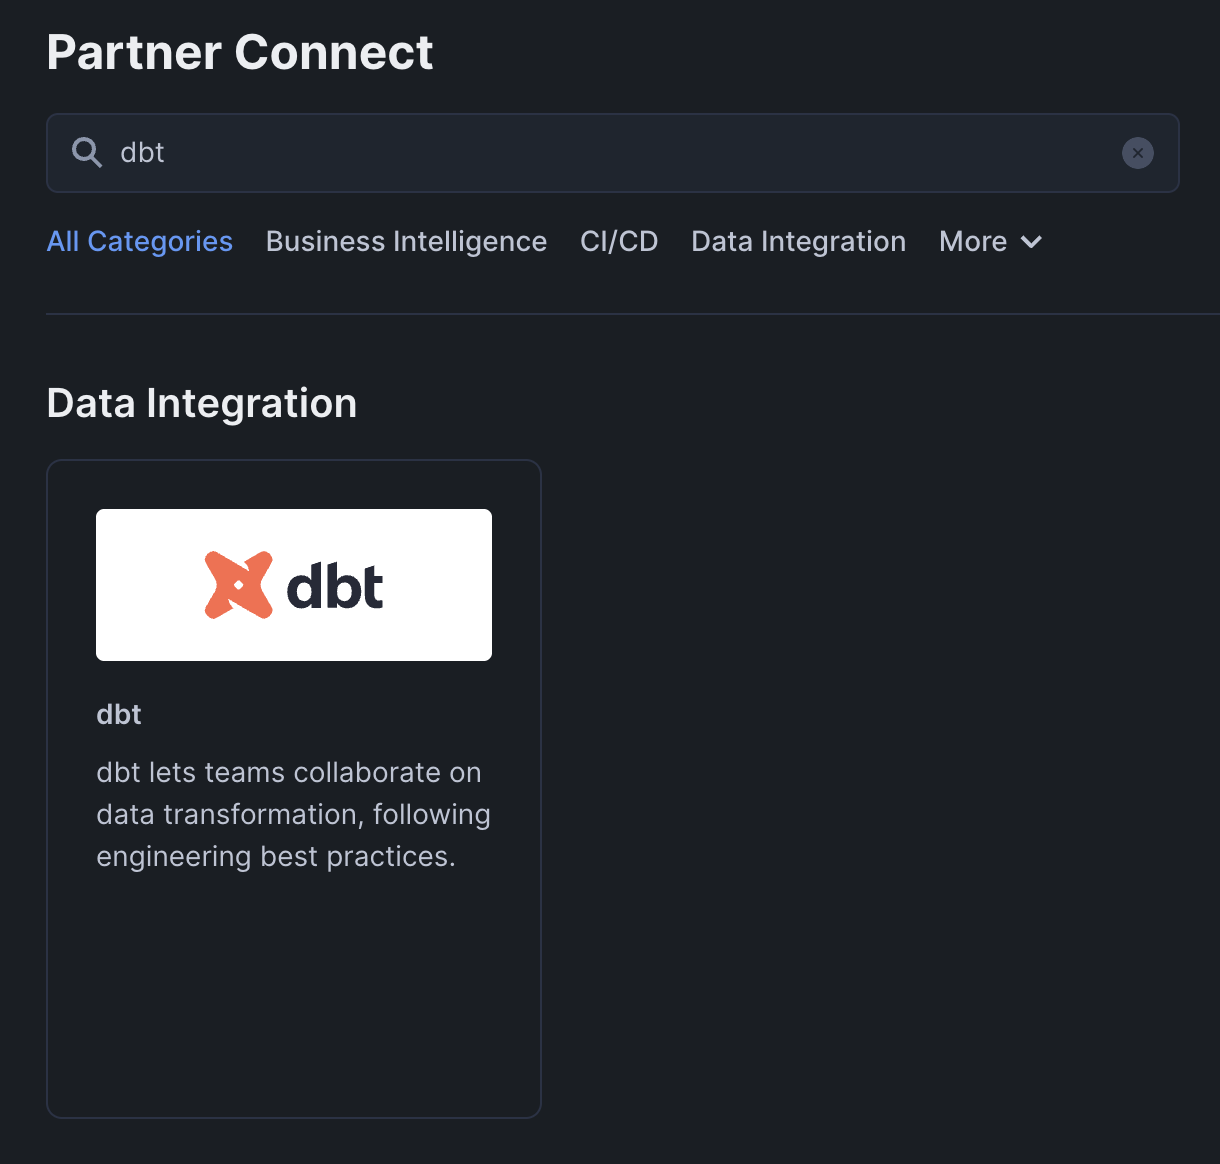](#)Snowflake Partner Connect Box
If you’re using the classic version of the Snowflake UI, you can click the **Partner Connect** button in the top bar of your account. From there, click on the dbt tile to open up the connect box.
[](#)Snowflake Classic UI - Partner Connect
2. In the **Connect to dbt** popup, find the **Optional Grant** option and select the **RAW** and **ANALYTICS** databases. This will grant access for your new dbt user role to each selected database. Then, click **Connect**.
[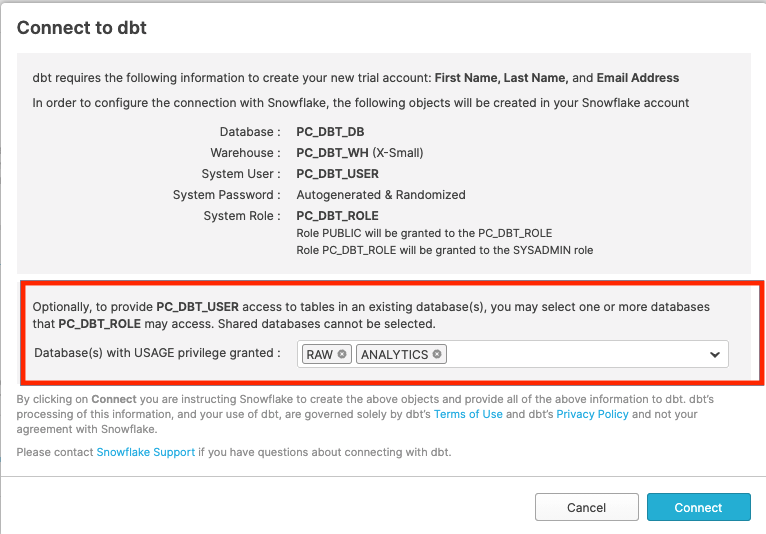](#)Snowflake Classic UI - Connection Box
[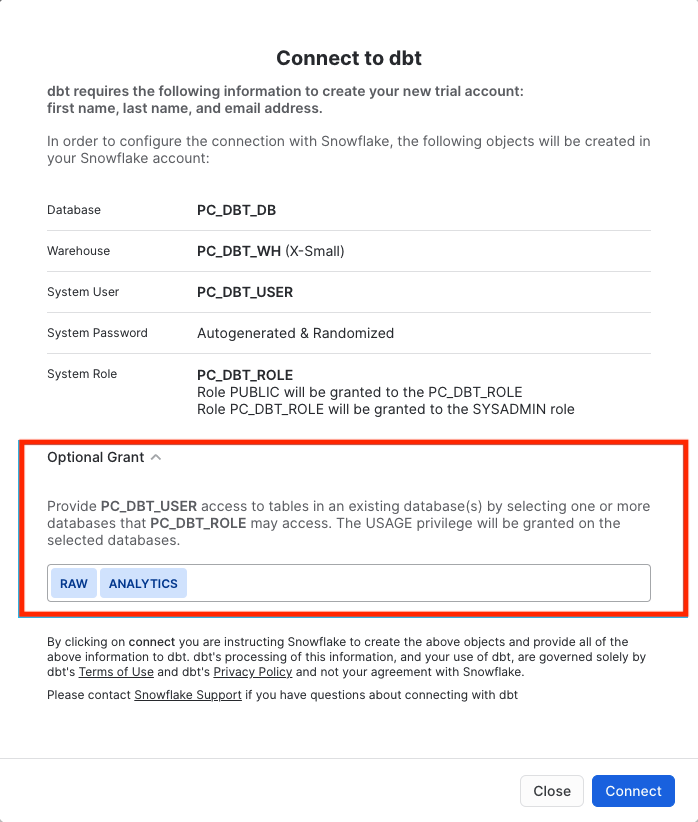](#)Snowflake New UI - Connection Box
3. Click **Activate** when a popup appears:
[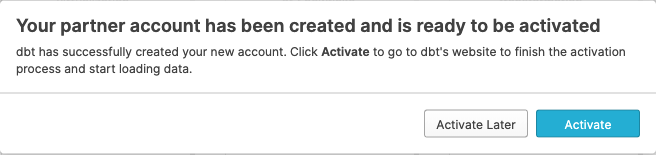](#)Snowflake Classic UI - Actviation Window
[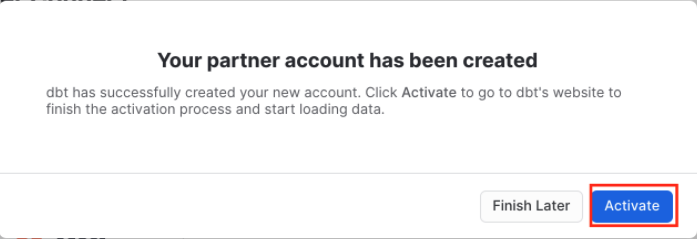](#)Snowflake New UI - Activation Window
4. After the new tab loads, you will see a form. If you already created a dbt account, you will be asked to provide an account name. If you haven't created an account, you will be asked to provide an account name and password.
5. After you have filled out the form and clicked **Complete Registration**, you will be logged into dbt automatically.
6. Click your account name in the left side menu and select **Account settings**, choose the "Partner Connect Trial" project, and select **snowflake** in the overview table. Select **Edit** and update the **Database** field to `analytics` and the **Warehouse** field to `transforming`.
[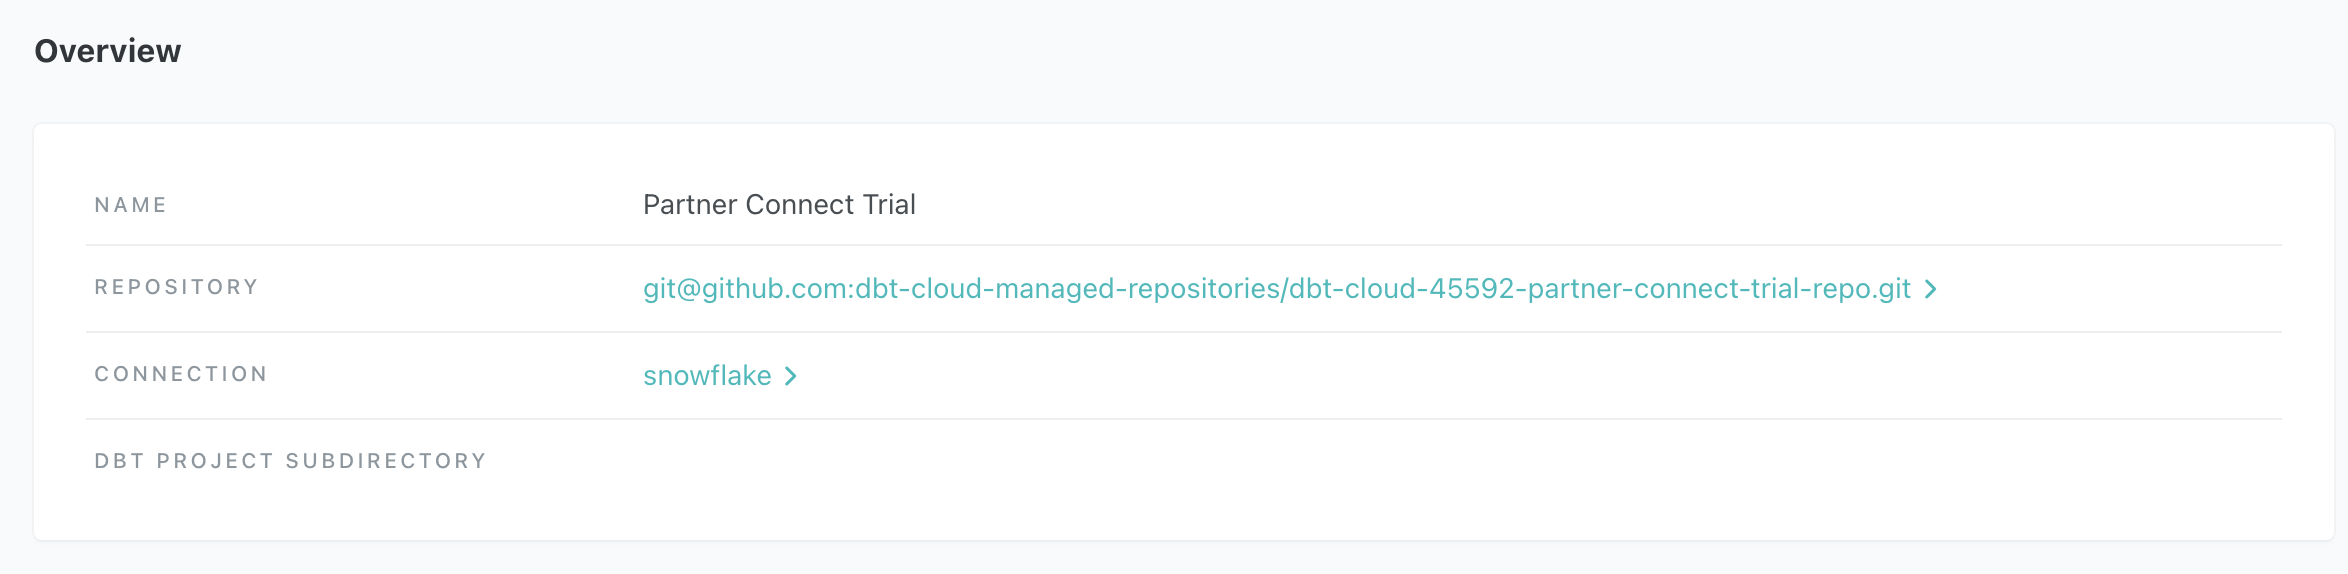](#)dbt - Snowflake Project Overview
[](#)dbt - Update Database and Warehouse
### Connect manually
1. Create a new project in dbt. Navigate to **Account settings** (by clicking on your account name in the left side menu), and click **+ New Project**.
2. Enter a project name and click **Continue**.
3. In the **Configure your development environment** section, click the **Connection** dropdown menu and select **Add new connection**. This directs you to the connection configuration settings.
4. In the **Type** section, select **Snowflake**.
[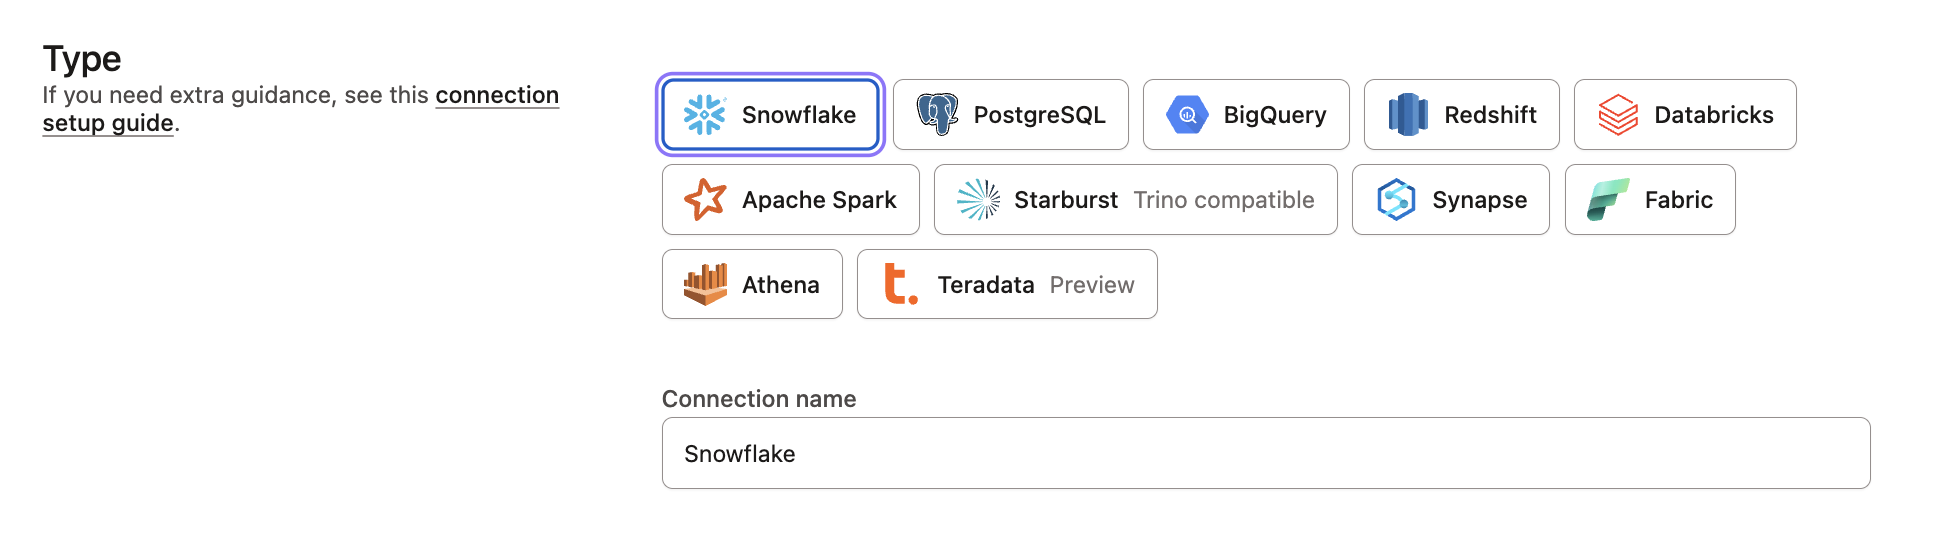](#)dbt - Choose Snowflake Connection
5. Enter your **Settings** for Snowflake with:
* **Account** — Find your account by using the Snowflake trial account URL and removing `snowflakecomputing.com`. The order of your account information will vary by Snowflake version. For example, Snowflake's Classic console URL might look like: `oq65696.west-us-2.azure.snowflakecomputing.com`. The AppUI or Snowsight URL might look more like: `snowflakecomputing.com/west-us-2.azure/oq65696`. In both examples, your account will be: `oq65696.west-us-2.azure`. For more information, see [Account Identifiers](https://docs.snowflake.com/en/user-guide/admin-account-identifier.html) in the Snowflake docs.
✅ `db5261993` or `db5261993.east-us-2.azure`
❌ `db5261993.eu-central-1.snowflakecomputing.com`
* **Role** — Leave blank for now. You can update this to a default Snowflake role later.
* **Database** — `analytics`. This tells dbt to create new models in the analytics database.
* **Warehouse** — `transforming`. This tells dbt to use the transforming warehouse that was created earlier.
[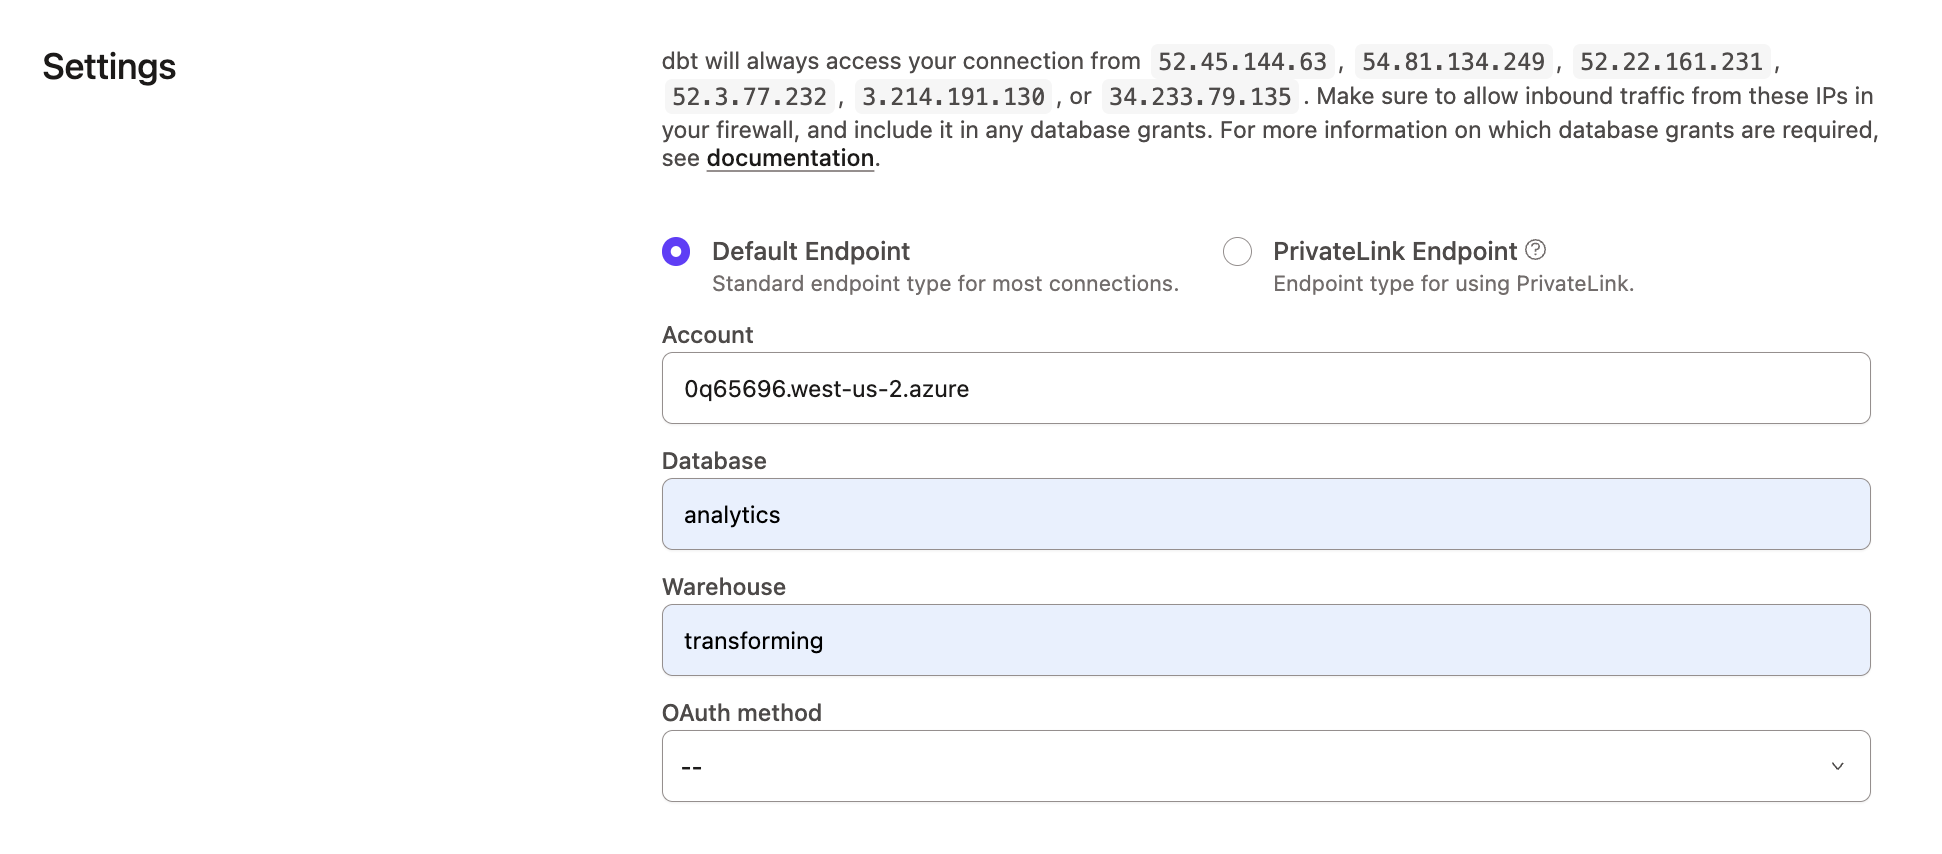](#)dbt - Snowflake Account Settings
6. Click **Save**.
7. Set up your personal user credentials by going to **Your profile** > **Credentials**.
8. Select your project that uses the Snowflake connection.
9. Click the **configure your development environment and add a connection** link. This directs you to a page where you can enter your personal user credentials.
10. Enter your **User credentials** for Snowflake with:
* **Username** — The username you created for Snowflake. The username is not your email address and is usually your first and last name together in one word.
* **Password** — The password you set when creating your Snowflake account.
* **Schema** — You’ll notice that the schema name has been auto-created for you. By convention, this is `dbt_`. This is the schema connected directly to your development environment, and it's where your models will be built when running dbt within the Studio IDE.
* **Target name** — Leave as the default.
* **Threads** — Leave as 4. This is the number of simultaneous connects that dbt will make to build models concurrently.
[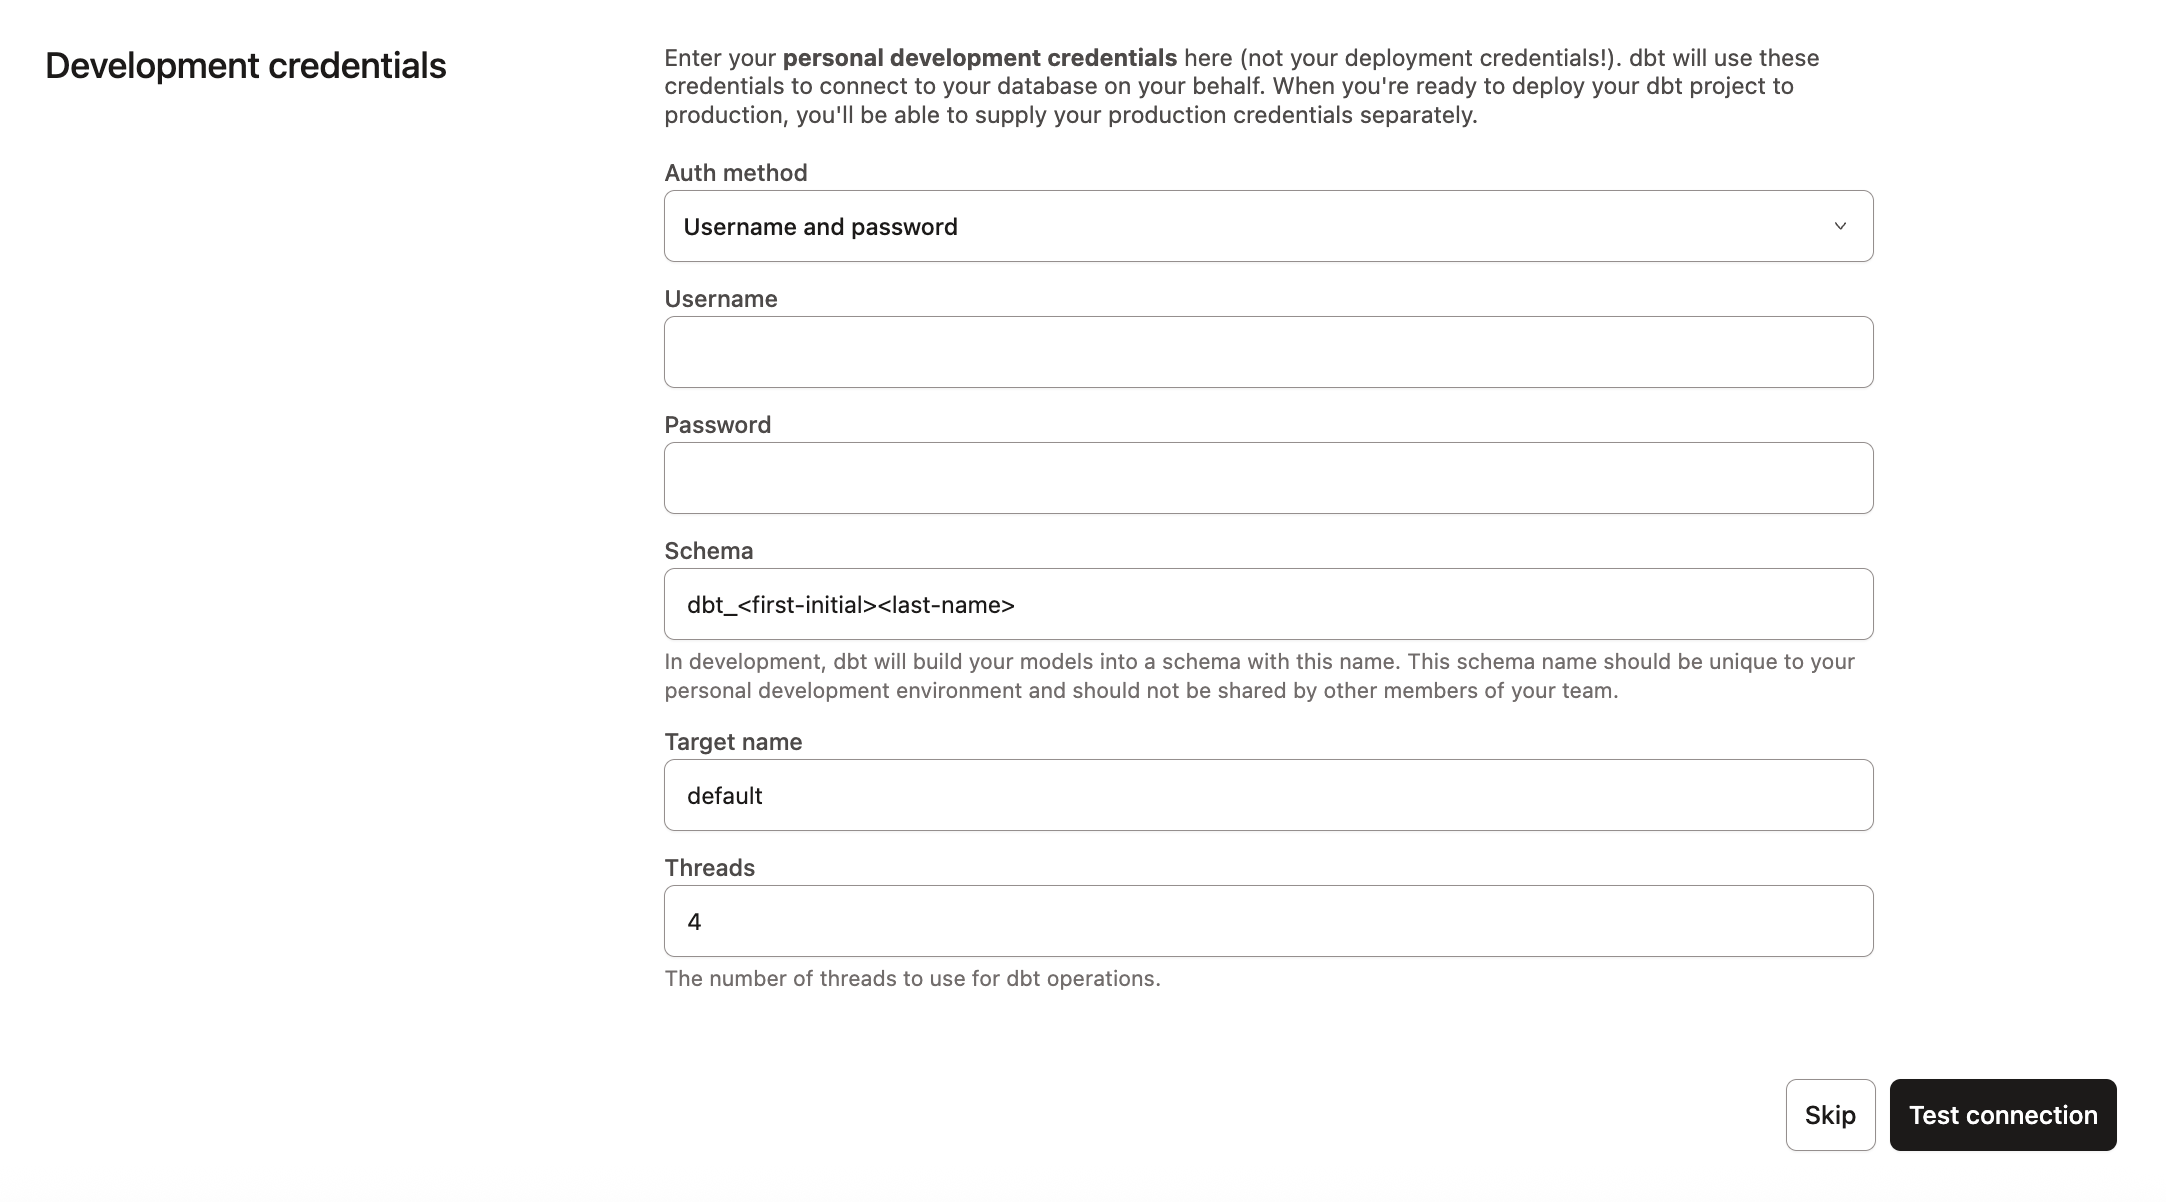](#)dbt - Snowflake User credentials
11. Click **Test connection**. This verifies that dbt can access your Snowflake account.
12. If the test succeeded, click **Save** to complete the configuration. If it failed, you may need to check your Snowflake settings and credentials.
## Set up dbt project
In this section, you will set up a dbt managed repository and initialize your dbt project to start developing.
### Set up a dbt managed repository
If you used Partner Connect, you can skip to [initializing your dbt project](#initialize-your-dbt-project-and-start-developing) as Partner Connect provides you with a [managed repository](../docs/platform/git/managed-repository.md). Otherwise, you will need to create your repository connection.
When you develop in dbt, you can leverage [Git](../docs/platform/git/git-version-control.md) to version control your code.
To connect to a repository, you can either set up a dbt-hosted [managed repository](../docs/platform/git/managed-repository.md) or directly connect to a [supported git provider](../docs/platform/git/connect-github.md). Managed repositories are a great way to trial dbt without needing to create a new repository. In the long run, it's better to connect to a supported git provider to use features like automation and [continuous integration](../docs/deploy/continuous-integration.md).
To set up a managed repository:
1. Under "Setup a repository", select **Managed**.
2. Type a name for your repo such as `bbaggins-dbt-quickstart`
3. Click **Create**. It will take a few seconds for your repository to be created and imported.
4. Once you see the "Successfully imported repository," click **Continue**.
### Initialize your dbt project
This guide assumes you use the [Studio IDE](../docs/platform/studio-ide/develop-in-studio.md) to develop your dbt project, define metrics, and query and preview metrics using [MetricFlow commands](../docs/build/metricflow-commands.md).
Now that you have a repository configured, you can initialize your project and start development in dbt using the Studio IDE:
1. Click **Start developing in the Studio IDE**. It might take a few minutes for your project to spin up for the first time as it establishes your git connection, clones your repo, and tests the connection to the warehouse.
2. Above the file tree to the left, click **Initialize your project**. This builds out your folder structure with example models.
3. Make your initial commit by clicking **Commit and sync**. Use the commit message `initial commit`. This creates the first commit to your managed repo and allows you to open a branch where you can add a new dbt code.
4. You can now directly query data from your warehouse and execute `dbt run`. You can try this out now:
* Delete the models/examples folder in the **File Catalog**.
* Click **+ Create new file**, add this query to the new file, and click **Save as** to save the new file:
```sql
select * from raw.jaffle_shop.customers
```
* In the command line bar at the bottom, enter dbt run and click Enter. You should see a dbt run succeeded message.
## Build your dbt project
The next step is to build your project. This involves adding sources, staging models, business-defined entities, and packages to your project.
### Add sources
[Sources](../docs/build/sources.md) in dbt are the raw data tables you'll transform. By organizing your source definitions, you document the origin of your data. It also makes your project and transformation more reliable, structured, and understandable.
You have two options for working with files in the Studio IDE:
* **Create a new branch (recommended)** — Create a new branch to edit and commit your changes. Navigate to **Version Control** on the left sidebar and click **Create branch**.
* **Edit in the protected primary branch** — If you prefer to edit, format, or lint files and execute dbt commands directly in your primary git branch, use this option. The Studio IDE prevents commits to the protected branch so you'll be prompted to commit your changes to a new branch.
Name the new branch `build-project`.
1. Hover over the `models` directory and click the three-dot menu (**...**), then select **Create file**.
2. Name the file `staging/jaffle_shop/src_jaffle_shop.yml` , then click **Create**.
3. Copy the following text into the file and click **Save**.
models/staging/jaffle\_shop/src\_jaffle\_shop.yml
```yaml
sources:
- name: jaffle_shop
database: raw
schema: jaffle_shop
tables:
- name: customers
- name: orders
```
tip
In your source file, you can also use the **Generate model** button to create a new model file for each source. This creates a new file in the `models` directory with the given source name and fill in the SQL code of the source definition.
4. Hover over the `models` directory and click the three dot menu (**...**), then select **Create file**.
5. Name the file `staging/stripe/src_stripe.yml` , then click **Create**.
6. Copy the following text into the file and click **Save**.
models/staging/stripe/src\_stripe.yml
```yaml
sources:
- name: stripe
database: raw
schema: stripe
tables:
- name: payment
```
### Add staging models
[Staging models](../best-practices/how-we-structure/2-staging.md) are the first transformation step in dbt. They clean and prepare your raw data, making it ready for more complex transformations and analyses. Follow these steps to add your staging models to your project.
1. In the `jaffle_shop` sub-directory, create the file `stg_customers.sql`. Or, you can use the **Generate model** button to create a new model file for each source.
2. Copy the following query into the file and click **Save**.
models/staging/jaffle\_shop/stg\_customers.sql
```sql
select
id as customer_id,
first_name,
last_name
from {{ source('jaffle_shop', 'customers') }}
```
3. In the same `jaffle_shop` sub-directory, create the file `stg_orders.sql`
4. Copy the following query into the file and click **Save**.
models/staging/jaffle\_shop/stg\_orders.sql
```sql
select
id as order_id,
user_id as customer_id,
order_date,
status
from {{ source('jaffle_shop', 'orders') }}
```
5. In the `stripe` sub-directory, create the file `stg_payments.sql`.
6. Copy the following query into the file and click **Save**.
models/staging/stripe/stg\_payments.sql
```sql
select
id as payment_id,
orderid as order_id,
paymentmethod as payment_method,
status,
-- amount is stored in cents, convert it to dollars
amount / 100 as amount,
created as created_at
from {{ source('stripe', 'payment') }}
```
7. Enter `dbt run` in the command prompt at the bottom of the screen. You should get a successful run and see the three models.
### Add business-defined entities
This phase involves creating [models that serve as the entity layer or concept layer of your dbt project](../best-practices/how-we-structure/4-marts.md), making the data ready for reporting and analysis. It also includes adding [packages](../docs/build/packages.md) and the [MetricFlow time spine](../docs/build/metricflow-time-spine.md) that extend dbt's functionality.
This phase is the [marts layer](../best-practices/how-we-structure/1-guide-overview.md#guide-structure-overview), which brings together modular pieces into a wide, rich vision of the entities an organization cares about.
1. Create the file `models/marts/fct_orders.sql`.
2. Copy the following query into the file and click **Save**.
models/marts/fct\_orders.sql
```sql
with orders as (
select * from {{ ref('stg_orders' )}}
),
payments as (
select * from {{ ref('stg_payments') }}
),
order_payments as (
select
order_id,
sum(case when status = 'success' then amount end) as amount
from payments
group by 1
),
final as (
select
orders.order_id,
orders.customer_id,
orders.order_date,
coalesce(order_payments.amount, 0) as amount
from orders
left join order_payments using (order_id)
)
select * from final
```
3. In the `models/marts` directory, create the file `dim_customers.sql`.
4. Copy the following query into the file and click **Save**.
models/marts/dim\_customers.sql
```sql
with customers as (
select * from {{ ref('stg_customers')}}
),
orders as (
select * from {{ ref('fct_orders')}}
),
customer_orders as (
select
customer_id,
min(order_date) as first_order_date,
max(order_date) as most_recent_order_date,
count(order_id) as number_of_orders,
sum(amount) as lifetime_value
from orders
group by 1
),
final as (
select
customers.customer_id,
customers.first_name,
customers.last_name,
customer_orders.first_order_date,
customer_orders.most_recent_order_date,
coalesce(customer_orders.number_of_orders, 0) as number_of_orders,
customer_orders.lifetime_value
from customers
left join customer_orders using (customer_id)
)
select * from final
```
5. Create a MetricFlow time spine model by following the [MetricFlow time spine guide](./mf-time-spine.md?step=1). This guide walks you through creating both the SQL model and YAML configuration required for time-based metric calculations.
6. Enter `dbt run` in the command prompt at the bottom of the screen. You should get a successful run message and also see in the run details that dbt has successfully built your models.
## Create semantic models
In this section, you'll learn about [semantic model](./sl-snowflake-qs.md?step=6#about-semantic-models), [their components](./sl-snowflake-qs.md?step=6#semantic-model-components), and [how to configure a time spine](./sl-snowflake-qs.md?step=6#configure-a-time-spine).
### About semantic models
(Applies to dbt v1.12 and later)
[Semantic models](../docs/build/semantic-models.md) contain many object types (such as entities, simple metrics, and dimensions) that allow MetricFlow to construct the queries for metric definitions.
* Each semantic model will be 1:1 with a dbt SQL model.
* Each semantic model will contain (at most) 1 primary or natural entity.
* Each semantic model will contain zero, one, or many foreign or unique entities used to connect to other entities.
* Each semantic model may also contain dimensions, simple metrics, and metrics. This is what actually gets fed into and queried by your downstream BI tool.
In the following steps, semantic models enable you to define how to interpret the data related to orders. It includes entities (like ID columns serving as keys for joining data), dimensions (for grouping or filtering data), and simple metrics (for data aggregations).
1. In the `models` directory, create a new file `fct_orders.yml`.
tip
Make sure to save all semantic models and metrics under the directory defined in the [`model-paths`](../reference/project-configs/model-paths.md) (or a subdirectory of it, like `models/semantic_models/`). If you save them outside of this path, it will result in an empty `semantic_manifest.json` file, and your semantic models or metrics won't be recognized.
2. Add the following code to that newly created file:
models/fct\_orders.yml
```yaml
models:
- name: fct_orders
description: |
Order fact table. This table's grain is one row per order.
semantic_model:
enabled: true
name: orders
agg_time_dimension: order_date
```
### Semantic model components
(Applies to dbt v1.12 and later)
The following sections explain [dimensions](../docs/build/dimensions.md), [entities](../docs/build/entities.md), and [simple metrics](../docs/build/metrics-overview.md#simple-metrics) in more detail, showing how they each play a role in semantic models.
* [Entities](#entities) act as unique identifiers (like ID columns) that link data together from different tables.
* [Dimensions](#dimensions) categorize and filter data, making it easier to organize.
* [Simple metrics](#simple-metrics) calculates data using an aggregation function, providing valuable insights through aggregation.
### Entities
[Entities](../docs/build/semantic-models.md#entities) are a real-world concept in a business, serving as the backbone of your semantic model. These are going to be ID columns (like `order_id`) in our semantic models. These will serve as join keys to other semantic models.
Add entities to your `fct_orders.yml` semantic model file:
(Applies to dbt v1.12 and later)
models/fct\_orders.yml
```yaml
models:
- name: fct_orders
semantic_model:
enabled: true
name: orders
agg_time_dimension: order_date
columns:
# Entities
- name: order_id
entity:
type: primary
name: order_id
- name: customer_id
entity:
name: customer
type: foreign
```
### Dimensions
[Dimensions](../docs/build/semantic-models.md#dimensions) are a way to group or filter information based on categories or time.
Add dimensions to your `fct_orders.yml` semantic model file:
(Applies to dbt v1.12 and later)
models/fct\_orders.yml
```yaml
models:
- name: fct_orders
semantic_model:
enabled: true
name: orders
agg_time_dimension: order_date
columns:
# Entities
- name: order_id
entity:
type: primary
name: order_id
- name: customer_id
entity:
name: customer
type: foreign
# Newly added - Dimensions
- name: order_date
granularity: day
dimension:
type: time
```
(Applies to dbt v1.12 and later)
### Simple metrics
[Simple metrics](../docs/build/simple.md) perform an aggregation (like `sum`, `count`, or `average`, and so on) on a single field in your model. They replace the concept of "measures" in previous versions. To define more advanced metrics, refer to [Define metrics and add a second semantic model](./sl-snowflake-qs.md?step=10).
Add simple metrics to your `fct_orders.yml` model file:
models/fct\_orders.yml
```yaml
models:
- name: fct_orders
semantic_model:
enabled: true
name: orders
agg_time_dimension: order_date
columns:
# Entities
- name: order_id
entity:
type: primary
name: order_id
- name: customer_id
entity:
name: customer
type: foreign
# Dimensions
- name: order_date
granularity: day
dimension:
type: time
- name: amount
dimension:
type: categorical
# Newly added - Simple metrics
metrics:
- name: order_total
description: The total amount for each order including taxes
type: simple
label: Order total
agg: sum
expr: amount
- name: order_count
type: simple
label: Order count
agg: sum
expr: 1
- name: customers_with_orders
description: Distinct count of customers placing orders
type: simple
label: Customers with orders
agg: count_distinct
expr: customer_id
- name: order_value_p99
type: simple
label: Order value P99
agg: percentile
expr: amount
percentile: 99.0
percentile_type: discrete
```
### Configure a time spine
To ensure accurate time-based aggregations, you must configure a [time spine](../docs/build/metricflow-time-spine.md). The time spine allows you to have accurate metric calculations over different time granularities.
Follow the [MetricFlow time spine guide](./mf-time-spine.md?step=1) for complete step-by-step instructions on creating and configuring your time spine model. This guide provides the current best practices and avoids deprecated configurations.
## Define metrics and add a second semantic model
In this section, you will [define metrics](#define-metrics) and [add a second semantic model](#add-second-semantic-model-to-your-project) to your project.
### Define metrics
[Metrics](../docs/build/metrics-overview.md) are the language your business users speak and measure business performance. They are an aggregation over a column in your warehouse that you enrich with dimensional cuts.
There are different types of metrics you can configure:
* [Conversion metrics](../docs/build/conversion.md) — Track when a base event and a subsequent conversion event occur for an entity within a set time period.
* [Cumulative metrics](../docs/build/cumulative.md) — Aggregate a measure over a given window. If no window is specified, the window will accumulate the measure over all of the recorded time period. Note that you must create the time spine model before you add cumulative metrics.
* [Derived metrics](../docs/build/metrics-overview.md#derived-metrics) — Allows you to do calculations on top of metrics.
* [Simple metrics](../docs/build/metrics-overview.md#simple-metrics) — Directly reference a single column expression within a semantic model, without any additional columns involved. They are aggregations over a column in your data platform and can be filtered by one or multiple dimensions.
* [Ratio metrics](../docs/build/metrics-overview.md#ratio-metrics) — Involve a numerator metric and a denominator metric. A constraint string can be applied to both the numerator and denominator or separately to the numerator or denominator.
Once you've created your semantic models, it's time to start referencing those (Applies to dbt v1.12 and later) simple metrics you made to create some metrics:
1. Add metrics to your `fct_orders.yml` file:
tip
Make sure to save all semantic models and metrics under the directory defined in the [`model-paths`](../reference/project-configs/model-paths.md) (or a subdirectory of it, like `models/semantic_models/`). If you save them outside of this path, it will result in an empty `semantic_manifest.json` file, and your semantic models or metrics won't be recognized.
(Applies to dbt v1.12 and later)
models/fct\_orders.yml
```yaml
models:
- name: fct_orders
semantic_model:
enabled: true
name: orders
agg_time_dimension: order_date
columns:
- name: order_id
entity:
type: primary
name: order_id
- name: customer_id
entity:
name: customer
type: foreign
- name: order_date
granularity: day
dimension:
type: time
- name: amount
dimension:
type: categorical
metrics:
# Simple type metrics
- name: order_total
description: Sum of orders value
type: simple
label: Order total
agg: sum
expr: amount
- name: order_count
description: Number of orders
type: simple
label: Order count
agg: sum
expr: 1
- name: customers_with_orders
description: Distinct count of customers placing orders
type: simple
label: Customers with orders
agg: count_distinct
expr: customer_id
- name: large_orders
description: Count of orders with order total over 20
type: simple
label: Large orders
agg: sum
expr: 1
filter: |
{{ Dimension('order_id__amount') }} >= 20
# Ratio type metric
- name: avg_order_value
label: Average order value
description: Average value of each order
type: ratio
numerator: order_total
denominator: order_count
# Cumulative type metrics
- name: cumulative_order_amount_mtd
label: Cumulative order amount MTD
description: The month to date value of all orders
type: cumulative
grain_to_date: month
input_metric: order_total
# Derived metric
- name: pct_of_orders_that_are_large
label: Percent of orders that are large
description: Percent of orders that are large
type: derived
expr: large_orders / order_count
input_metrics:
- name: large_orders
- name: order_count
```
### Add second semantic model to your project
(Applies to dbt v1.12 and later)
Great job, you've successfully built your first semantic model! It has all the required elements: entities, dimensions, and metrics.
Let’s expand your project's analytical capabilities by adding another semantic model in your other marts model, such as: `dim_customers.yml`.
After setting up your orders model:
1. Create the file `dim_customers.yml`.
2. Copy the following code into the file and click **Save**.
(Applies to dbt v1.12 and later)
models/dim\_customers.yml
```yaml
models:
- name: dim_customers
semantic_model:
enabled: true
name: customers
agg_time_dimension: most_recent_order_date
columns:
# Entities
- name: customer_id
entity:
name: customer
type: primary
# Dimensions
- name: first_name
dimension:
name: customer_name
type: categorical
- name: first_order_date
granularity: day
dimension:
type: time
- name: most_recent_order_date
granularity: day
dimension:
type: time
- name: number_of_orders
dimension:
type: categorical
- name: lifetime_value
dimension:
type: categorical
# Metrics
metrics:
- name: customers_with_orders
label: Customers with orders
description: Unique count of customers placing orders
type: simple
agg: count_distinct
expr: customer_id
- name: count_lifetime_orders
description: Total count of orders per customer
type: simple
label: Lifetime orders
agg: sum
expr: number_of_orders
- name: lifetime_spend
description: Gross customer lifetime spend inclusive of taxes
type: simple
label: Lifetime spend
agg: sum
expr: lifetime_value
```
This semantic model uses simple metrics to focus on customer metrics and emphasizes customer dimensions like name, type, and order dates. It uniquely analyzes customer behavior, lifetime value, and order patterns.
## Test and query metrics
To work with metrics in dbt, you have several tools to validate or run commands. Here's how you can test and query metrics depending on your setup:
* [**Studio IDE users**](#studio-ide-users) — Run [MetricFlow commands](../docs/build/metricflow-commands.md#metricflow-commands) directly in the [Studio IDE](../docs/platform/studio-ide/develop-in-studio.md) to query/preview metrics. View metrics visually in the **Lineage** tab.
* [**dbt CLI users**](#dbt-cli-users) — The [dbt CLI](../docs/platform/dbt-cli-installation.md) enables you to run [MetricFlow commands](../docs/build/metricflow-commands.md#metricflow-commands) to query and preview metrics directly in your command line interface.
* **dbt Core users** — Use the MetricFlow CLI for command execution. While this guide focuses on dbt users, dbt Core users can find detailed MetricFlow CLI setup instructions in the [MetricFlow commands](../docs/build/metricflow-commands.md#metricflow-commands) page. Note that to use the Semantic Layer, you need to have a [Starter or Enterprise-tier account](https://www.getdbt.com/).
Alternatively, you can run commands with SQL client tools like DataGrip, DBeaver, or RazorSQL.
### Studio IDE users
You can use the `dbt sl` prefix before the command name to execute them in dbt. For example, to list all metrics, run `dbt sl list metrics`. For a complete list of the MetricFlow commands available in the Studio IDE, refer to the [MetricFlow commands](../docs/build/metricflow-commands.md#metricflow-commandss) page.
The Studio IDE **Status button** (located in the bottom right of the editor) displays an **Error** status if there's an error in your metric or semantic model definition. You can click the button to see the specific issue and resolve it.
Once viewed, make sure you commit and merge your changes in your project.
### dbt CLI users
This section is for dbt CLI users. MetricFlow commands are integrated with dbt, which means you can run MetricFlow commands as soon as you install the dbt CLI. Your account will automatically manage version control for you.
Refer to the following steps to get started:
1. Install the [dbt CLI](../docs/platform/dbt-cli-installation.md) (if you haven't already). Then, navigate to your dbt project directory.
2. Run a dbt command, such as `dbt parse`, `dbt run`, `dbt compile`, or `dbt build`. If you don't, you'll receive an error message that begins with: "ensure that you've ran an artifacts....".
3. MetricFlow builds a semantic graph and generates a `semantic_manifest.json` file in dbt, which is stored in the `/target` directory. (Applies to dbt v1.12 and later) Starting in dbt Core v1.12, dbt also writes `osi_document.json` to your `target/` directory at parse time. For more information, refer to [Semantic manifest](../reference/artifacts/sl-manifest.md#apache-ossie-document). If using the Jaffle Shop example, run `dbt seed && dbt run` to ensure the required data is in your data platform before proceeding.
Run dbt parse to reflect metric changes
When you make changes to metrics, make sure to run `dbt parse` at a minimum to update the Semantic Layer. This updates the `semantic_manifest.json` file(Applies to dbt v1.12 and later) and `osi_document.json`, reflecting your changes when querying metrics. By running `dbt parse`, you won't need to rebuild all the models.
4. Run `dbt sl --help` to confirm you have MetricFlow installed and that you can view the available commands.
5. Run `dbt sl query --metrics --group-by ` to query the metrics and dimensions. For example, to query the `order_total` and `order_count` (both metrics), and then group them by the `order_date` (dimension), you would run:
```sql
dbt sl query --metrics order_total,order_count --group-by order_id__order_date
```
6. Verify that the metric values are what you expect. To further understand how the metric is being generated, you can view the generated SQL if you type `--compile` in the command line.
7. Commit and merge the code changes that contain the metric definitions.
## Run a production job
This section explains how you can perform a job run in your deployment environment in dbt to materialize and deploy your metrics. Currently, the deployment environment is only supported.
1. Once you’ve [defined your semantic models and metrics](./sl-snowflake-qs.md?step=10), commit and merge your metric changes in your dbt project.
2. In dbt, create a new [deployment environment](../docs/deploy/deploy-environments.md#create-a-deployment-environment) or use an existing environment on dbt 1.6 or higher.
* Note — Deployment environment is currently supported (*development experience coming soon*)
3. To create a new environment, navigate to **Orchestration** in the navigation menu, select **Environments**, and then select **Create new environment**.
4. Fill in your deployment credentials with your Snowflake username and password. You can name the schema anything you want. Click **Save** to create your new production environment.
5. [Create a new deploy job](../docs/deploy/deploy-jobs.md#create-and-schedule-jobs) that runs in the environment you just created. Go back to the **Orchestration** menu, select **Jobs**, select **Create job**, and click **Deploy job**.
6. Set the job to run a `dbt parse` job to parse your projects and generate a [`semantic_manifest.json` artifact](../reference/artifacts/sl-manifest.md) file(Applies to dbt v1.12 and later) and an [`osi_document.json` artifact](../reference/artifacts/sl-manifest.md#apache-ossie-document). Although running `dbt build` isn't required, you can choose to do so if needed.
note
If you are on the dbt Fusion engine, add the `dbt docs generate` command to your job to successfully deploy your metrics.
7. Run the job by clicking the **Run now** button. Monitor the job's progress in real-time through the **Run summary** tab.
Once the job completes successfully, your dbt project, including the generated documentation, will be fully deployed and available for use in your production environment. If any issues arise, review the logs to diagnose and address any errors.
What’s happening internally?
* Merging the code into your main branch allows dbt to pull those changes and build the definition in the manifest produced by the run.
* Re-running the job in the deployment environment helps materialize the models, which the metrics depend on, in the data platform. It also makes sure that the manifest is up to date.
* The Semantic Layer APIs pull in the most recent manifest and enables your integration to extract metadata from it.
## Administer the Semantic Layer
In this section, you will learn how to add credentials and create service tokens to start querying the dbt Semantic Layer. This section goes over the following topics:
* [Select environment](#1-select-environment)
* [Configure credentials and create tokens](#2-configure-credentials-and-create-tokens)
* [View connection detail](#3-view-connection-detail)
* [Add more credentials](#4-add-more-credentials)
* [Delete configuration](#delete-configuration)
You must be part of the Owner group and have the correct [license](../docs/platform/manage-access/seats-and-users.md) and [permissions](../docs/platform/manage-access/enterprise-permissions.md) to administer the Semantic Layer at the environment and project level.
* Enterprise+ and Enterprise plan:
* Developer license with Account Admin permissions, or
* Owner with a Developer license, assigned Project Creator, Database Admin, or Admin permissions.
* Starter plan: Owner with a Developer license.
* Free trial: You are on a free trial of the Starter plan as an Owner, which means you have access to the dbt Semantic Layer.
### 1. Select environment
Select the environment where you want to enable the Semantic Layer:
1. Navigate to **Account settings** in the navigation menu.
2. Under **Settings**, click **Projects** and select the specific project you want to enable the Semantic Layer for.
3. In the **Project details** page, navigate to the **Semantic Layer** section. Select **Configure Semantic Layer**.
[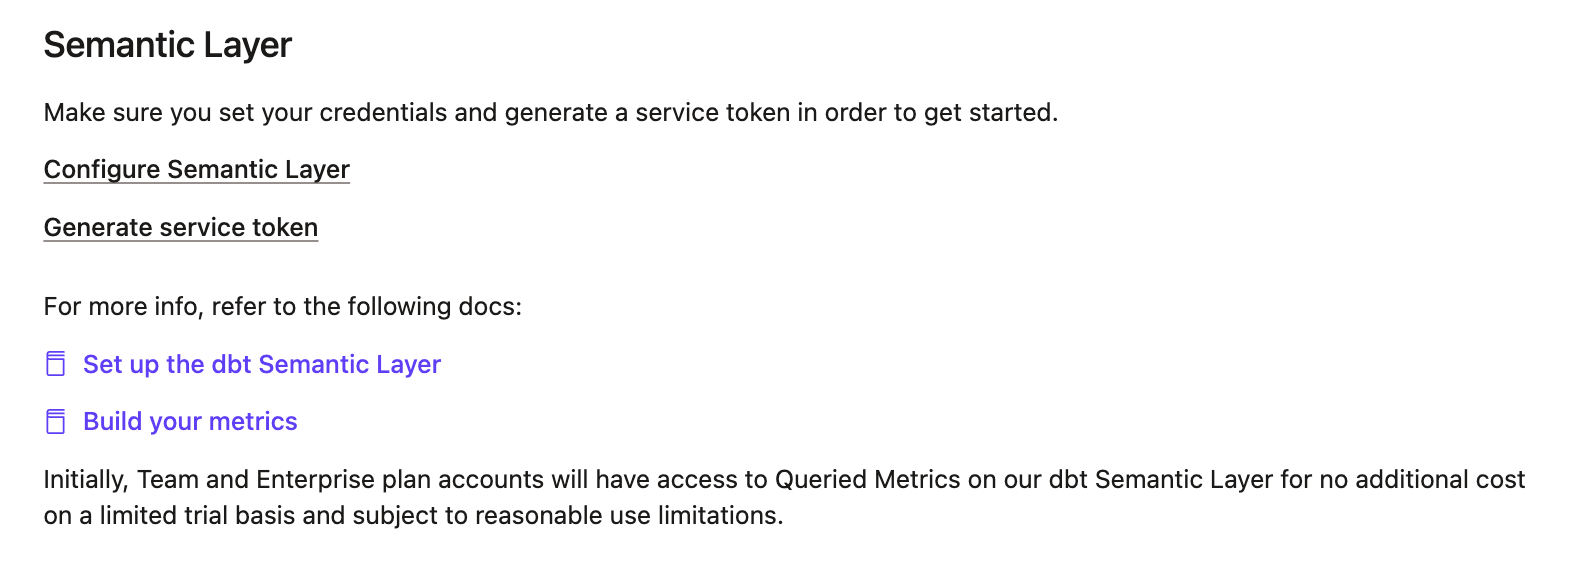](#)Semantic Layer section in the 'Project details' page
4. In the **Set Up Semantic Layer Configuration** page, select the deployment environment you want for the Semantic Layer and click **Save**. This provides administrators with the flexibility to choose the environment where the Semantic Layer will be enabled.
[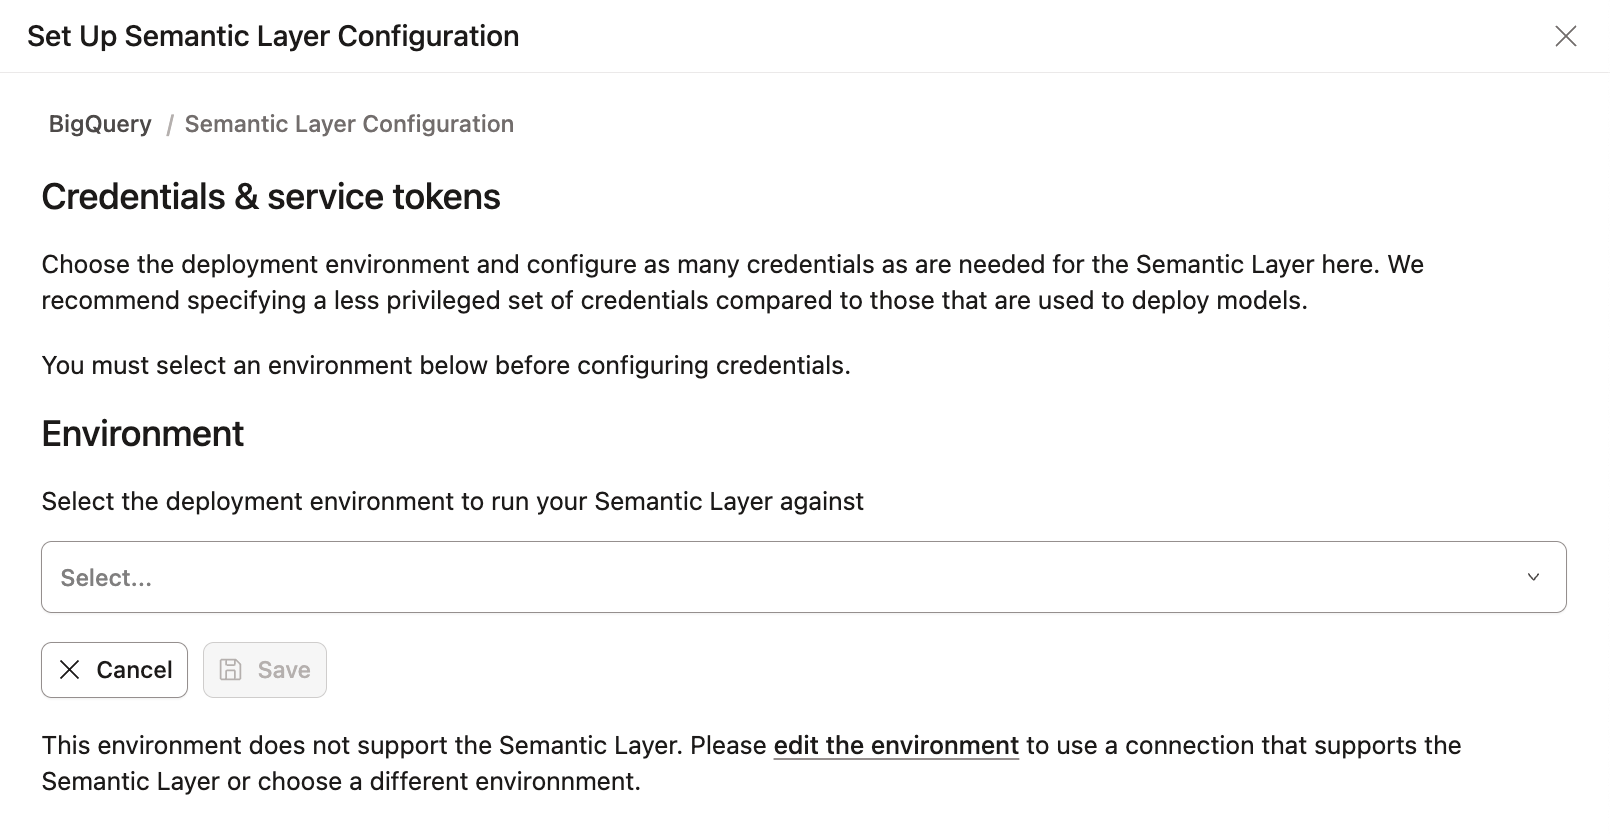](#)Select the deployment environment to run your Semantic Layer against.
### 2. Configure credentials and create tokens
There are two options for setting up Semantic Layer using API tokens:
* [Add a credential and create service tokens](#add-a-credential-and-create-service-tokens)
* [Configure user credentials and create personal tokens](#configure-development-credentials-and-create-a-personal-token)
#### Add a credential and create service tokens
The first option is to use [service tokens](../docs/dbt-apis/service-tokens.md) for authentication which are tied to an underlying data platform credential that you configure. The credential configured is used to execute queries that the Semantic Layer issues against your data platform.
This credential controls the physical access to underlying data accessed by the Semantic Layer, and all access policies set in the data platform for this credential will be respected.
| Feature | Starter plan | Enterprise+ and Enterprise plan |
| --------------------------------------------------- | ------------------------------------------------------------ | --------------------------------------------------------------------------------------------------------------------------------------------------------------- |
| Service tokens | Can create multiple service tokens linked to one credential. | Can use multiple credentials and link multiple service tokens to each credential. Note that you cannot link a single service token to more than one credential. |
| Credentials per project | One credential per project. | Can [add multiple](#4-add-more-credentials) credentials per project. |
| Link multiple service tokens to a single credential | ✅ | ✅ |
*If you're on a Starter plan and need to add more credentials, consider upgrading to our [Enterprise+ or Enterprise plan](https://www.getdbt.com/contact). All Enterprise users can refer to [Add more credentials](#4-add-more-credentials) for detailed steps on adding multiple credentials.*
##### 1. Select deployment environment
* After selecting the deployment environment, you should see the **Credentials & service tokens** page.
* Click the **Add Semantic Layer credential** button.
##### 2. Configure credential
* In the **1. Add credentials** section, enter the credentials specific to your data platform that you want the Semantic Layer to use.
* Use credentials with minimal privileges. The Semantic Layer requires read access to the schema(s) containing the dbt models used in your semantic models for downstream applications
* Use [Extended Attributes](../docs/dbt-platform-environments.md#extended-attributes) and [Environment Variables](../docs/build/environment-variables.md) when connecting to the Semantic Layer. If you set a value directly in the Semantic Layer Credentials, it will have a higher priority than Extended Attributes. When using environment variables, the default value for the environment will be used.
For example, set the warehouse by using `{{env_var('DBT_WAREHOUSE')}}` in your Semantic Layer credentials.
Similarly, if you set the account value using `{{env_var('DBT_ACCOUNT')}}` in Extended Attributes, dbt will check both the Extended Attributes and the environment variable.
[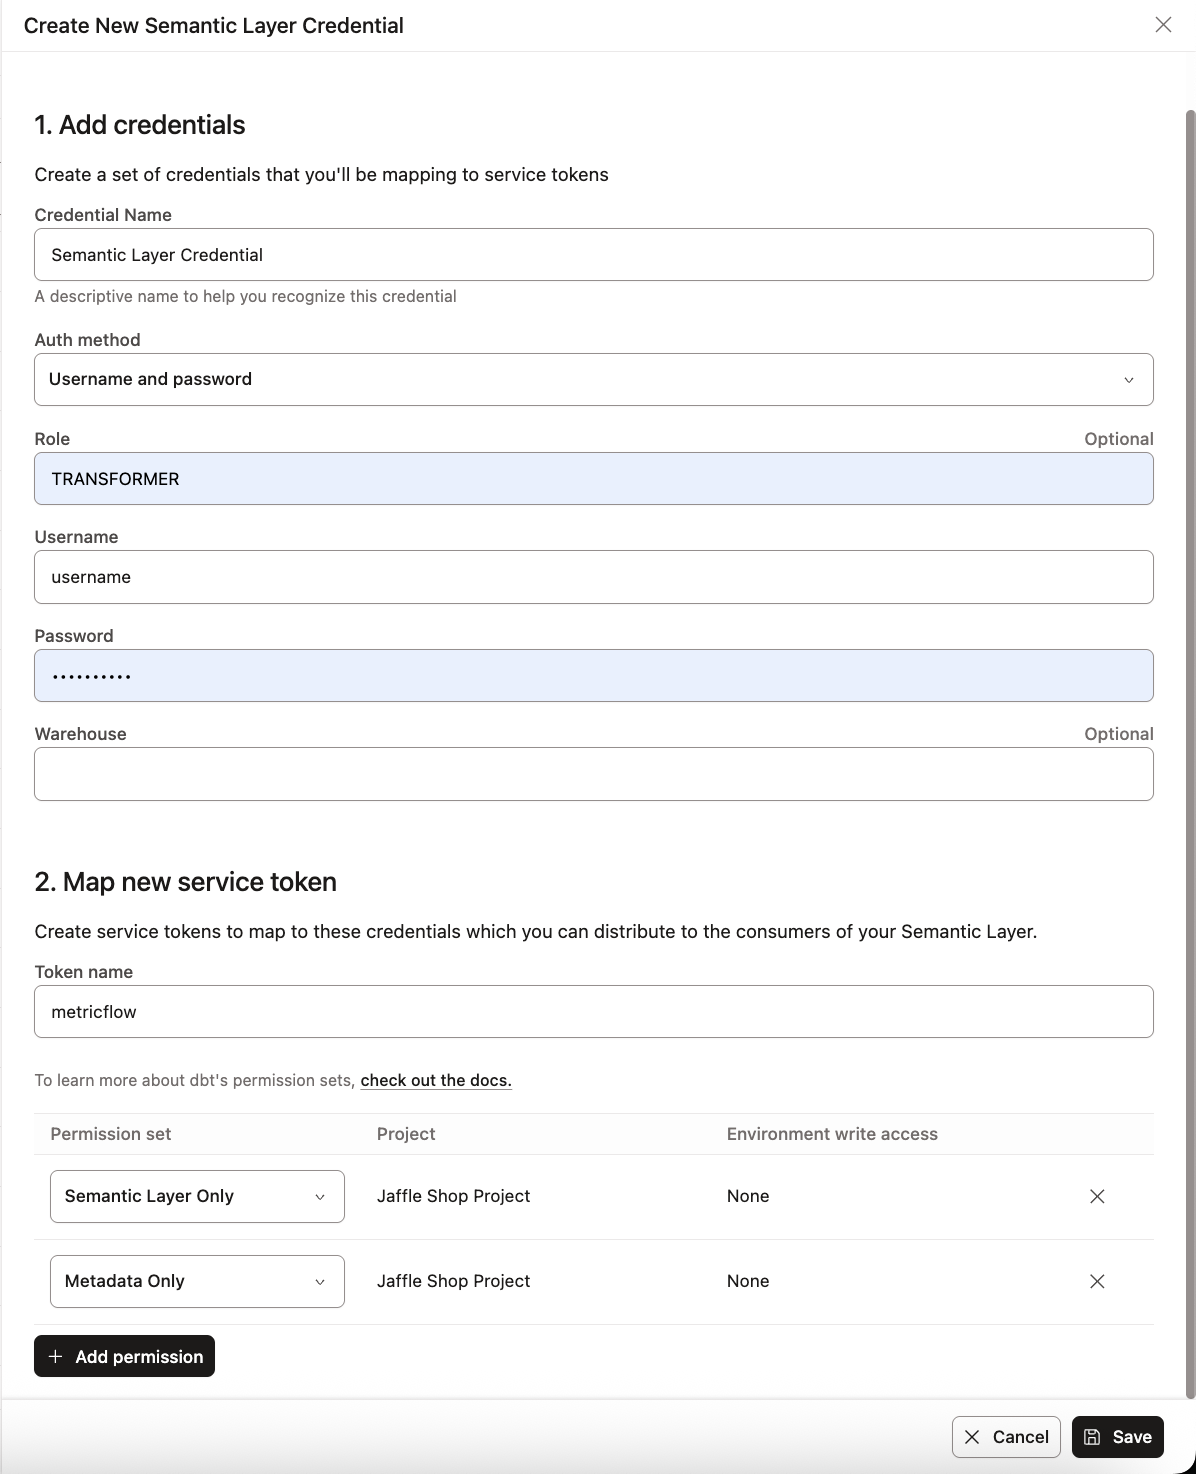](#)Add credentials and map them to a service token.
##### 3. Create or link service tokens
* If you have permission to create service tokens, you’ll see the [**Map new service token** option](../docs/use-dbt-semantic-layer/setup-sl.md#map-service-tokens-to-credentials) after adding the credential. Name the token, set permissions to 'Semantic Layer Only' and 'Metadata Only', and click **Save**.
* Once the token is generated, you won't be able to view this token again, so make sure to record it somewhere safe.
* If you don’t have access to create service tokens, you’ll see a message prompting you to contact your admin to create one for you. Admins can create and link tokens as needed.
[](#)If you don’t have access to create service tokens, you can create a credential and contact your admin to create one for you.
info
* Starter plans can create multiple service tokens that link to a single underlying credential, but each project can only have one credential.
* All Enterprise plans can [add multiple credentials](#4-add-more-credentials) and map those to service tokens for tailored access.
[Book a free live demo](https://www.getdbt.com/contact) to discover the full potential of dbt Enterprise and higher plans.
#### Configure development credentials and create a personal token
Using [personal access tokens (PATs)](../docs/dbt-apis/user-tokens.md) is also a supported authentication method for the dbt Semantic Layer. This enables user-level authentication, reducing the need for sharing tokens between users. When you authenticate using PATs, queries are run using your personal user credentials.
To use PATs in Semantic Layer:
1. Configure your user credentials.
1. Click your account name at the bottom left-hand menu and go to **Account settings** > **Credentials**.
2. Select your project.
3. Click **Edit**.
4. Go to **User credentials** and enter your details.
5. Click **Save**.
2. [Create a personal access token](../docs/dbt-apis/user-tokens.md). Make sure to copy the token.
You can use the generated PAT as the authentication method for Semantic Layer [APIs](../docs/dbt-apis/sl-api-overview.md) and [integrations](../docs/platform-integrations/avail-sl-integrations.md).
### 3. View connection detail
1. Go back to the **Project details** page for connection details to connect to downstream tools.
2. Copy and share the Environment ID, service or personal token, Host, as well as the service or personal token name to the relevant teams for BI connection setup. If your tool uses the GraphQL API, save the GraphQL API host information instead of the JDBC URL.
For info on how to connect to other integrations, refer to [Available integrations](../docs/platform-integrations/avail-sl-integrations.md).
[](#)After configuring, you'll be provided with the connection details to connect to you downstream tools.
### 4. Add more credentials [Enterprise +](https://www.getdbt.com/pricing "Go to https://www.getdbt.com/pricing")[Enterprise](https://www.getdbt.com/pricing "Go to https://www.getdbt.com/pricing")
All dbt Enterprise plans can optionally add multiple credentials and map them to service tokens, offering more granular control and tailored access for different teams, which can then be shared to relevant teams for BI connection setup. These credentials control the physical access to underlying data accessed by the Semantic Layer.
We recommend configuring credentials and service tokens to reflect your teams and their roles. For example, create tokens or credentials that align with your team's needs, such as providing access to finance-related schemas to the Finance team.
Considerations for linking credentials
* Admins can link multiple service tokens to a single credential within a project, but each service token can only be linked to one credential per project.
* When you send a request through the APIs, the service token of the linked credential will follow access policies of the underlying view and tables used to build your semantic layer requests.
* Use [Extended Attributes](../docs/dbt-platform-environments.md#extended-attributes) and [Environment Variables](../docs/build/environment-variables.md) when connecting to the Semantic Layer. If you set a value directly in the Semantic Layer Credentials, it will have a higher priority than Extended Attributes. When using environment variables, the default value for the environment will be used.
For example, set the warehouse by using `{{env_var('DBT_WAREHOUSE')}}` in your Semantic Layer credentials.
Similarly, if you set the account value using `{{env_var('DBT_ACCOUNT')}}` in Extended Attributes, dbt will check both the Extended Attributes and the environment variable.
#### 1. Add more credentials
* After configuring your environment, on the **Credentials & service tokens** page, click the **Add Semantic Layer credential** button to create multiple credentials and map them to a service token.
* In the **1. Add credentials** section, fill in the data platform's credential fields. We recommend using “read-only” credentials.
[](#)Add credentials and map them to a service token.
#### 2. Map service tokens to credentials
* In the **2. Map new service token** section, [map a service token to the credential](../docs/use-dbt-semantic-layer/setup-sl.md#map-service-tokens-to-credentials) you configured in the previous step. dbt automatically selects the service token permission set you need (Semantic Layer Only and Metadata Only).
* To add another service token during configuration, click **Add Service Token**.
* You can link more service tokens to the same credential later on in the **Semantic Layer Configuration Details** page. To add another service token to an existing Semantic Layer configuration, click **Add service token** under the **Linked service tokens** section.
* Click **Save** to link the service token to the credential. Remember to copy and save the service token securely, as it won't be viewable again after generation.
[](#)Use the configuration page to manage multiple credentials or link or unlink service tokens for more granular control.
#### 3. Delete credentials
* To delete a credential, go back to the **Credentials & service tokens** page.
* Under **Linked Service Tokens**, click **Edit** and, select **Delete Credential** to remove a credential.
When you delete a credential, any service tokens mapped to that credential in the project will no longer work and will break for any end users.
### Delete configuration
You can delete the entire Semantic Layer configuration for a project. Note that deleting the Semantic Layer configuration will remove all credentials and unlink all service tokens to the project. It will also cause all queries to the Semantic Layer to fail.
Follow these steps to delete the Semantic Layer configuration for a project:
1. Navigate to the **Project details** page.
2. In the **Semantic Layer** section, select **Delete Semantic Layer**.
3. Confirm the deletion by clicking **Yes, delete semantic layer** in the confirmation pop up.
To re-enable the dbt Semantic Layer setup in the future, you will need to recreate your setup configurations by following the [previous steps](#set-up-dbt-semantic-layer). If your semantic models and metrics are still in your project, no changes are needed. If you've removed them, you'll need to set up the YAML configs again.
[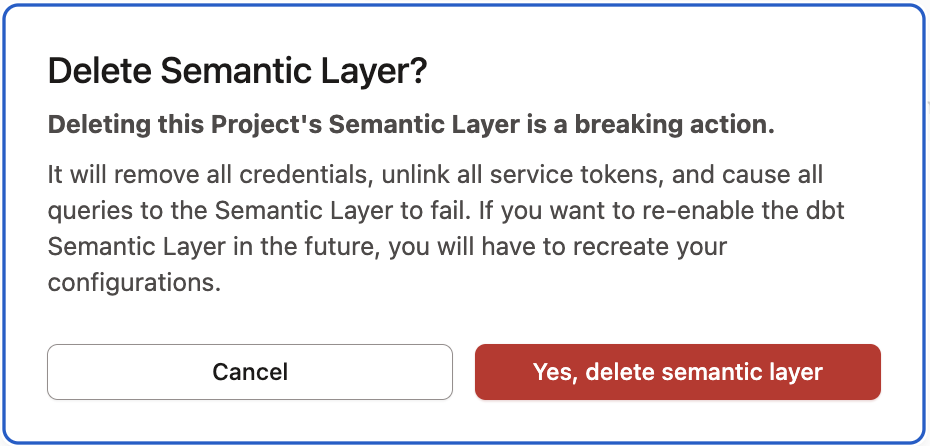](#)Delete the Semantic Layer configuration for a project.
## Additional configuration
The following are the additional flexible configurations for Semantic Layer credentials.
### Map service tokens to credentials
* After configuring your environment, you can map additional service tokens to the same credential if you have the required [permissions](../docs/platform/manage-access/about-user-access.md#permission-sets).
* Go to the **Credentials & service tokens** page and click the **+Add Service Token** button in the **Linked Service Tokens** section.
* Type the service token name and select the permission set you need (Semantic Layer Only and Metadata Only).
* Click **Save** to link the service token to the credential.
* Remember to copy and save the service token securely, as it won't be viewable again after generation.
[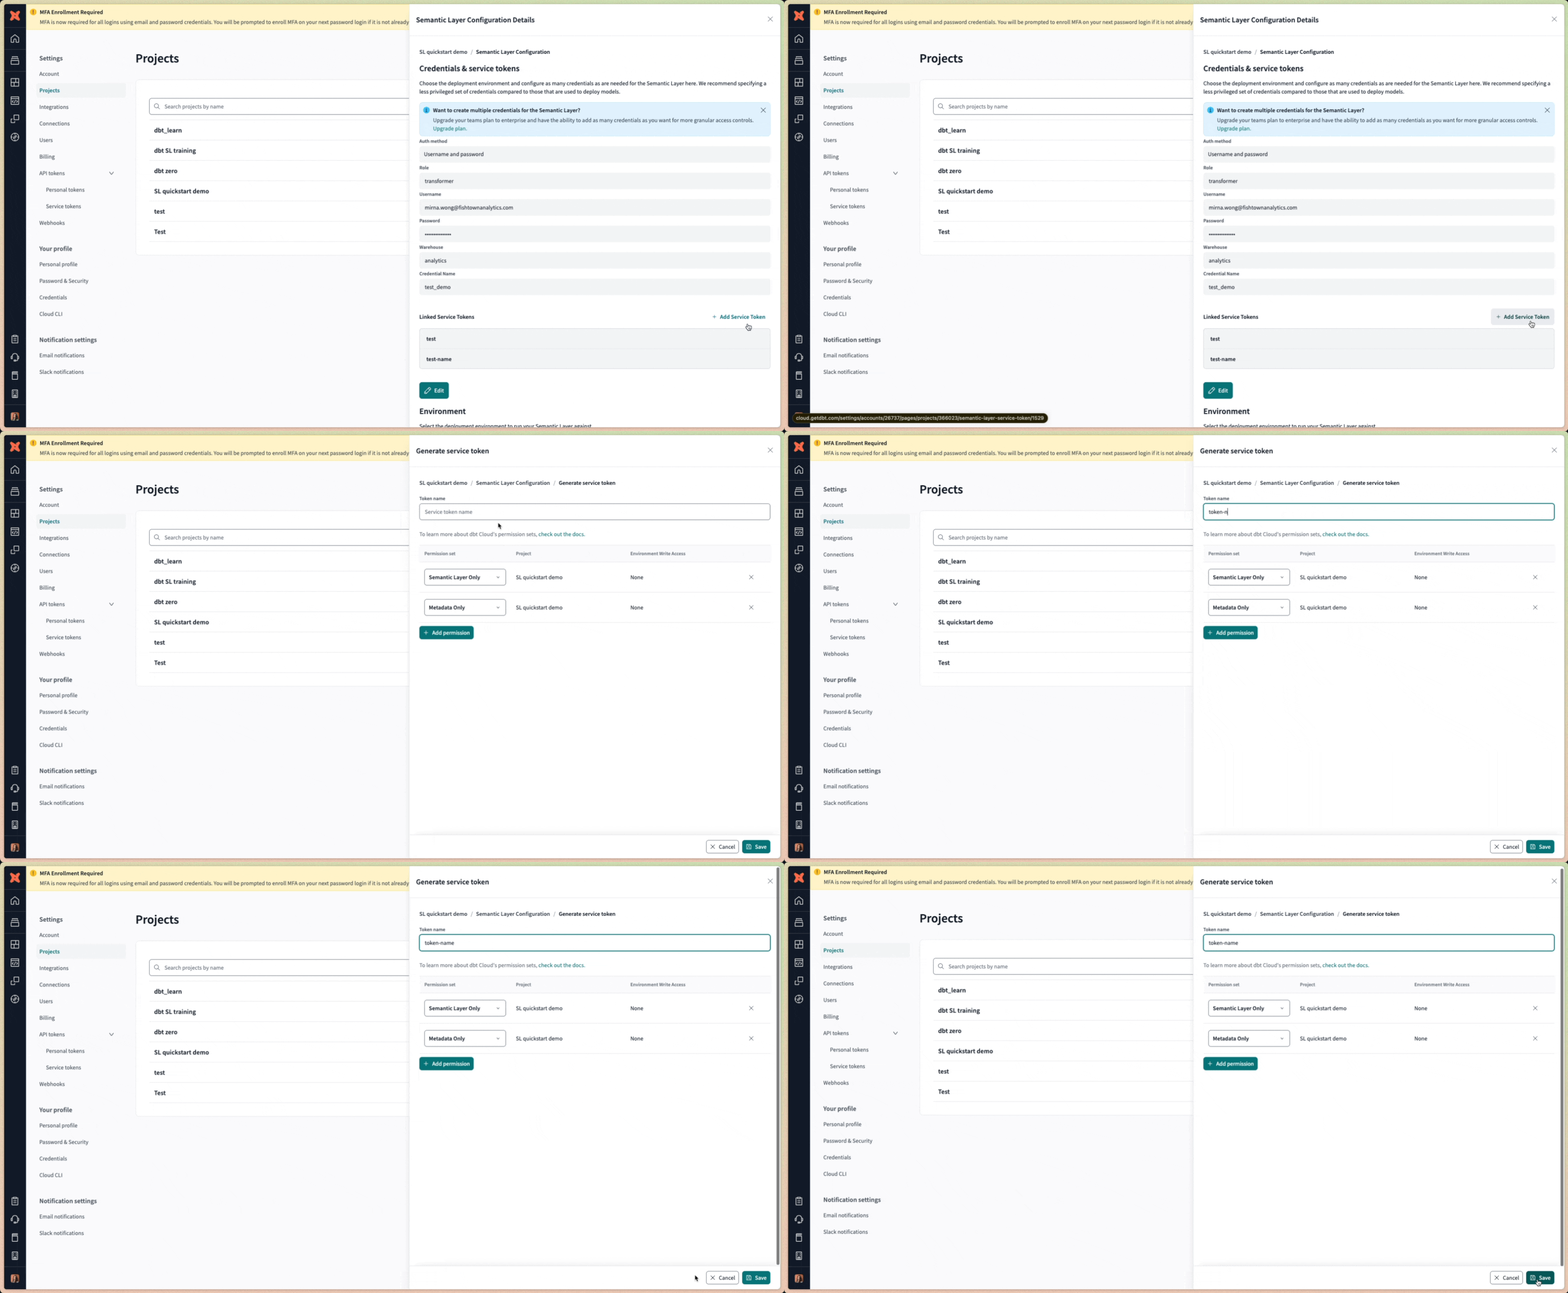](#)Map additional service tokens to a credential.
### Unlink service tokens
* Unlink a service token from the credential by clicking **Unlink** under the **Linked service tokens** section. If you try to query the Semantic Layer with an unlinked credential, you'll experience an error in your BI tool because no valid token is mapped.
### Manage from service token page
**View credential from service token**
* View your Semantic Layer credential directly by navigating to the **API tokens** and then **Service tokens** page.
* Select the service token to view the credential it's linked to. This is useful if you want to know which service tokens are mapped to credentials in your project.
#### Create a new service token
* From the **Service tokens** page, create a new service token and map it to the credential(s) (assuming the semantic layer permission exists). This is useful if you want to create a new service token and directly map it to a credential in your project.
* Make sure to select the correct permission set for the service token (Semantic Layer Only and Metadata Only).
[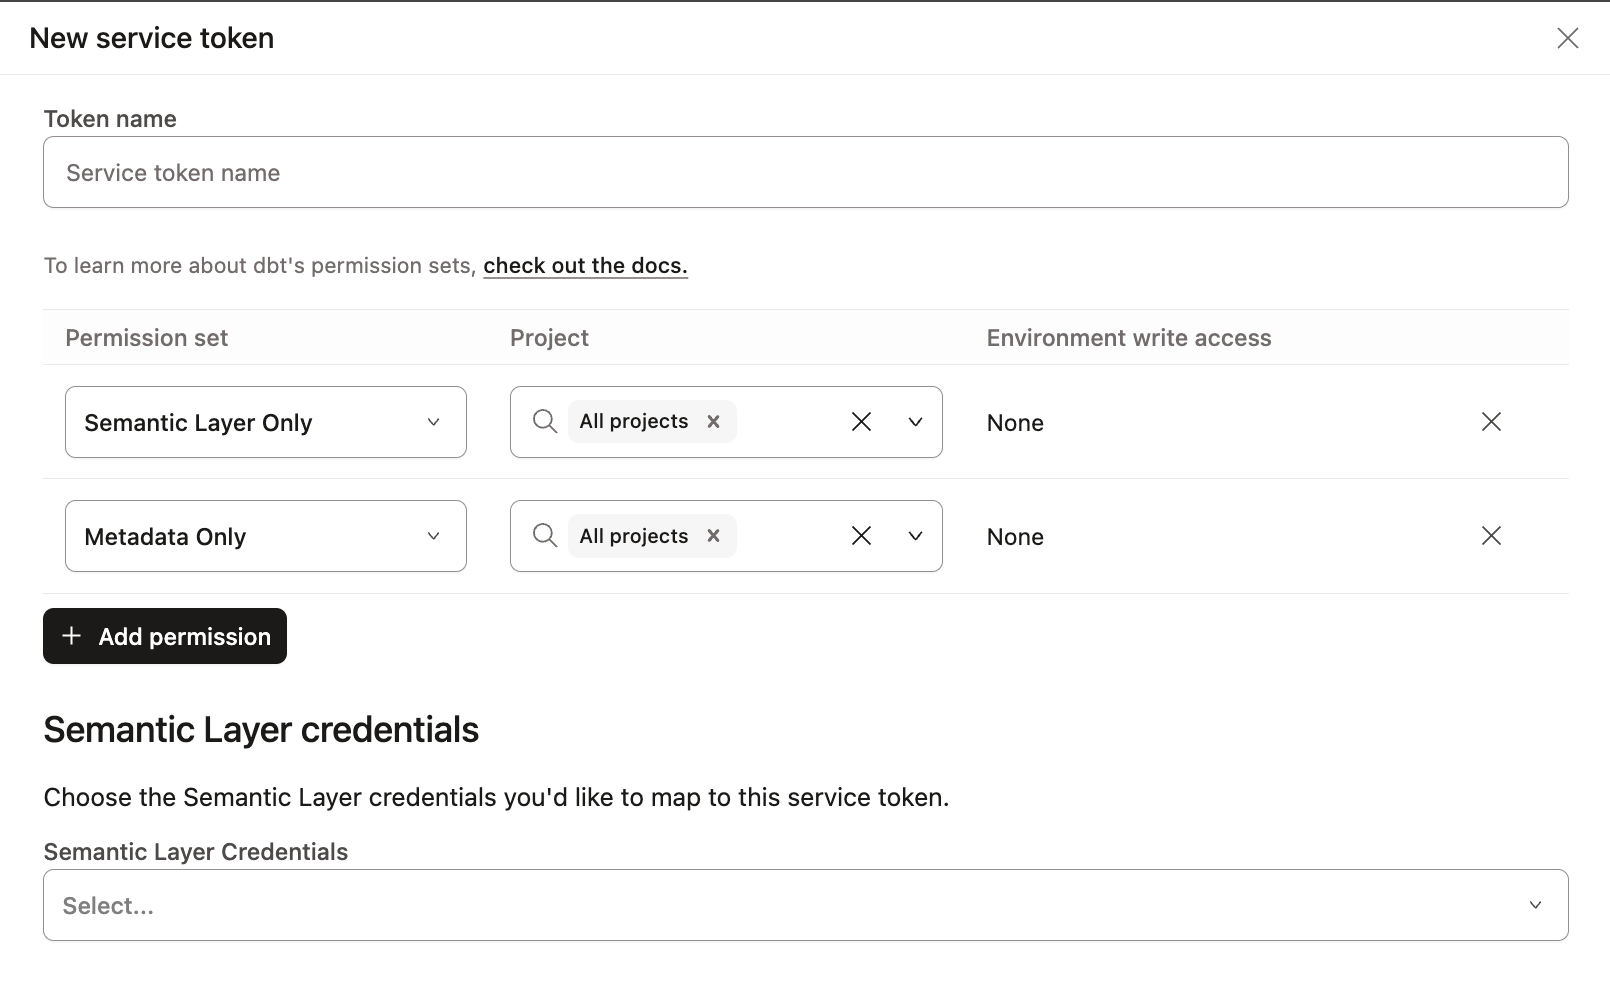](#)Create a new service token and map credentials directly on the separate 'Service tokens page'.
## Query the Semantic Layer
This page will guide you on how to connect and use the following integrations to query your metrics:
* [Connect and query with Google Sheets](#connect-and-query-with-google-sheets)
* [Connect and query with Hex](#connect-and-query-with-hex)
* [Connect and query with Sigma](#connect-and-query-with-sigma)
The Semantic Layer enables you to connect and query your metric with various available tools like [PowerBI](../docs/platform-integrations/semantic-layer/power-bi.md), [Google Sheets](../docs/platform-integrations/semantic-layer/gsheets.md), [Hex](https://learn.hex.tech/docs/connect-to-data/data-connections/dbt-integration#dbt-semantic-layer-integration), [Microsoft Excel](../docs/platform-integrations/semantic-layer/excel.md), [Tableau](../docs/platform-integrations/semantic-layer/tableau.md), and more.
Query metrics using other tools such as [first-class integrations](../docs/platform-integrations/avail-sl-integrations.md), [Semantic Layer APIs](../docs/dbt-apis/sl-api-overview.md), and [exports](../docs/use-dbt-semantic-layer/exports.md) to expose tables of metrics and dimensions in your data platform and create a custom integrations.
### Connect and query with Google Sheets
The Google Sheets integration allows you to query your metrics using Google Sheets. This section will guide you on how to connect and use the Google Sheets integration.
To query your metrics using Google Sheets:
1. Make sure you have a [Gmail](http://gmail.com/) account.
2. To set up Google Sheets and query your metrics, follow the detailed instructions on [Google Sheets integration](../docs/platform-integrations/semantic-layer/gsheets.md).
3. Start exploring and querying metrics!
* Query a metric, like `order_total`, and filter it with a dimension, like `order_date`.
* You can also use the `group_by` parameter to group your metrics by a specific dimension.
[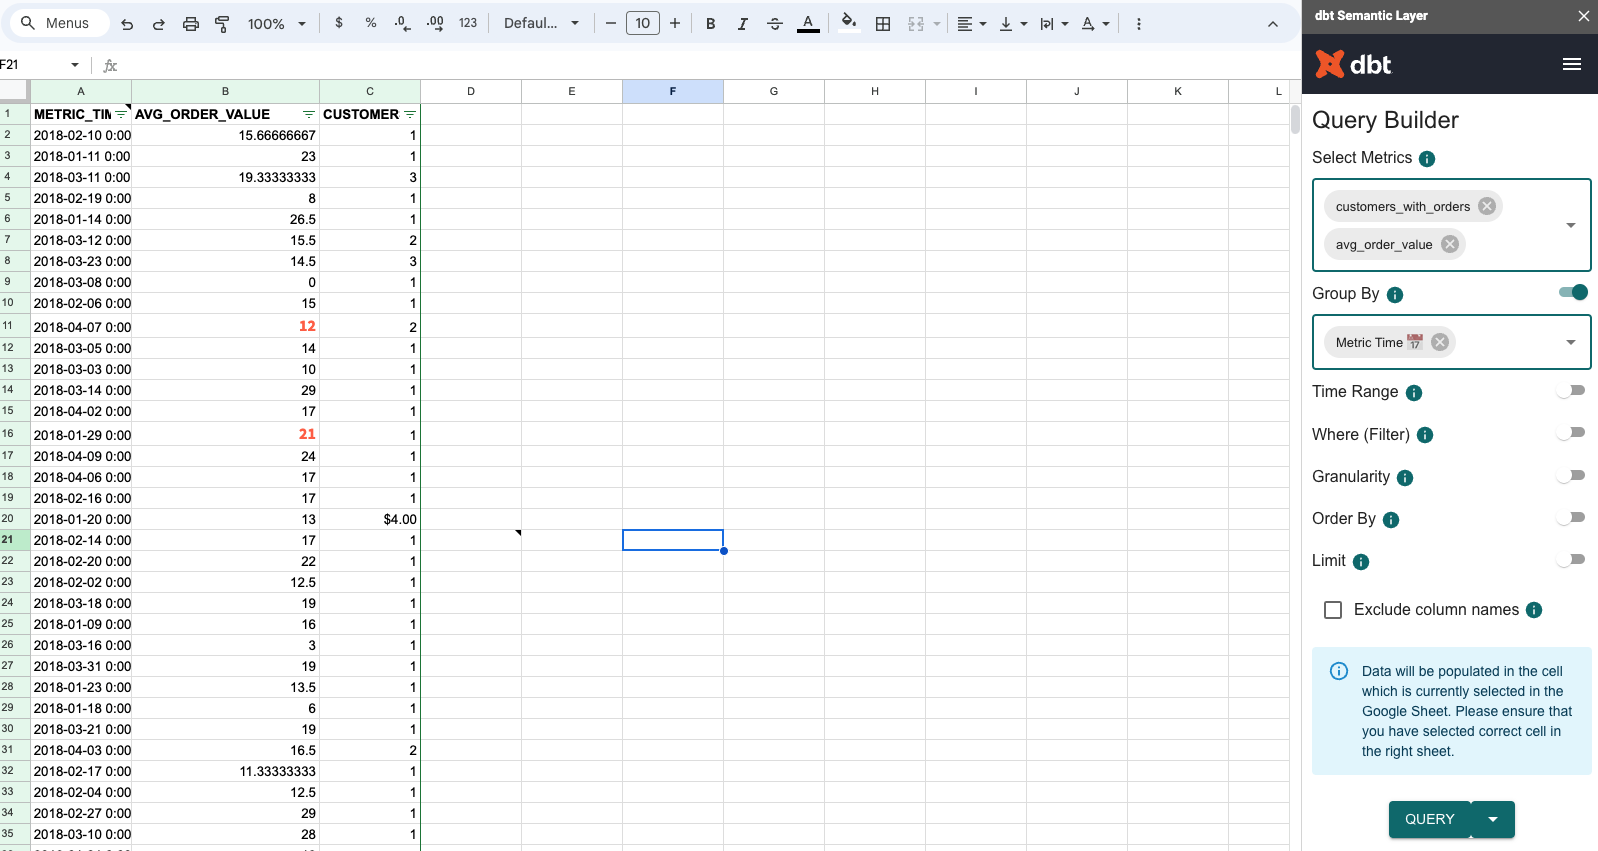](#)Use the dbt Semantic Layer's Google Sheet integration to query metrics with a Query Builder menu.
### Connect and query with Hex
This section will guide you on how to use the Hex integration to query your metrics using Hex. Select the appropriate tab based on your connection method:
### Query Semantic Layer with Hex
1. Navigate to the [Hex login page](https://app.hex.tech/login).
2. Sign in or make an account (if you don’t already have one).
* You can make Hex free trial accounts with your work email or a .edu email.
3. In the top left corner of your page, click on the **HEX** icon to go to the home page.
4. Then, click the **+ New project** button on the top right.
[](#)Click the '+ New project' button on the top right
5. Go to the menu on the left side and select **Data browser**. Then select **Add a data connection**.
6. Click **Snowflake**. Provide your data connection a name and description. You don't need to your data warehouse credentials to use the Semantic Layer.
[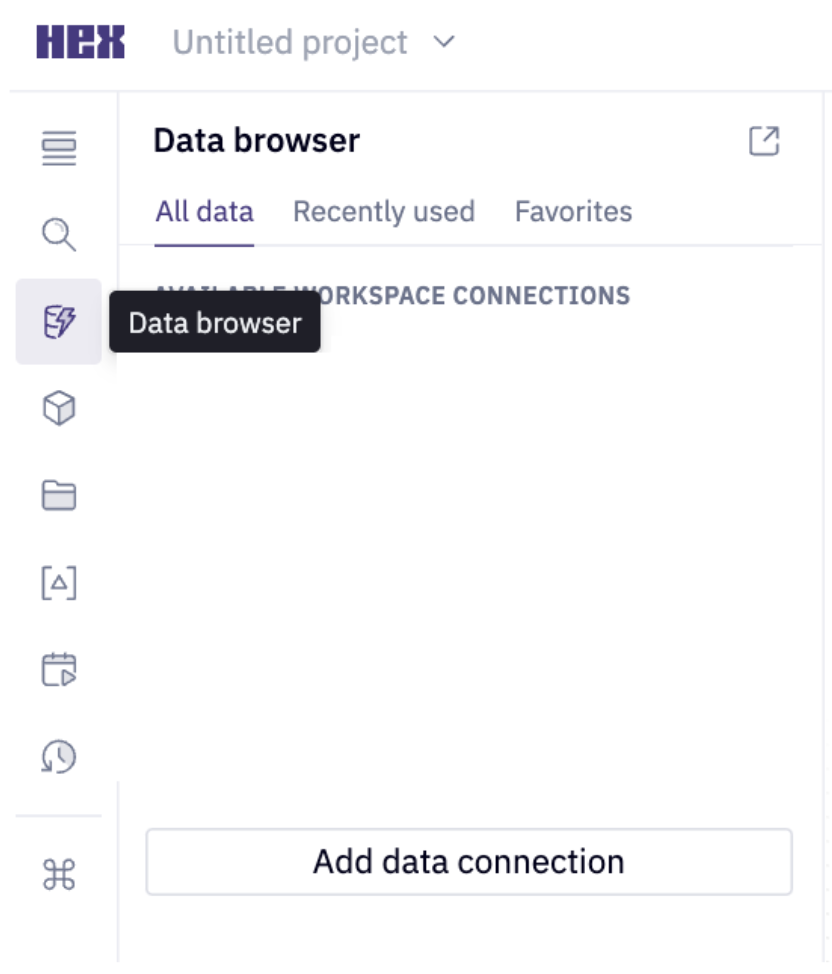](#)Select 'Data browser' and then 'Add a data connection' to connect to Snowflake.
7. Under **Integrations**, toggle the dbt switch to the right to enable the dbt integration.
[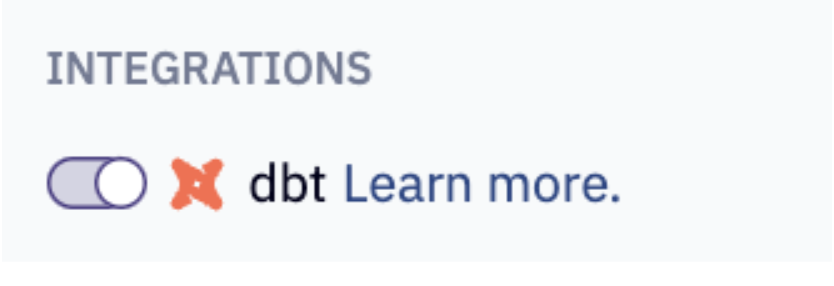](#)Click on the dbt toggle to enable the integration.
8. Enter the following information:
* Select your version of dbt as 1.6 or higher
* Enter your Environment ID
* Enter your service or personal token
* Make sure to click on the **Use Semantic Layer** toggle. This way, all queries are routed through dbt.
* Click **Create connection** in the bottom right corner.
9. Hover over **More** on the menu shown in the following image and select **Semantic Layer**.
[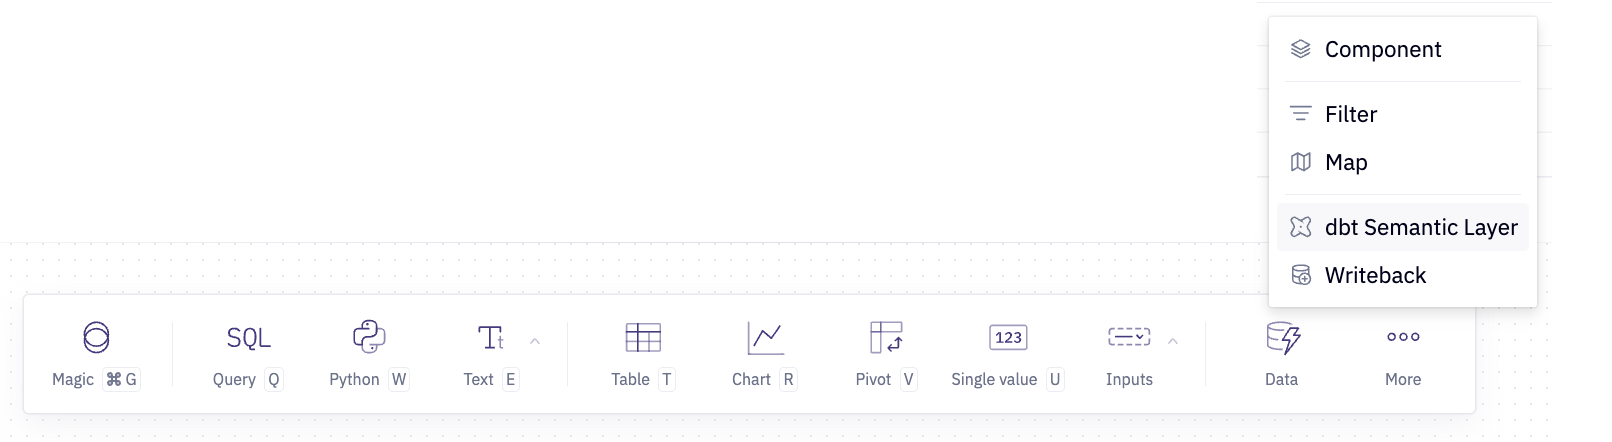](#)Hover over 'More' on the menu and select 'dbt Semantic Layer'.
10. Now, you should be able to query metrics using Hex! Try it yourself:
* Create a new cell and pick a metric.
* Filter it by one or more dimensions.
* Create a visualization.
### Getting started with the Semantic Layer workshop
1. Click on the link provided to you in the workshop’s chat.
* Look at the **Pinned message** section of the chat if you don’t see it right away.
2. Enter your email address in the textbox provided. Then, select **SQL and Python** to be taken to Hex’s home screen.
[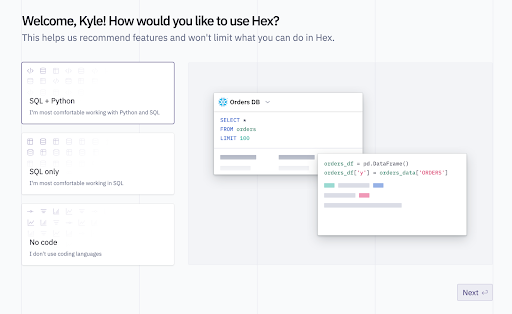](#)The 'Welcome to Hex' homepage.
3. Then click the purple Hex button in the top left corner.
4. Click the **Collections** button on the menu on the left.
5. Select the **Semantic Layer Workshop** collection.
6. Click the **Getting started with the Semantic Layer** project collection.
[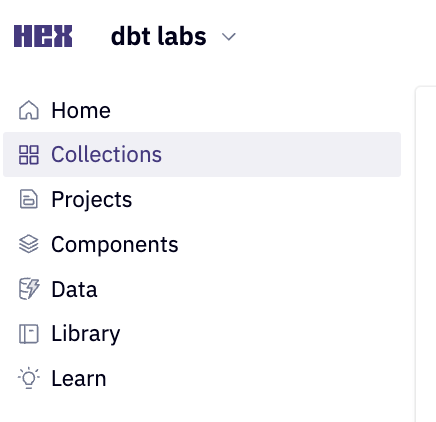](#)Click 'Collections' to select the 'Semantic Layer Workshop' collection.
7. To edit this Hex notebook, click the **Duplicate** button from the project dropdown menu (as displayed in the following image). This creates a new copy of the Hex notebook that you own.
[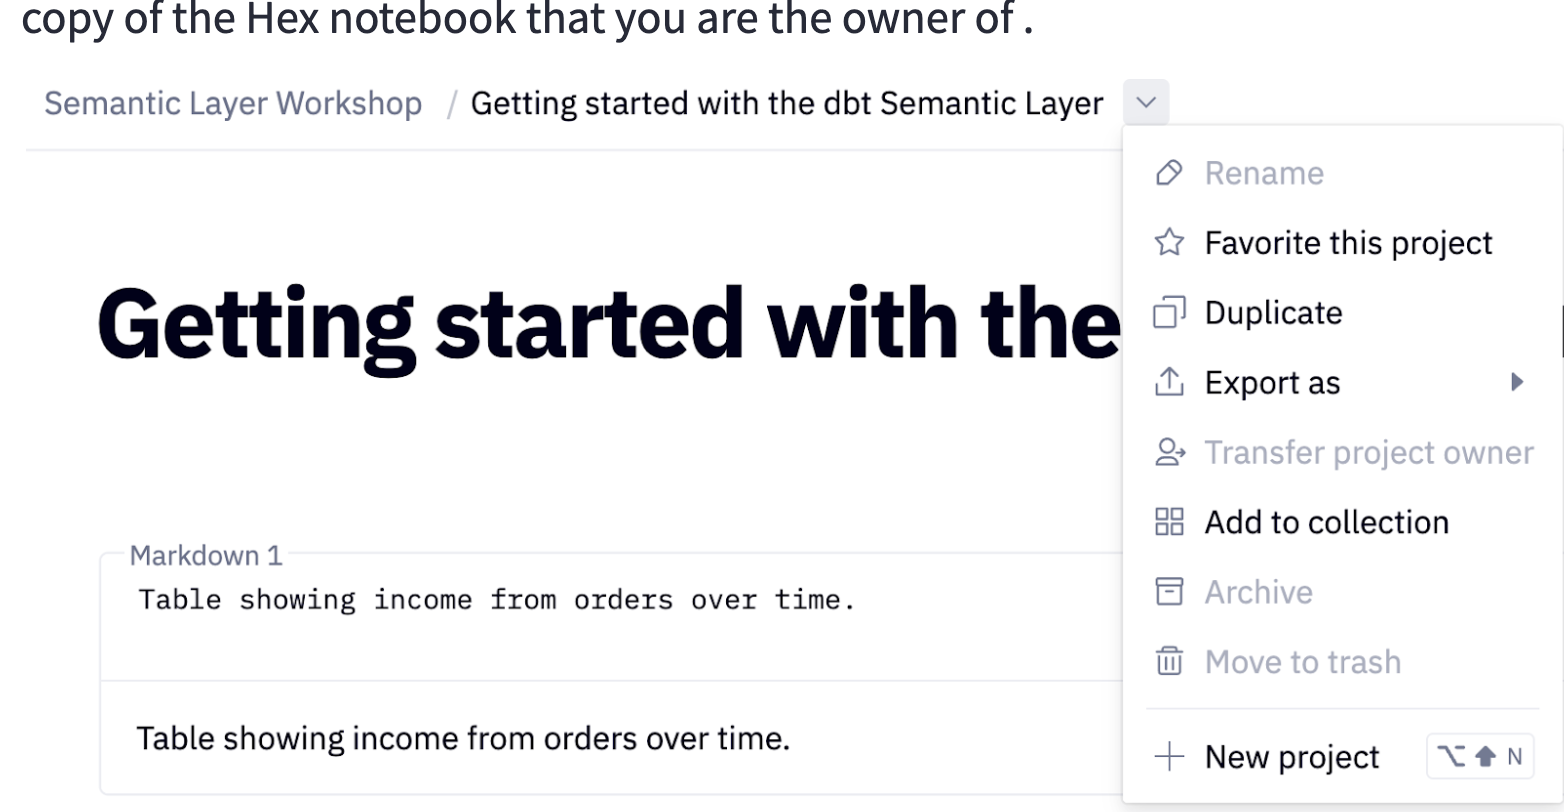](#)Click the 'Duplicate' button from the project dropdown menu to create a Hex notebook copy.
8. To make it easier to find, rename your copy of the Hex project to include your name.
[](#)Rename your Hex project to include your name.
9. Now, you should be able to query metrics using Hex! Try it yourself with the following example queries:
* In the first cell, you can see a table of the `order_total` metric over time. Add the `order_count` metric to this table.
* The second cell shows a line graph of the `order_total` metric over time. Play around with the graph! Try changing the time grain using the **Time unit** drop-down menu.
* The next table in the notebook, labeled “Example\_query\_2”, shows the number of customers who have made their first order on a given day. Create a new chart cell. Make a line graph of `first_ordered_at` vs `customers` to see how the number of new customers each day changes over time.
* Create a new semantic layer cell and pick one or more metrics. Filter your metric(s) by one or more dimensions.
[](#)Query metrics using Hex
### Connect and query with Sigma
This section will guide you on how to use the Sigma integration to query your metrics using Sigma. If you already have a Sigma account, simply log in and skip to step 6. Otherwise, you'll be using a Sigma account you'll create with Snowflake Partner Connect.
1. Go back to your Snowflake account. In the Snowflake UI, click on the home icon in the upper left corner. In the left sidebar, select **Data Products**. Then, select **Partner Connect**. Find the Sigma tile by scrolling or by searching for Sigma in the search bar. Click the tile to connect to Sigma.
[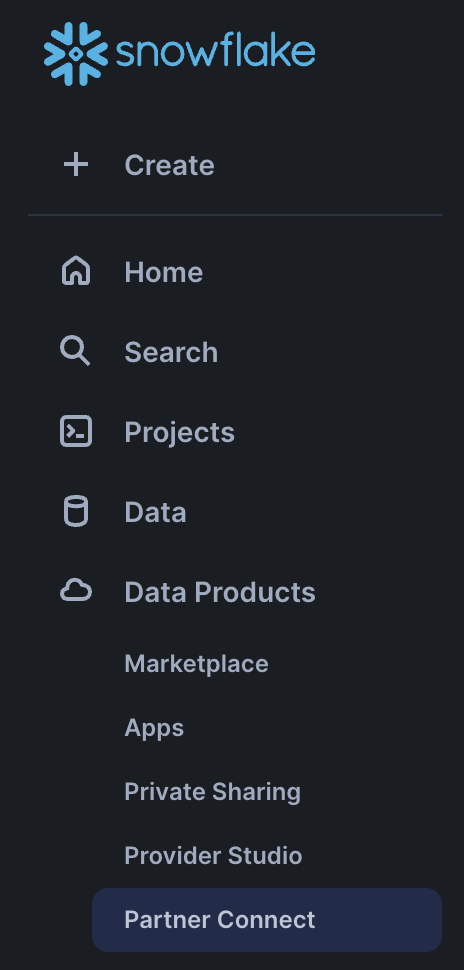](#)Click the '+ New project' button on the top right
2. Select the Sigma tile from the list. Click the **Optional Grant** dropdown menu. Write **RAW** and **ANALYTICS** in the text box and then click **Connect**.
[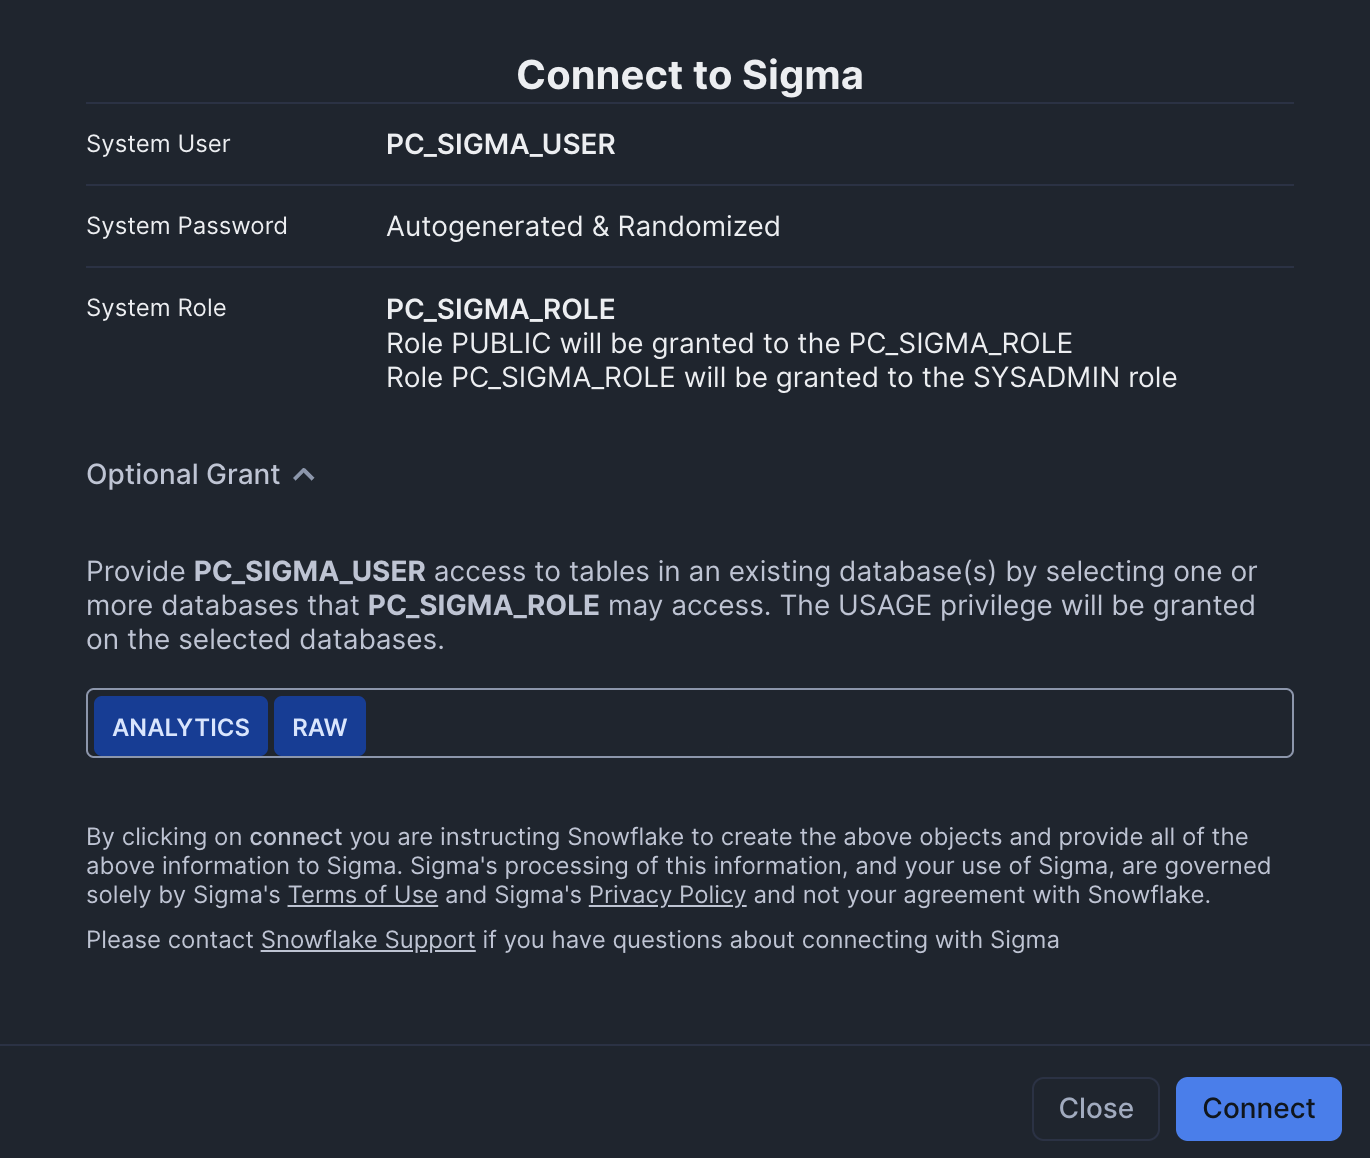](#)Click the '+ New project' button on the top right
3. Make up a company name and URL to use. It doesn’t matter what URL you use, as long as it’s unique.
[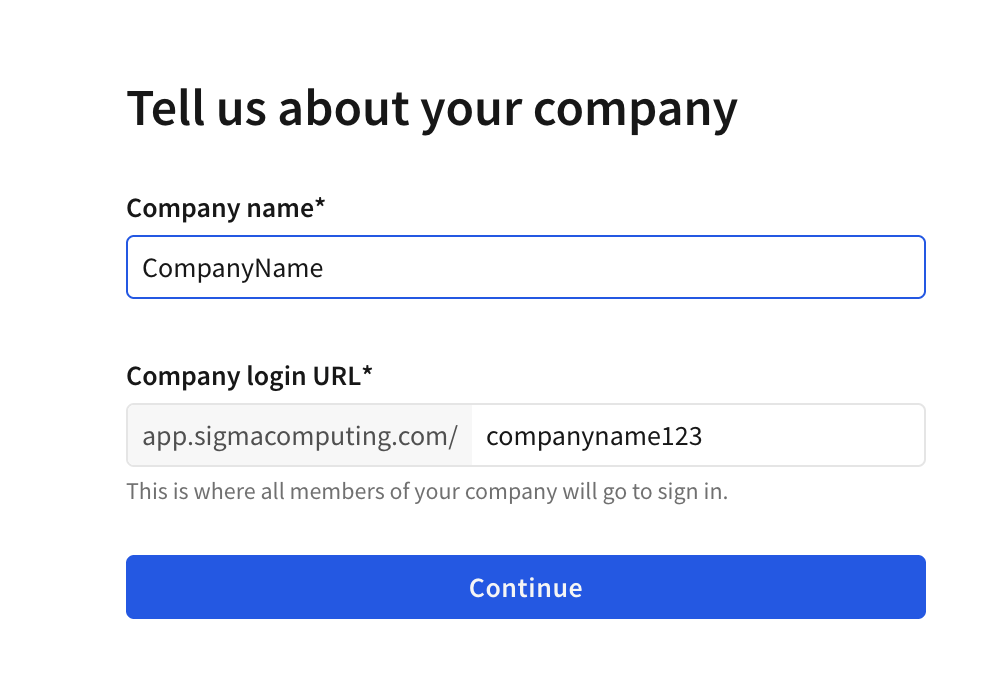](#)Click the '+ New project' button on the top right
4. Enter your name and email address. Choose a password for your account.
[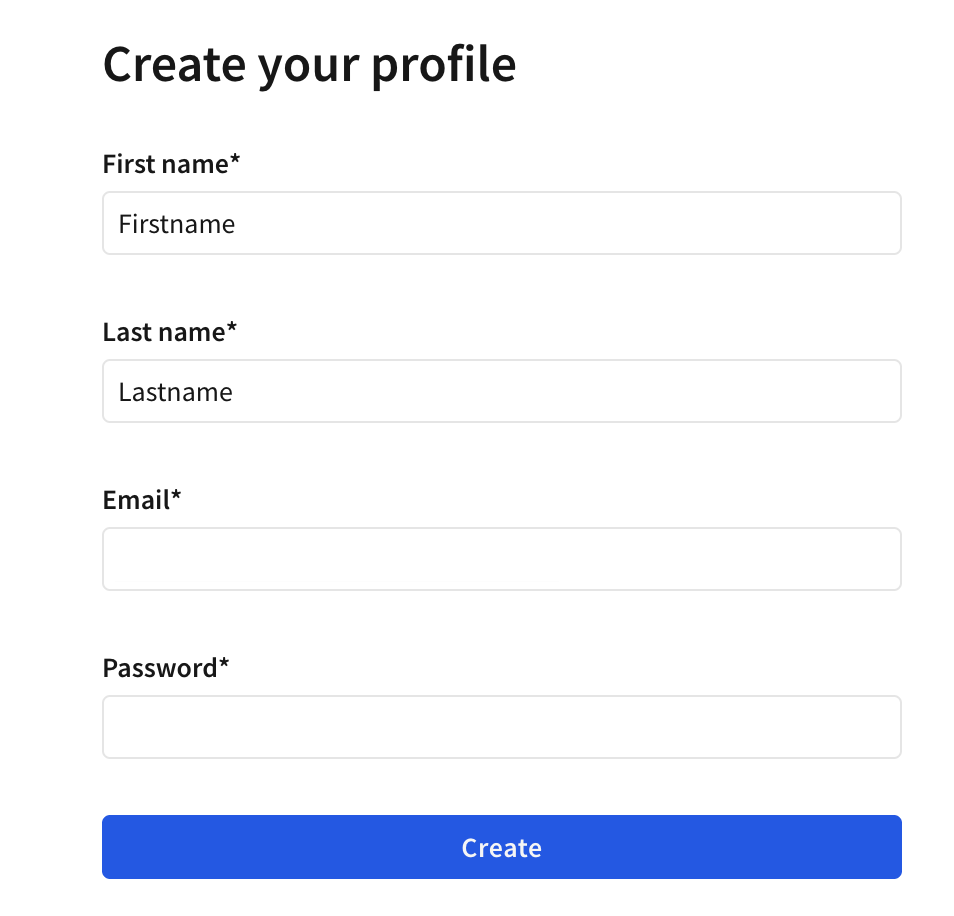](#)Click the '+ New project' button on the top right
5. Great! You now have a Sigma account. Before we get started, go back to Snowflake and open a blank file. Run these lines.
* `grant all privileges on all views in schema analytics.SCHEMA to role pc_sigma_role;`
* `grant all privileges on all tables in schema analytics.SCHEMA to role pc_sigma_role;`
6. Click on your bubble in the top right corner. Click the **Administration** button from the dropdown menu.
[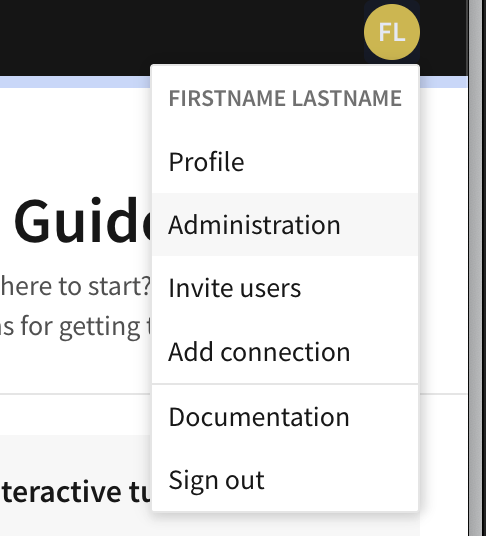](#)Click the '+ New project' button on the top right
7. Scroll down to the integrations section, then select **Add** next to the dbt integration.
[](#)Click the '+ New project' button on the top right
8. In the **dbt Integration** section, fill out the required fields, and then hit save:
* Your dbt [service account token](../docs/dbt-apis/service-tokens.md) or [personal access tokens](../docs/dbt-apis/user-tokens.md).
* Your access URL of your existing Sigma dbt integration. Use `cloud.getdbt.com` as your access URL.
* Your dbt Environment ID.
[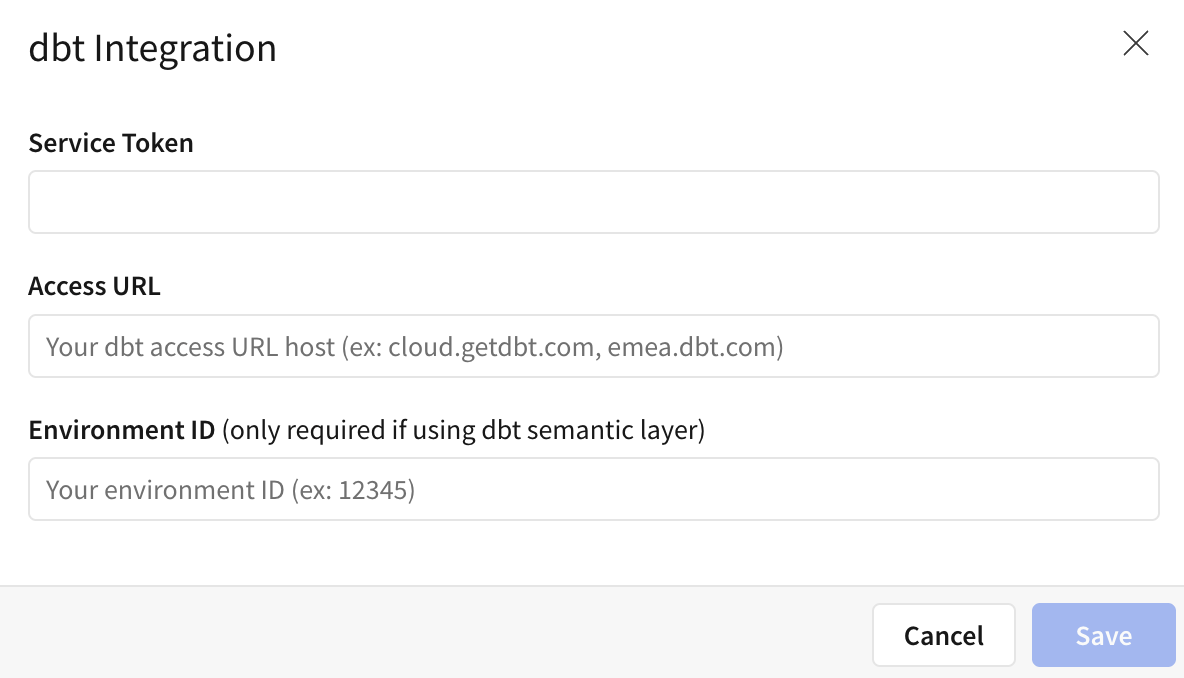](#)Click the '+ New project' button on the top right
9. Return to the Sigma home page. Create a new workbook.
[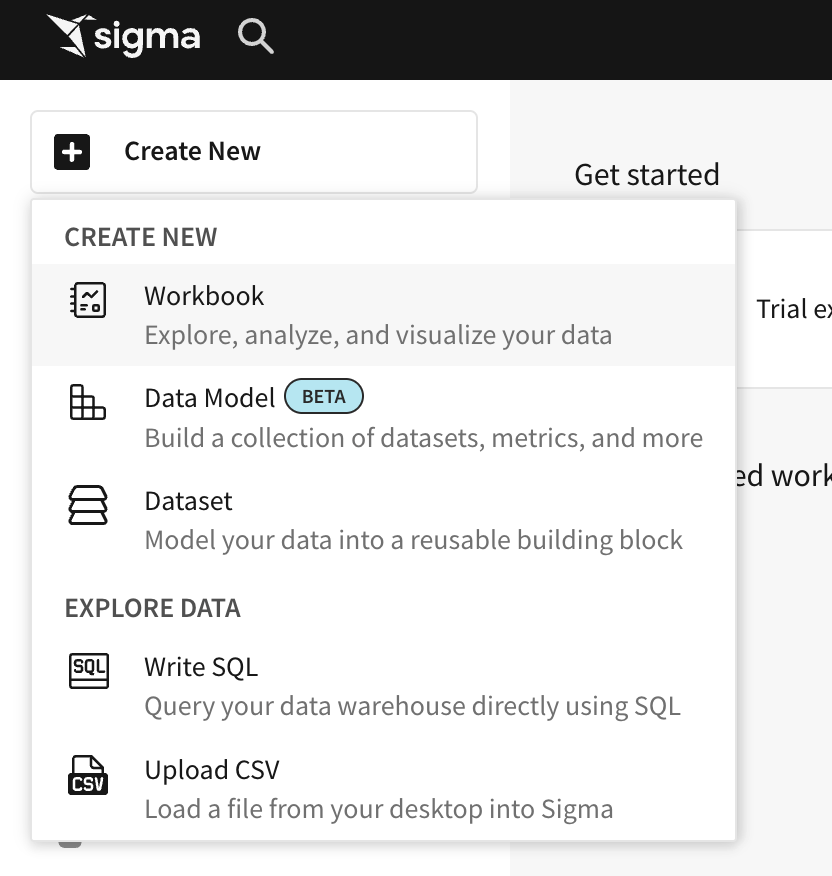](#)Click the '+ New project' button on the top right
10. Click on **Table**, then click on **SQL**. Select Snowflake `PC_SIGMA_WH` as your data connection.
[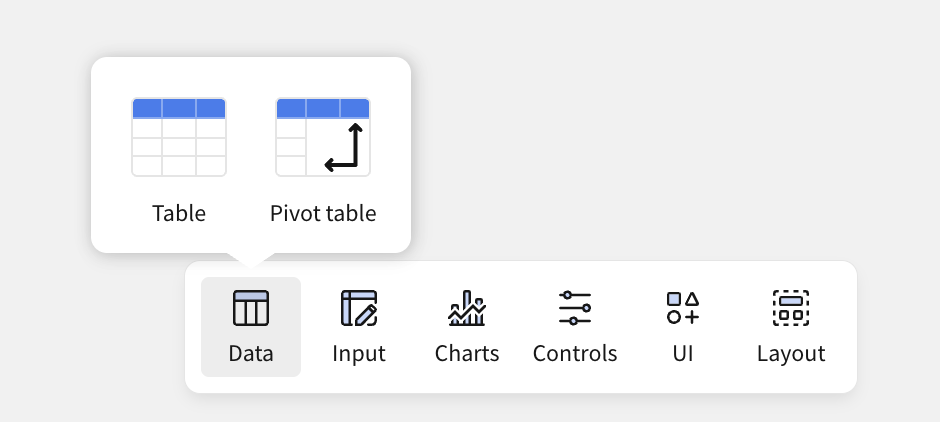](#)Click the '+ New project' button on the top right
11. Go ahead and query a working metric in your project! For example, let's say you had a metric that measures various order-related values. Here’s how you would query it:
```sql
select * from
{{ semantic_layer.query (
metrics = ['order_total', 'order_count', 'large_orders', 'customers_with_orders', 'avg_order_value', 'pct_of_orders_that_are_large'],
group_by =
[Dimension('metric_time').grain('day') ]
) }}
```
## What's next
Great job on completing the comprehensive Semantic Layer guide 🎉! You should hopefully have gained a clear understanding of what the Semantic Layer is, its purpose, and when to use it in your projects.
You've learned how to:
* Set up your Snowflake environment and dbt, including creating SQL files and loading data.
* Connect and configure dbt with Snowflake.
* Build, test, and manage dbt projects, focusing on metrics and semantic layers.
* Run production jobs and query metrics with our available integrations.
For next steps, you can start defining your own metrics and learn additional configuration options such as [exports](../docs/use-dbt-semantic-layer/exports.md), [fill null values](../docs/build/advanced-topics.md), [implementing Mesh with the Semantic Layer](../docs/use-dbt-semantic-layer/sl-faqs.md#how-can-i-implement-dbt-mesh-with-the-dbt-semantic-layer), and more.
Here are some additional resources to help you continue your journey:
* [Semantic Layer FAQs](../docs/use-dbt-semantic-layer/sl-faqs.md)
* [Available integrations](../docs/platform-integrations/avail-sl-integrations.md)
* Demo on [how to define and query metrics with MetricFlow](https://www.loom.com/share/60a76f6034b0441788d73638808e92ac?sid=861a94ac-25eb-4fd8-a310-58e159950f5a)
* [Join our live demos](https://www.getdbt.com/resources/webinars/dbt-cloud-demos-with-experts)
## Was this page helpful?
YesNo
[Privacy policy](https://www.getdbt.com/cloud/privacy-policy)[Create a GitHub issue](https://github.com/dbt-labs/docs.getdbt.com/issues)
This site is protected by reCAPTCHA and the Google [Privacy Policy](https://policies.google.com/privacy) and [Terms of Service](https://policies.google.com/terms) apply.