Post to Slack with error context when a job fails
Introduction
This guide will show you how to set up an integration between dbt jobs and Slack using dbt webhooks and Zapier. It builds on the native native Slack integration by attaching error message details of models and tests in a thread.
Note: Because there is not a webhook for Run Cancelled, you may want to keep the standard Slack integration installed to receive those notifications. You could also use the alternative integration that augments the native integration without replacing it.
When a dbt job finishes running, the integration will:
- Receive a webhook notification in Zapier
- Extract the results from the dbt admin API
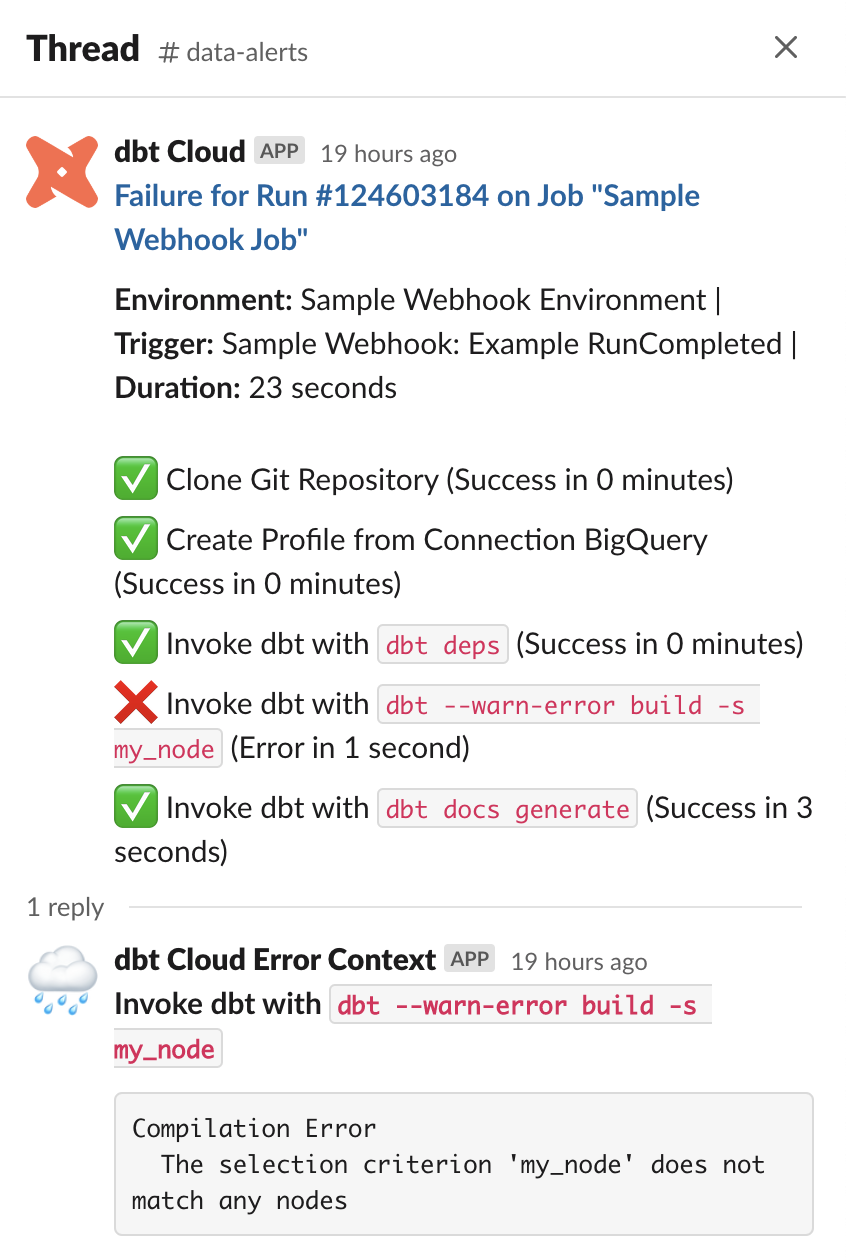
- Post a brief summary of the run to a Slack channel
- Create a threaded message attached to that post which contains any reasons that the job failed
Prerequisites
In order to set up the integration, you should have familiarity with:
- dbt webhooks
- Zapier
Create a new Zap in Zapier
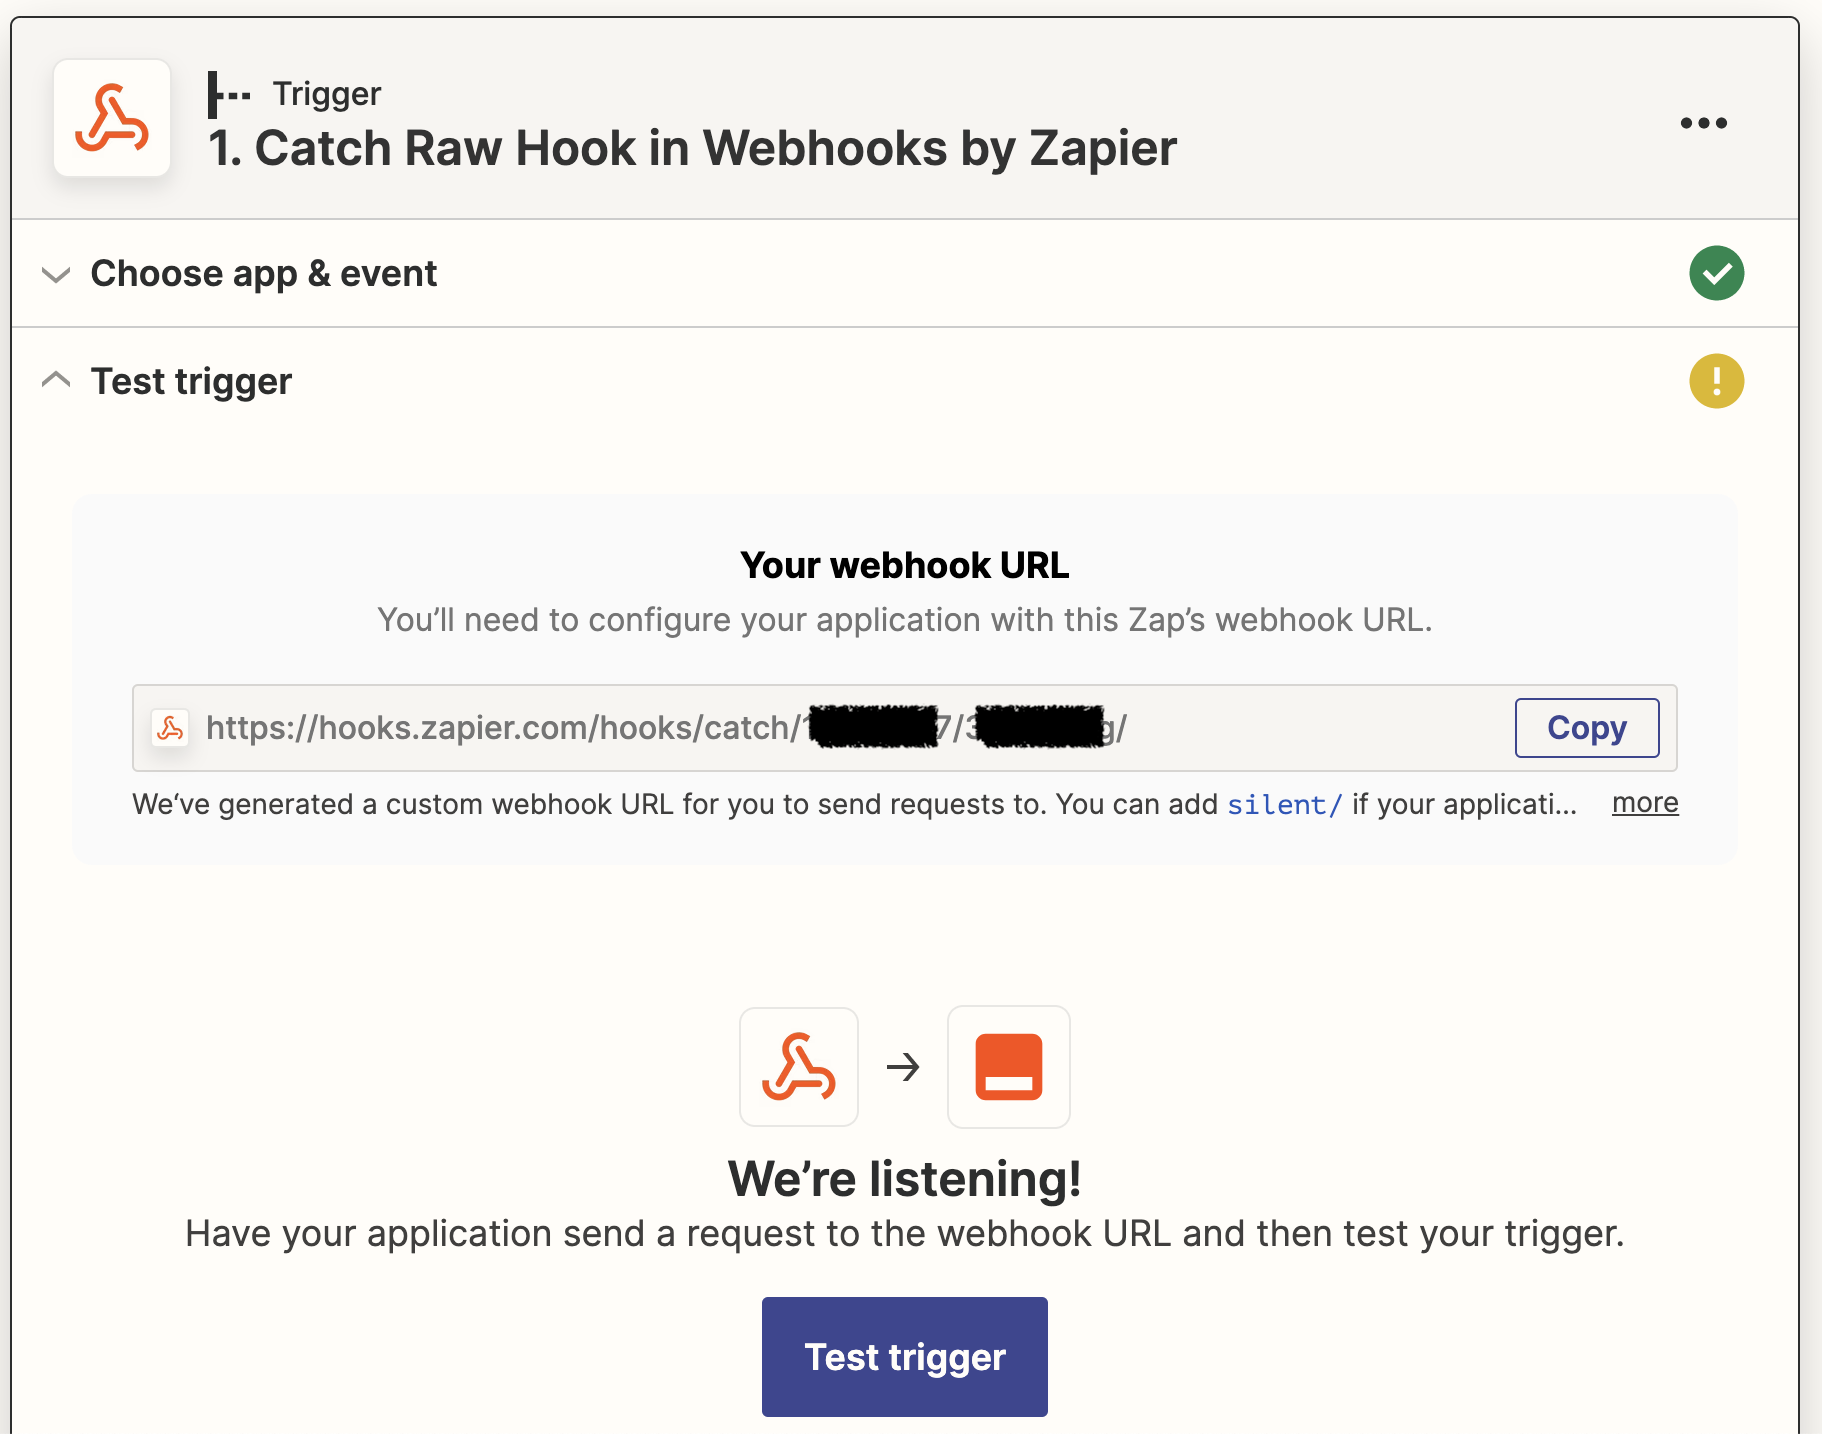
- Use Webhooks by Zapier as the Trigger, and Catch Raw Hook as the Event. If you don't intend to validate the authenticity of your webhook (not recommended!) then you can choose Catch Hook instead.
- Click Continue, then copy the webhook URL.
Configure a new webhook in dbt
See Create a webhook subscription for full instructions. Choose Run completed as the Event. You can alternatively choose Run errored, but you will need to account for the fact that the necessary metadata might not be available immediately.
Remember the Webhook Secret Key for later.
Once you've tested the endpoint in dbt, go back to Zapier and click Test Trigger. This creates a sample webhook body based on the test event dbt sent.
The sample body's values are hardcoded and not reflective of your project, but they give Zapier a correctly-shaped object during development.
Store secrets
In the next step, you will need the Webhook Secret Key from the prior step, and a dbt personal access token or service account token.
Zapier allows you to store secrets. This prevents your keys from being displayed as plaintext in the Zap code. You can access them with the StoreClient utility.
This guide assumes the names for the secret keys are: DBT_CLOUD_SERVICE_TOKEN and DBT_WEBHOOK_KEY. If you're using different names, make sure you update all references to it in the sample code.
This guide uses a short-lived code action to store the secrets, but you can also use a tool like Postman to interact with the REST API or create a separate Zap and call the Set Value Action.
a. Create a Storage by Zapier connection
If you haven't already got one, go to https://zapier.com/app/connections/storage and create a new connection. Remember the UUID secret you generate for later.
b. Add a temporary code step
Choose Run Python as the Event. Run the following code:
store = StoreClient('abc123') #replace with your UUID secret
store.set('DBT_WEBHOOK_KEY', 'abc123') #replace with webhook secret
store.set('DBT_CLOUD_SERVICE_TOKEN', 'abc123') #replace with your dbt API token
Test the step. You can delete this Action when the test succeeds. The key will remain stored as long as it is accessed at least once every three months.
Add a code action
Select Code by Zapier as the App, and Run Python as the Event.
In the Set up action section, add two items to Input Data: raw_body and auth_header. Map those to the 1. Raw Body and 1. Headers Http Authorization fields from the previous Catch Raw Hook step.
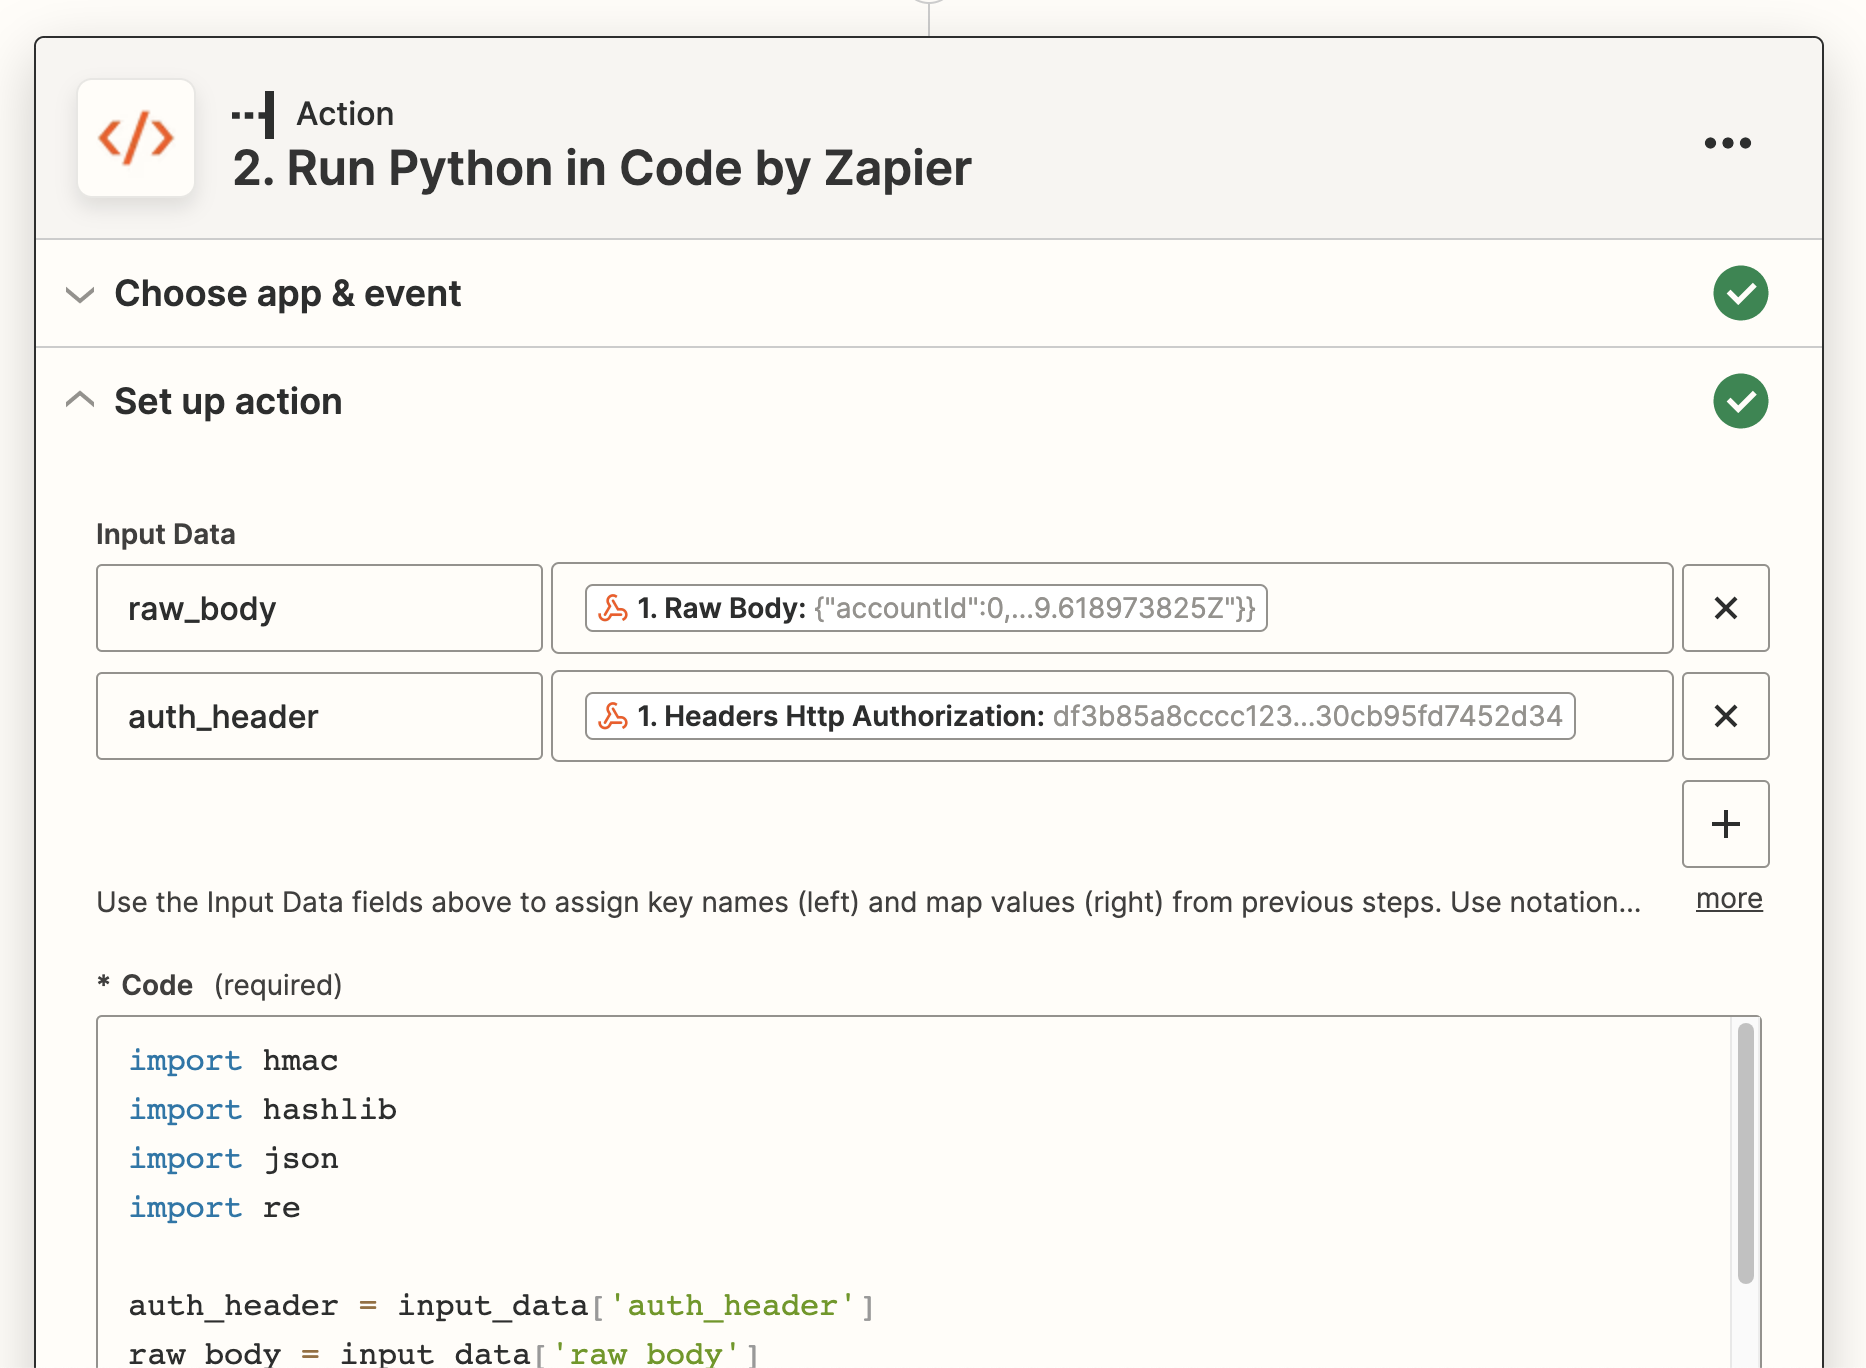
In the Code field, paste the following code, replacing YOUR_SECRET_HERE with the secret you created when setting up the Storage by Zapier integration. Remember that this is not your dbt secret.
This example code validates the authenticity of the request, extracts the run logs for the completed job from the Admin API, and then builds two messages: a summary message containing the outcome of each step and its duration, and a message for inclusion in a thread displaying any error messages extracted from the end-of-invocation logs created by dbt Core.
import hashlib
import hmac
import json
import re


auth_header = input_data['auth_header']
raw_body = input_data['raw_body']

# Access secret credentials
secret_store = StoreClient('YOUR_SECRET_HERE')
hook_secret = secret_store.get('DBT_WEBHOOK_KEY')
api_token = secret_store.get('DBT_CLOUD_SERVICE_TOKEN')

# Validate the webhook came from dbt
signature = hmac.new(hook_secret.encode('utf-8'), raw_body.encode('utf-8'), hashlib.sha256).hexdigest()

if signature != auth_header:
  raise Exception("Calculated signature doesn't match contents of the Authorization header. This webhook may not have been sent from <Constant name="dbt" />.")

full_body = json.loads(raw_body)
hook_data = full_body['data']

# Steps derived from these commands won't have their error details shown inline, as they're messy
commands_to_skip_logs = ['dbt source', 'dbt docs']

# When testing, you will want to hardcode run_id and account_id to IDs that exist; the sample webhook won't work.
run_id = hook_data['runId']
account_id = full_body['accountId']

# Fetch run info from the dbt Admin API
url = f'https://YOUR_ACCESS_URL/api/v2/accounts/{account_id}/runs/{run_id}/?include_related=["run_steps"]'
headers = {'Authorization': f'Token {api_token}'}
run_data_response = requests.get(url, headers=headers)
run_data_response.raise_for_status()
run_data_results = run_data_response.json()['data']

# Overall run summary
step_summary_post = f"""
*<{run_data_results['href']}|{hook_data['runStatus']} for Run #{run_id} on Job \"{hook_data['jobName']}\">*

*Environment:* {hook_data['environmentName']} | *Trigger:* {hook_data['runReason']} | *Duration:* {run_data_results['duration_humanized']}

"""

threaded_errors_post = ""

# Step-specific summaries
for step in run_data_results['run_steps']:
  if step['status_humanized'] == 'Success':
    step_summary_post += f"""
✅ {step['name']} ({step['status_humanized']} in {step['duration_humanized']})
"""
  else:
    step_summary_post += f"""
❌ {step['name']} ({step['status_humanized']} in {step['duration_humanized']})
"""

    # Don't try to extract info from steps that don't have well-formed logs
    show_logs = not any(cmd in step['name'] for cmd in commands_to_skip_logs)
    if show_logs:
      full_log = step['logs']
      # Remove timestamp and any colour tags
      full_log = re.sub('\x1b?\[[0-9]+m[0-9:]*', '', full_log)

      summary_start = re.search('(?:Completed with \d+ error.* and \d+ warnings?:|Database Error|Compilation Error|Runtime Error)', full_log)

      line_items = re.findall('(^.*(?:Failure|Error) in .*\n.*\n.*)', full_log, re.MULTILINE)

      if not summary_start:
        continue

      threaded_errors_post += f"""
*{step['name']}*
"""
      # If there are no line items, the failure wasn't related to dbt nodes, and we want the whole rest of the message.
      # If there are, then we just want the summary line and then to log out each individual node's error.
      if len(line_items) == 0:
        relevant_log = f'```{full_log[summary_start.start():]}```'
      else:
        relevant_log = summary_start[0]
        for item in line_items:
          relevant_log += f'\n```\n{item.strip()}\n```\n'
      threaded_errors_post += f"""
{relevant_log}
"""

send_error_thread = len(threaded_errors_post) > 0

# Zapier looks for the `output` dictionary for use in subsequent steps
output = {'step_summary_post': step_summary_post, 'send_error_thread': send_error_thread, 'threaded_errors_post': threaded_errors_post}
Add Slack actions in Zapier
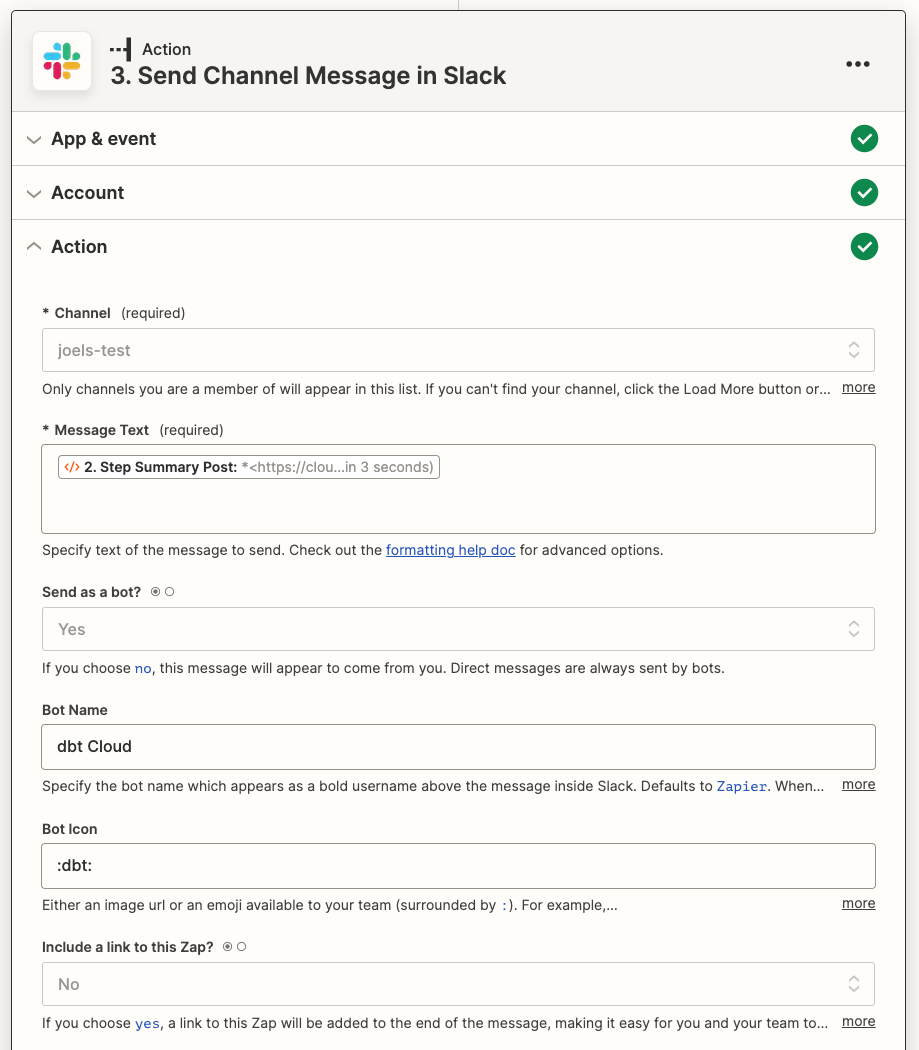
Select Slack as the App, and Send Channel Message as the Action.
In the Action section, choose which Channel to post to. Set the Message Text field to 2. Step Summary Post from the Run Python in Code by Zapier output.
Configure the other options as you prefer (for example, Bot Name and Bot Icon).
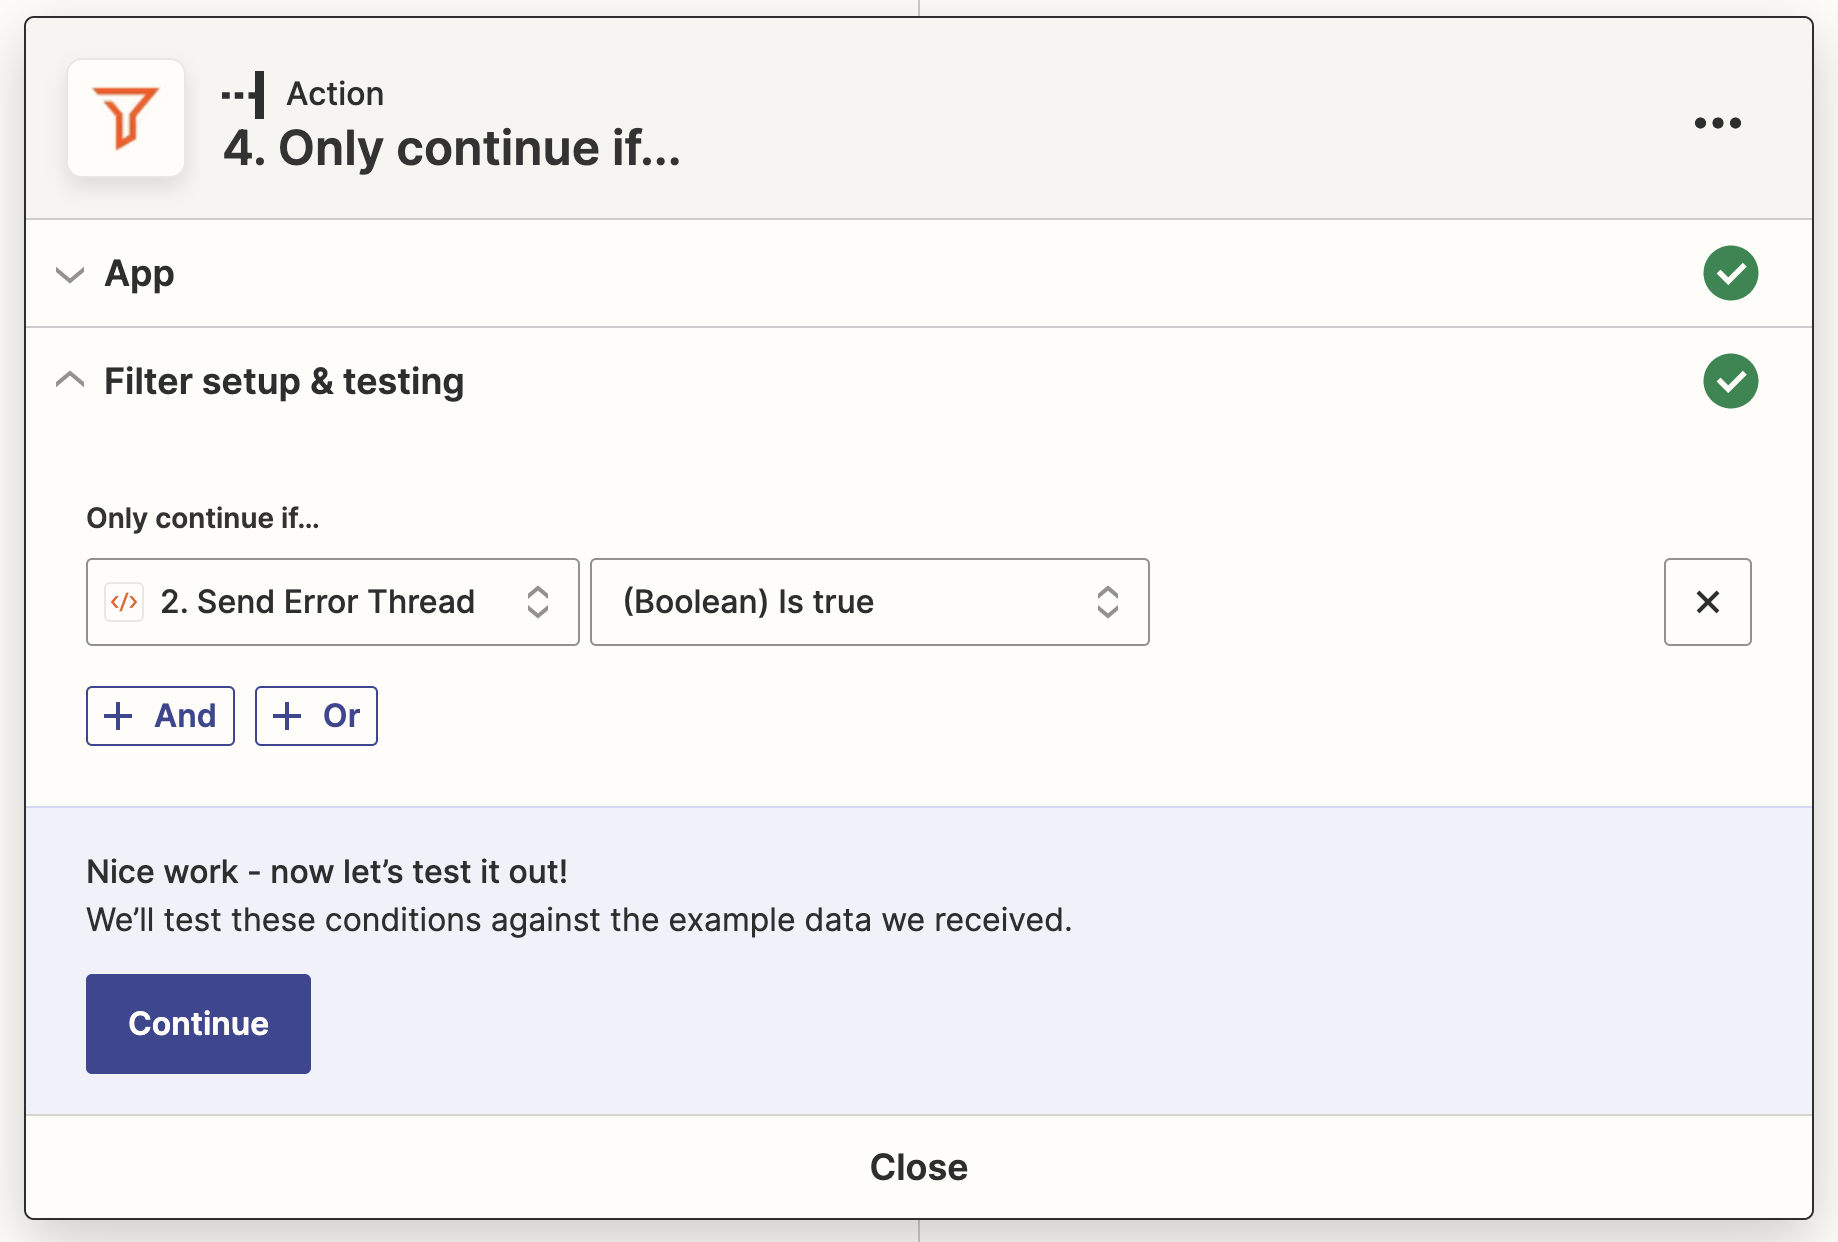
Add another step, Filter. In the Filter setup and testing section, set the Field to 2. Send Error Thread and the condition to (Boolean) Is true. This prevents the Zap from failing if the job succeeded and you try to send an empty Slack message in the next step.
Add another Send Channel Message in Slack action. In the Action section, choose the same channel as last time, but set the Message Text to 2. Threaded Errors Post from the same Run Python step. Set the Thread value to 3. Message Ts, which is the timestamp of the post created by the first Slack action. This tells Zapier to add this post as a threaded reply to the main message, which prevents the full (potentially long) output from cluttering your channel.

Test and deploy
When you're done testing your Zap, make sure that your run_id and account_id are no longer hardcoded in the Code step, then publish your Zap.
Alternately, use a dbt app Slack message to trigger Zapier
Instead of using a webhook as your trigger, you can keep the existing dbt app installed in your Slack workspace and use its messages being posted to your channel as the trigger. In this case, you can skip validating the webhook and only need to load the context from the thread.
1. Create a new Zap in Zapier
Use Slack as the initiating app, and New Message Posted to Channel as the Trigger. In the Trigger section, select the channel where your Slack alerts are being posted, and set Trigger for Bot Messages? to Yes.
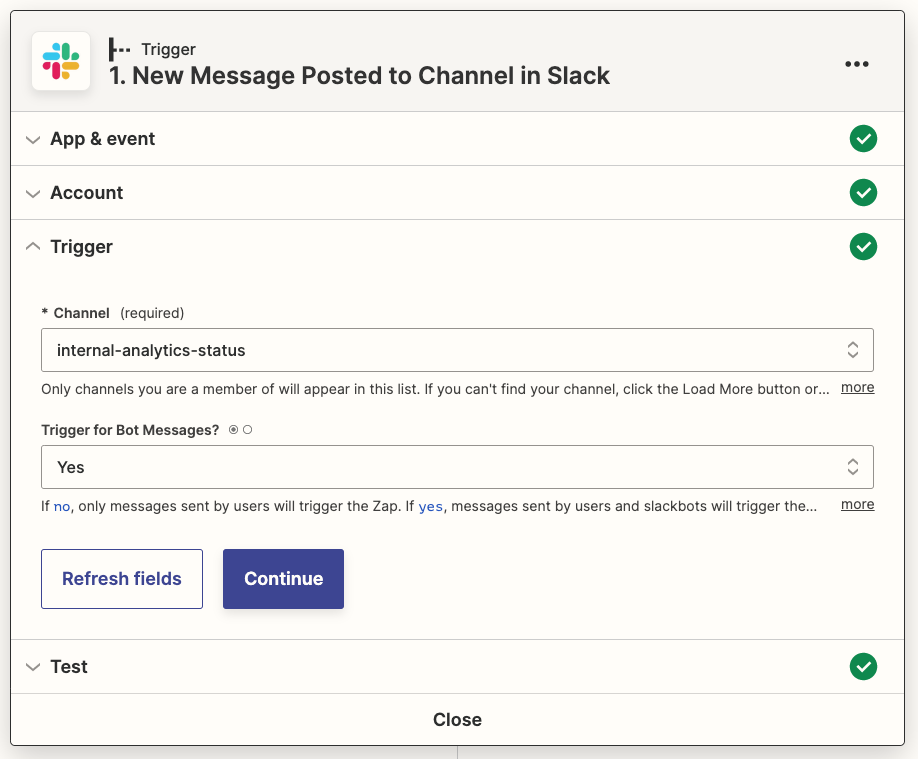
Test your Zap to find an example record. You might need to load additional samples until you get one that relates to a failed job, depending on whether you post all job events to Slack or not.
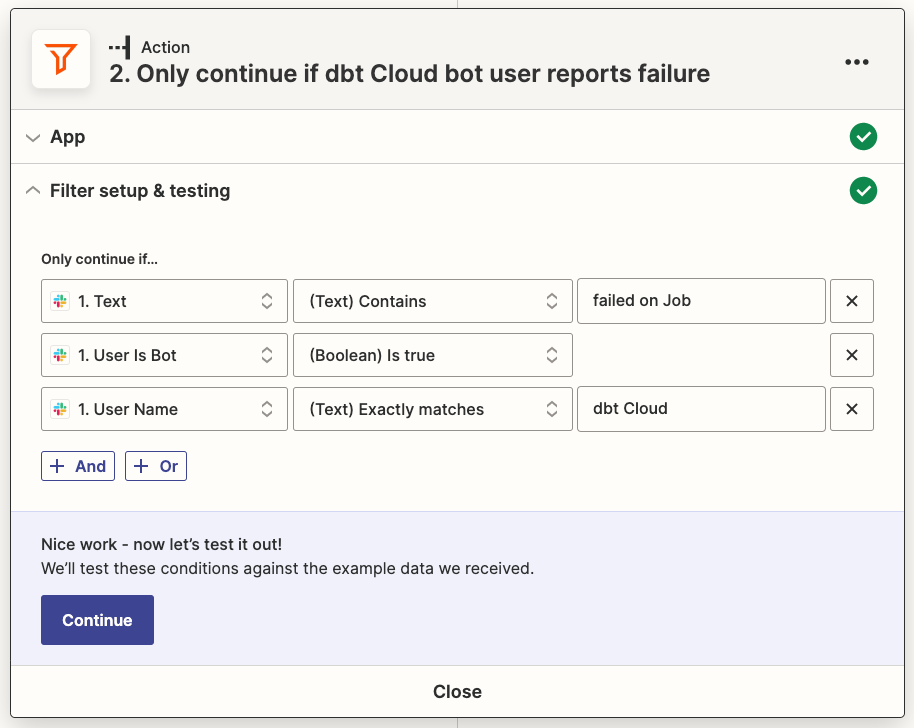
2. Add a Filter step
Add a Filter step with the following conditions:
- 1. Text contains failed on Job
- 1. User Is Bot Is true
- 1. User Name Exactly matches dbt
3. Extract the run ID
Add a Format step with the Event of Text, and the Action Extract Number. For the Input, select 1. Text.
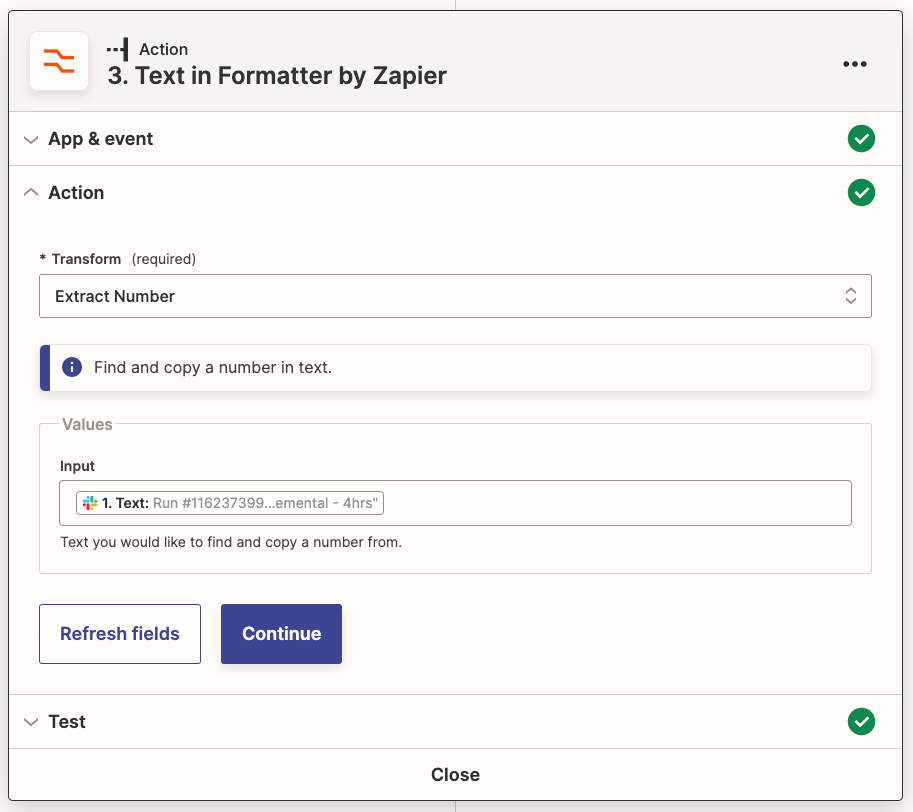
Test your step and validate that the run ID has been correctly extracted.
4. Add a Delay
Sometimes dbt posts the message about the run failing before the run's artifacts are available through the API. For this reason, it's recommended to add a brief delay to increase the likelihood that the data is available. On certain plans, Zapier will automatically retry a job that fails from to a 404 error, but its standdown period is longer than is normally necessary so the context will be missing from your thread for longer.
A one-minute delay is generally sufficient.
5. Store secrets
In the next step, you will need either a dbt personal access token or service account token.
Zapier allows you to store secrets. This prevents your keys from being displayed as plaintext in the Zap code. You can access them with the StoreClient utility.
This guide assumes the name for the secret key is DBT_CLOUD_SERVICE_TOKEN. If you're using a different name, make sure you update all references to it in the sample code.
This guide uses a short-lived code action to store the secrets, but you can also use a tool like Postman to interact with the REST API or create a separate Zap and call the Set Value Action.
a. Create a Storage by Zapier connection
If you haven't already got one, go to https://zapier.com/app/connections/storage and create a new connection. Remember the UUID secret you generate for later.
b. Add a temporary code step
Choose Run Python as the Event. Run the following code:
store = StoreClient('abc123') #replace with your UUID secret
store.set('DBT_CLOUD_SERVICE_TOKEN', 'abc123') #replace with your <Constant name="dbt" /> API token
Test the step. You can delete this Action when the test succeeds. The key will remain stored as long as it is accessed at least once every three months.
6. Add a Code action
Select Code by Zapier as the App, and Run Python as the Event.
This step is very similar to the one described in the main example, but you can skip a lot of the initial validation work.
In the Action section, add two items to Input Data: run_id and account_id. Map those to the 3. Output property and your hardcoded dbt Account ID, respectively.
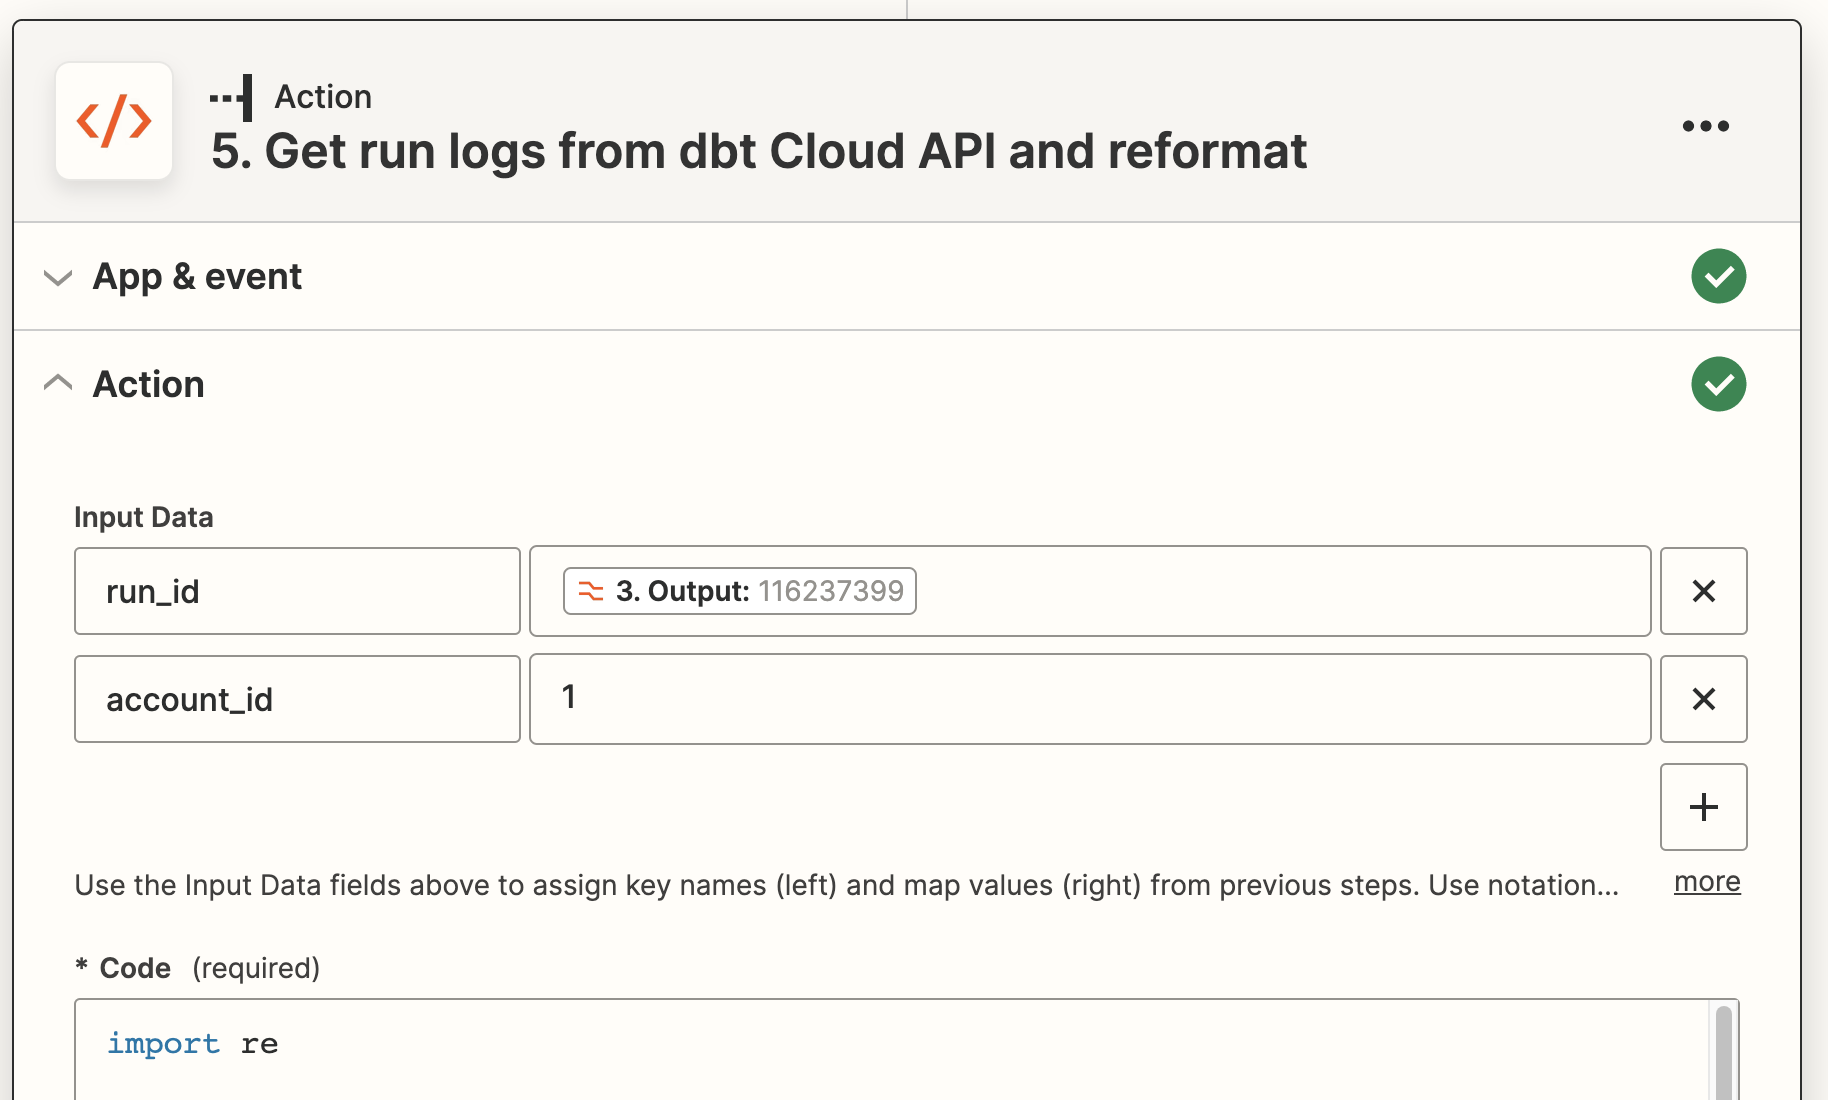
In the Code field, paste the following code, replacing YOUR_SECRET_HERE with the secret you created when setting up the Storage by Zapier integration. Remember that this is not your dbt secret.
This example code extracts the run logs for the completed job from the Admin API, and then builds a message displaying any error messages extracted from the end-of-invocation logs created by dbt Core (which will be posted in a thread).
import re

# Access secret credentials
secret_store = StoreClient('YOUR_SECRET_HERE')
api_token = secret_store.get('DBT_CLOUD_SERVICE_TOKEN')

# Steps derived from these commands won't have their error details shown inline, as they're messy
commands_to_skip_logs = ['dbt source', 'dbt docs']
run_id = input_data['run_id']
account_id = input_data['account_id']
url = f'https://YOUR_ACCESS_URL/api/v2/accounts/{account_id}/runs/{run_id}/?include_related=["run_steps"]'
headers = {'Authorization': f'Token {api_token}'}

response = requests.get(url, headers=headers)
response.raise_for_status()
results = response.json()['data']

threaded_errors_post = ""
for step in results['run_steps']:
  show_logs = not any(cmd in step['name'] for cmd in commands_to_skip_logs)
  if not show_logs:
    continue
  if step['status_humanized'] != 'Success':
    full_log = step['logs']
    # Remove timestamp and any colour tags
    full_log = re.sub('\x1b?\[[0-9]+m[0-9:]*', '', full_log)

    summary_start = re.search('(?:Completed with \d+ error.* and \d+ warnings?:|Database Error|Compilation Error|Runtime Error)', full_log)

    line_items = re.findall('(^.*(?:Failure|Error) in .*\n.*\n.*)', full_log, re.MULTILINE)
    if not summary_start:
      continue

    threaded_errors_post += f"""
*{step['name']}*
"""
    # If there are no line items, the failure wasn't related to dbt nodes, and we want the whole rest of the message.
    # If there are, then we just want the summary line and then to log out each individual node's error.
    if len(line_items) == 0:
      relevant_log = f'```{full_log[summary_start.start():]}```'
    else:
      relevant_log = summary_start[0]
      for item in line_items:
        relevant_log += f'\n```\n{item.strip()}\n```\n'
    threaded_errors_post += f"""
{relevant_log}
"""

output = {'threaded_errors_post': threaded_errors_post}
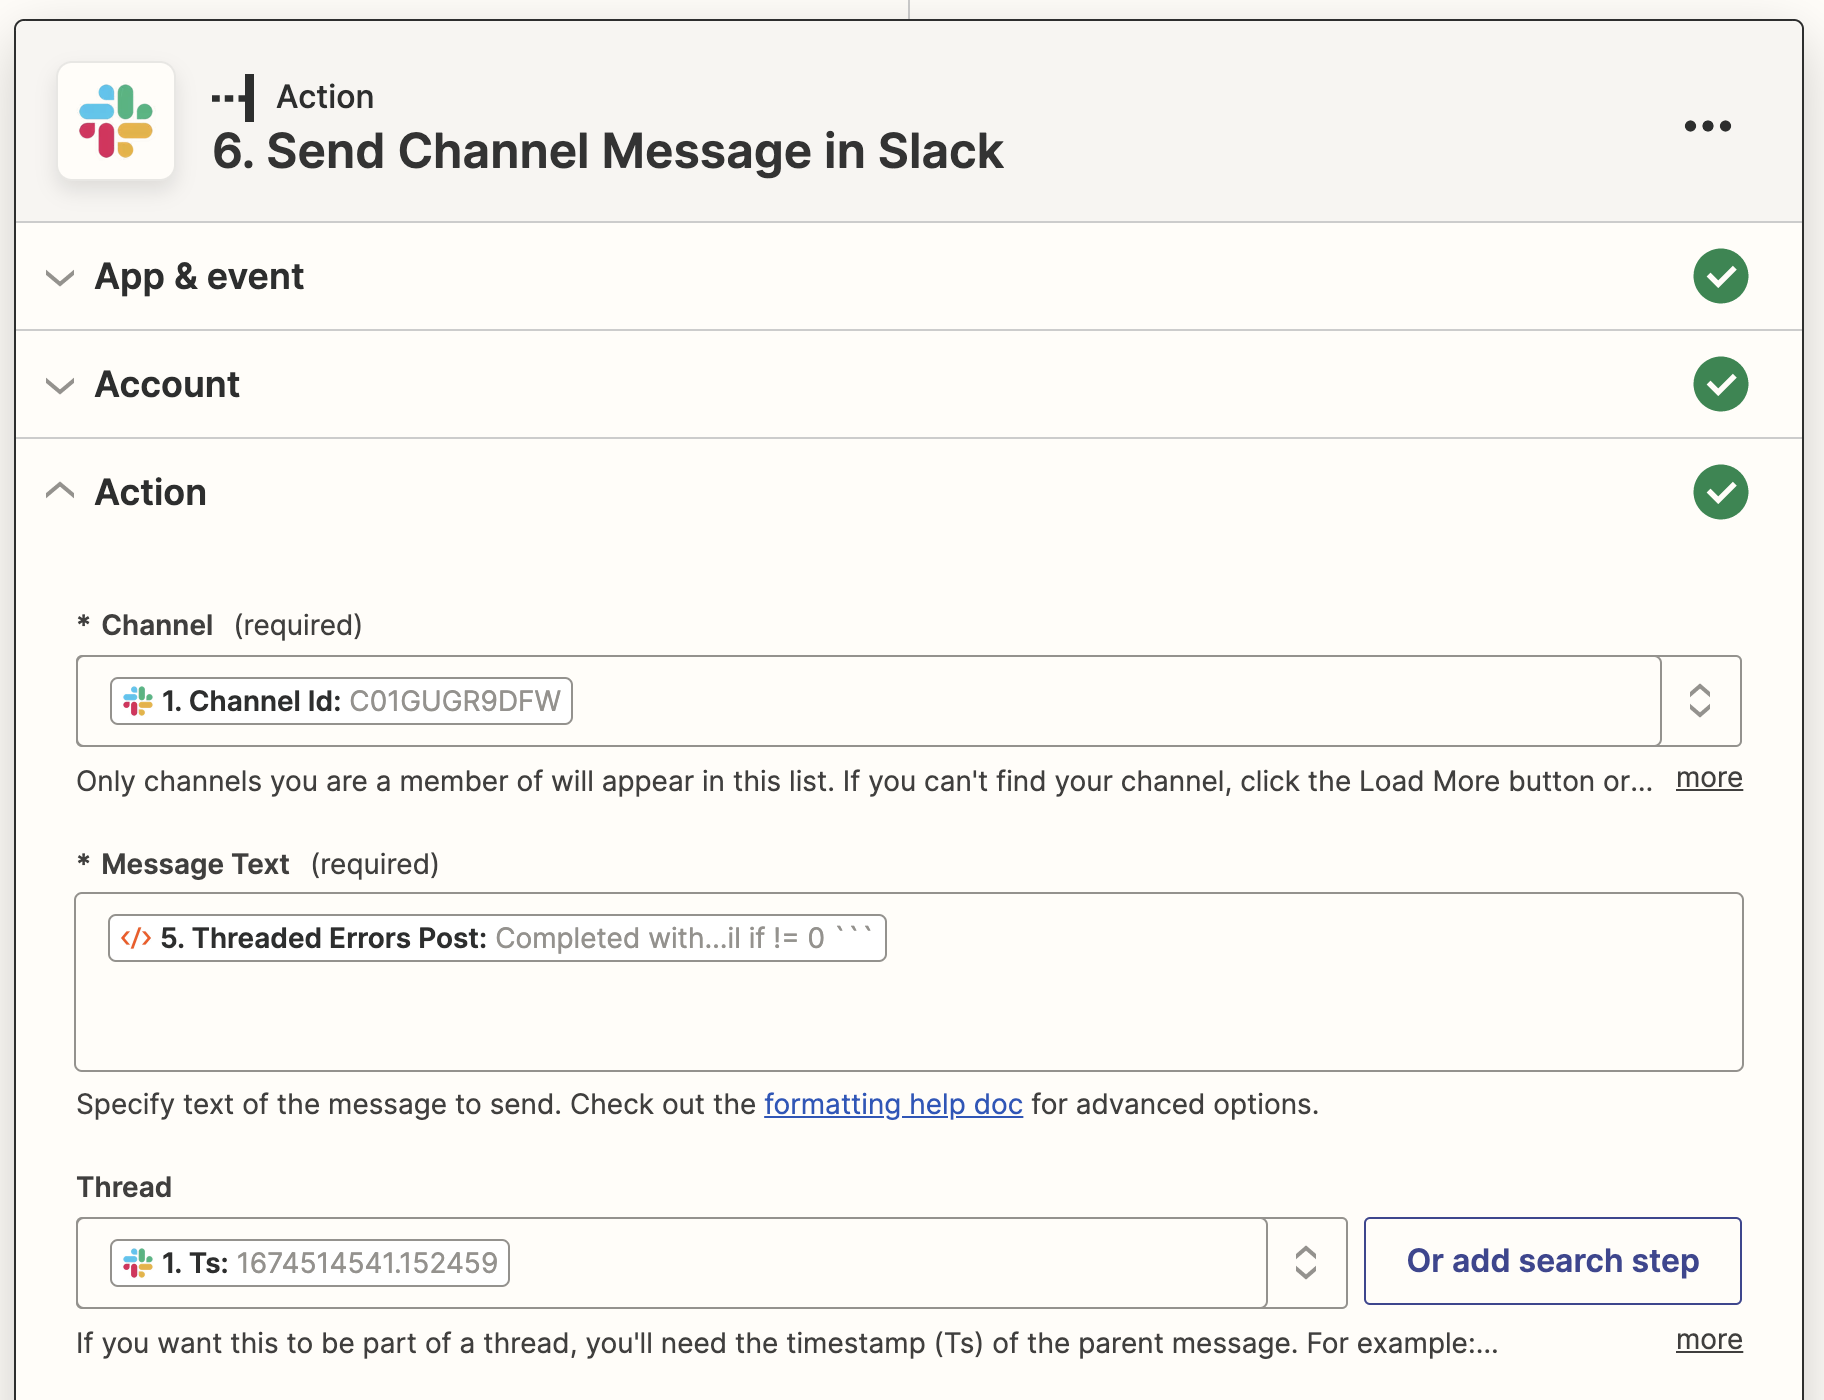
7. Add Slack action in Zapier
Add a Send Channel Message in Slack action. In the Action section, set the channel to 1. Channel Id, which is the channel that the triggering message was posted in.
Set the Message Text to 5. Threaded Errors Post from the Run Python step. Set the Thread value to 1. Ts, which is the timestamp of the triggering Slack post. This tells Zapier to add this post as a threaded reply to the main message, which prevents the full (potentially long) output from cluttering your channel.
8. Test and deploy
When you're done testing your Zap, publish it.
Was this page helpful?
This site is protected by reCAPTCHA and the Google Privacy Policy and Terms of Service apply.