Refresh Tableau workbook with extracts after a job finishes
Introduction
This guide will teach you how to refresh a Tableau workbook that leverages extracts when a dbt job has completed successfully and there is fresh data available. The integration will:
- Receive a webhook notification in Zapier
- Trigger a refresh of a Tableau workbook
Prerequisites
To set up the integration, you need to be familiar with:
- dbt Webhooks
- Zapier
- The Tableau API
- The version of Tableau's REST API that is compatible with your server
Obtain authentication credentials from Tableau
To authenticate with the Tableau API, obtain a Personal Access Token from your Tableau Server/Cloud instance. In addition, make sure your Tableau workbook uses data sources that allow refresh access, which is usually set when publishing.
Create a new Zap in Zapier
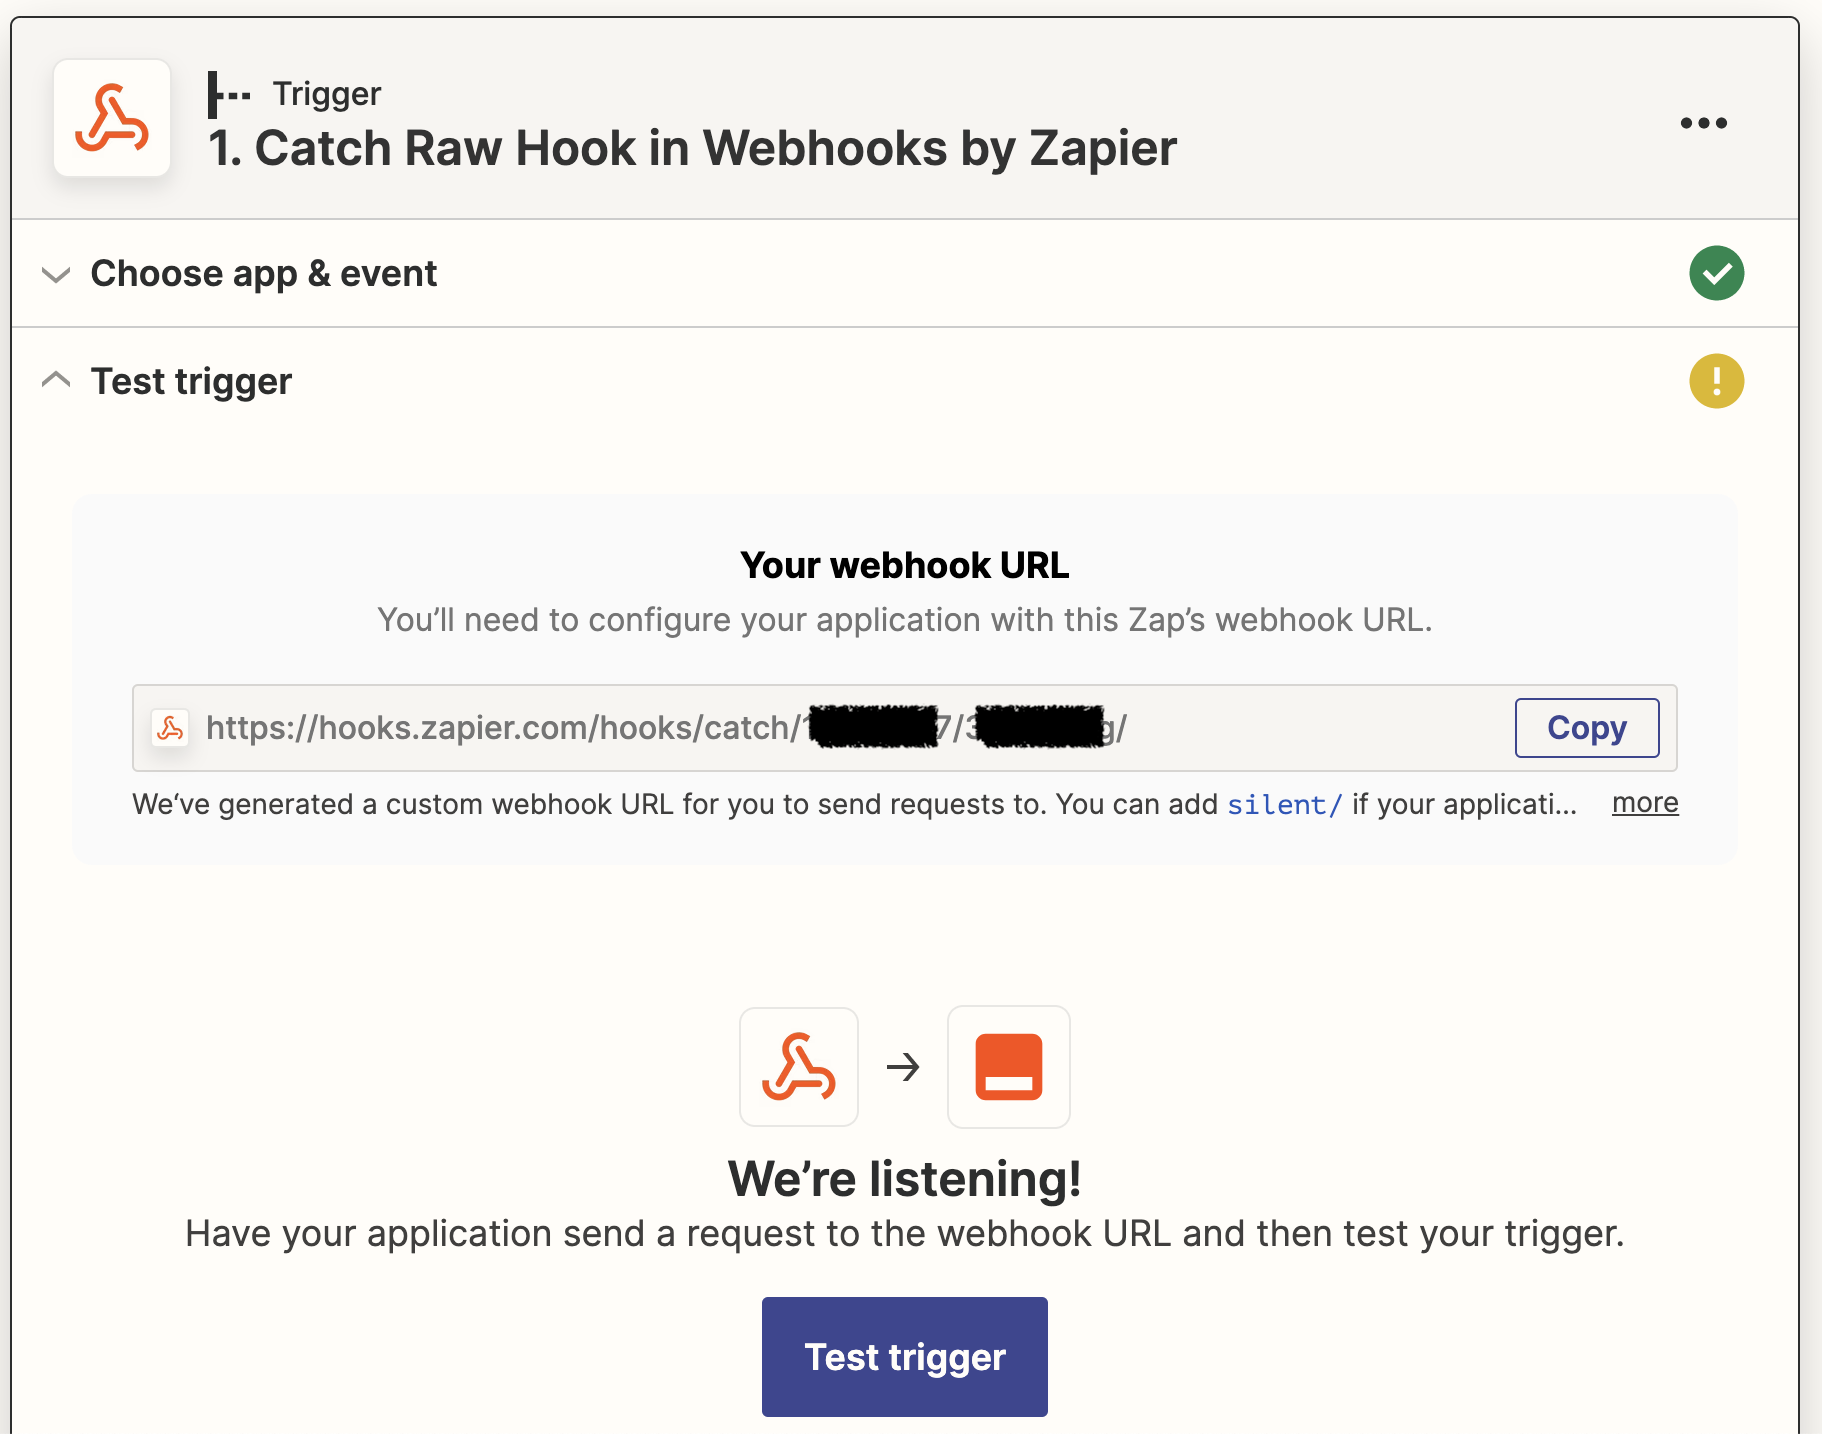
To trigger an action with the delivery of a webhook in Zapier, you'll want to create a new Zap with Webhooks by Zapier as the Trigger and Catch Raw Hook as the Event. However, if you choose not to validate the authenticity of your webhook, which isn't recommended, you can choose Catch Hook instead.
Press Continue, then copy the webhook URL.
Configure a new webhook in dbt
To set up a webhook subscription for dbt, follow the instructions in Create a webhook subscription. For the event, choose Run completed and modify the Jobs list to include only the jobs that should trigger a report refresh.
Remember to save the Webhook Secret Key for later. Paste in the webhook URL obtained from Zapier in step 2 into the Endpoint field and test the endpoint.
Once you've tested the endpoint in dbt, go back to Zapier and click Test Trigger, which will create a sample webhook body based on the test event dbt sent.
The sample body's values are hard-coded and not reflective of your project, but they give Zapier a correctly-shaped object during development.
Store secrets
In the next step, you will need the Webhook Secret Key from the prior step, and your Tableau authentication credentials and details. Specifically, you'll need your Tableau server/site URL, server/site name, PAT name, and PAT secret.
Zapier allows you to store secrets, which prevents your keys from being displayed in plaintext in the Zap code. You will be able to access them via the StoreClient utility.
This guide assumes the names for the secret keys are: DBT_WEBHOOK_KEY, TABLEAU_SITE_URL, TABLEAU_SITE_NAME, TABLEAU_API_TOKEN_NAME, and TABLEAU_API_TOKEN_SECRET. If you are using different names, make sure you update all references to them in the sample code.
This guide uses a short-lived code action to store the secrets, but you can also use a tool like Postman to interact with the REST API or create a separate Zap and call the Set Value Action.
a. Create a Storage by Zapier connection
Create a new connection at https://zapier.com/app/connections/storage if you don't already have one and remember the UUID secret you generate for later.
b. Add a temporary code step
Choose Run Python as the Event and input the following code:
store = StoreClient('abc123') #replace with your UUID secret
store.set('DBT_WEBHOOK_KEY', 'abc123') #replace with your <Constant name="dbt" /> Webhook key
store.set('TABLEAU_SITE_URL', 'abc123') #replace with your Tableau Site URL, inclusive of https:// and .com
store.set('TABLEAU_SITE_NAME', 'abc123') #replace with your Tableau Site/Server Name
store.set('TABLEAU_API_TOKEN_NAME', 'abc123') #replace with your Tableau API Token Name
store.set('TABLEAU_API_TOKEN_SECRET', 'abc123') #replace with your Tableau API Secret
Test the step to run the code. You can delete this action when the test succeeds. The keys will remain stored as long as it is accessed at least once every three months.
Add a code action
Select Code by Zapier as the App, and Run Python as the Event.
In the Set up action area, add two items to Input Data: raw_body and auth_header. Map those to the 1. Raw Body and 1. Headers Http Authorization fields from the Catch Raw Hook step above.
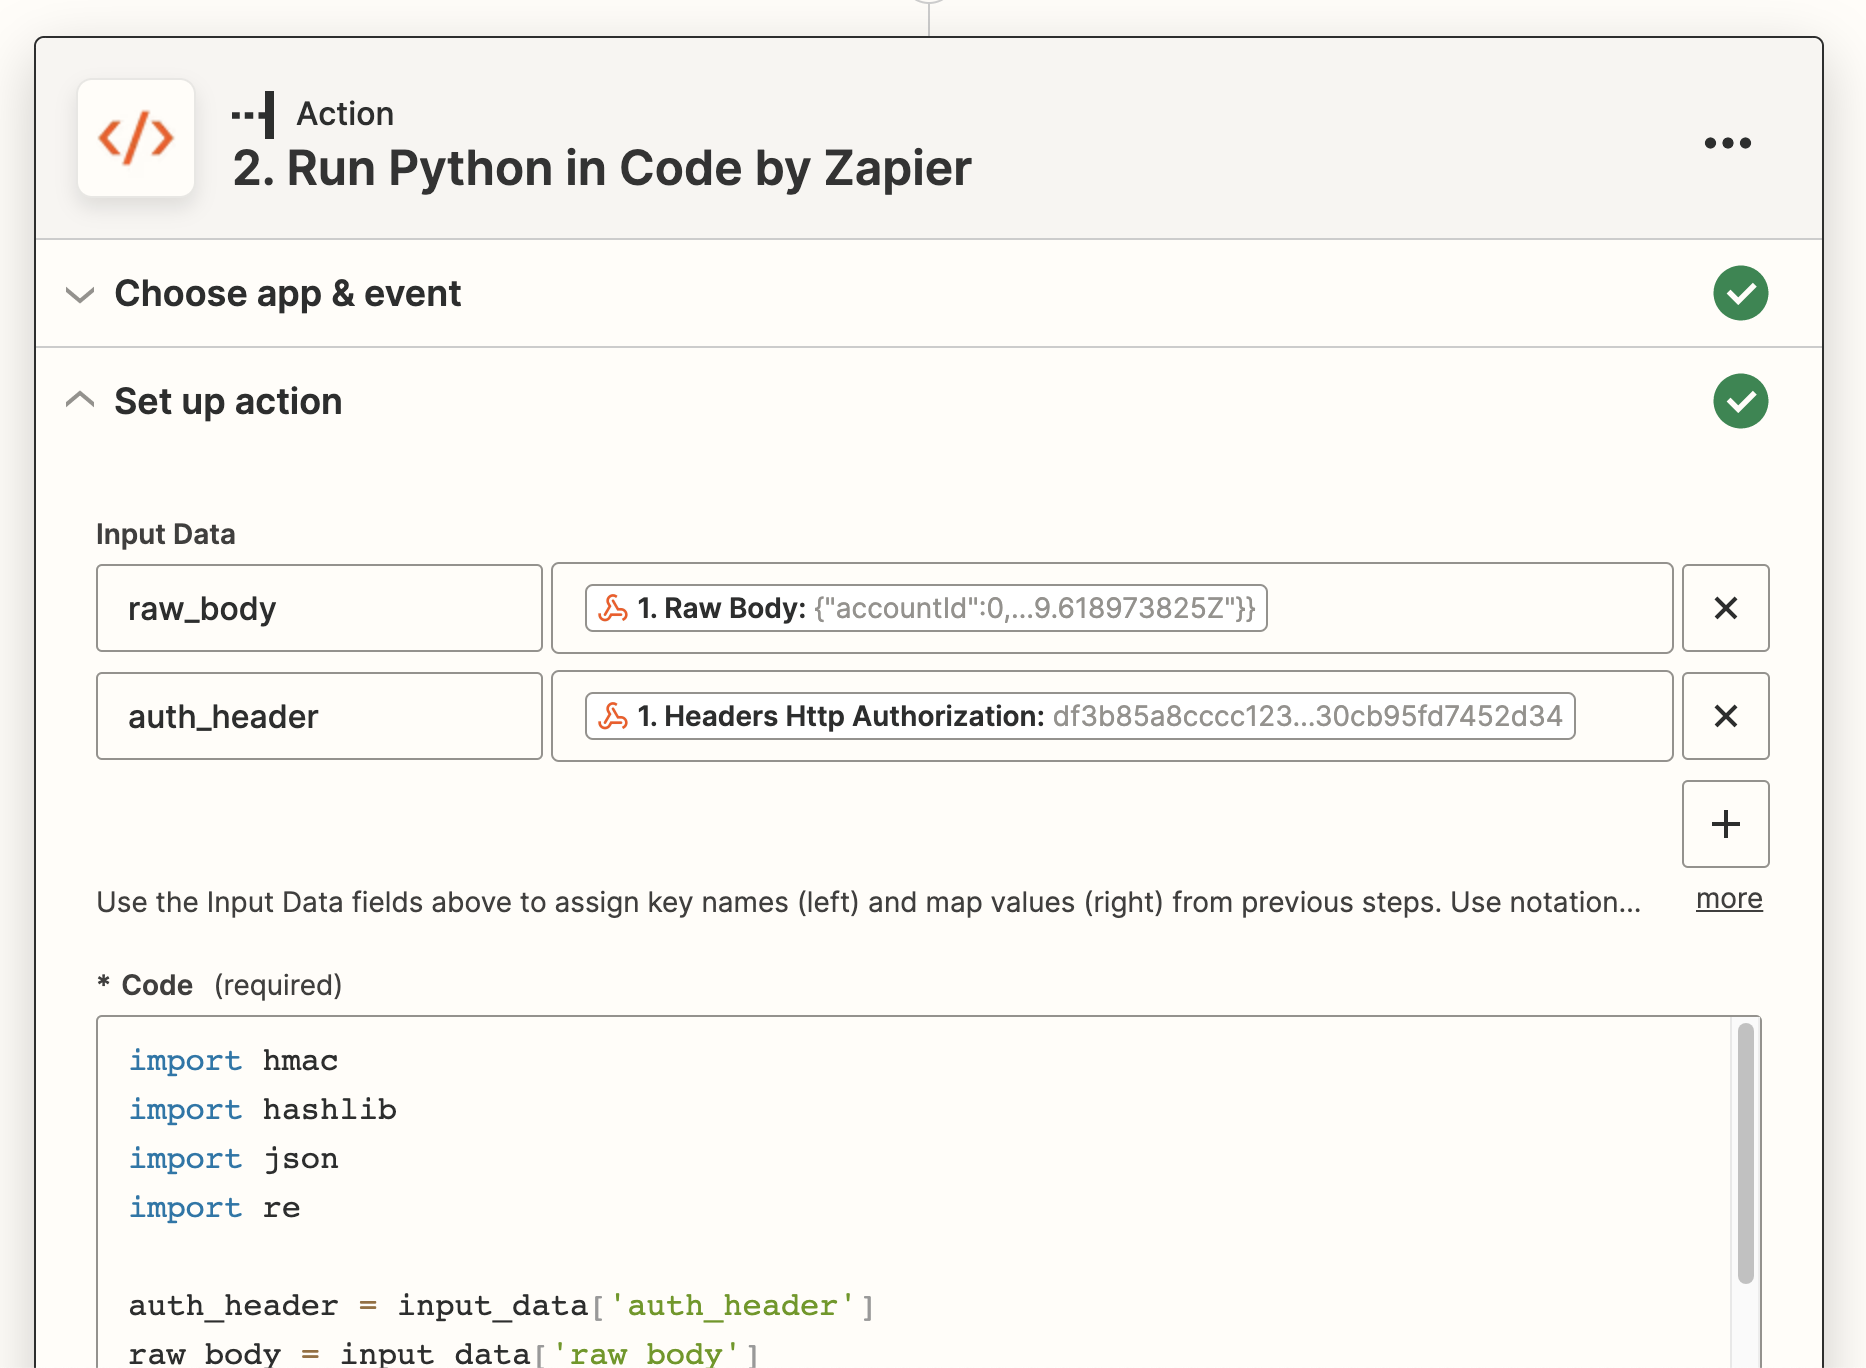
In the Code field, paste the following code, replacing YOUR_STORAGE_SECRET_HERE in the StoreClient constructor with the UUID secret you created when setting up the Storage by Zapier integration, and replacing the workbook_name and api_version variables to actual values.
The following code validates the authenticity of the request and obtains the workbook ID for the specified workbook name. Next, the code will send a update workbook command to the Tableau API for the given workbook ID.
import requests
import hashlib
import json
import hmac

# Access secret credentials
secret_store = StoreClient('YOUR_STORAGE_SECRET_HERE')
hook_secret = secret_store.get('DBT_WEBHOOK_KEY')
server_url = secret_store.get('TABLEAU_SITE_URL')
server_name = secret_store.get('TABLEAU_SITE_NAME')
pat_name = secret_store.get('TABLEAU_API_TOKEN_NAME')
pat_secret = secret_store.get('TABLEAU_API_TOKEN_SECRET')

#Enter the name of the workbook to refresh
workbook_name = "YOUR_WORKBOOK_NAME"
api_version = "ENTER_COMPATIBLE_VERSION"

#Validate authenticity of webhook coming from <Constant name="dbt" />
auth_header = input_data['auth_header']
raw_body = input_data['raw_body']

signature = hmac.new(hook_secret.encode('utf-8'), raw_body.encode('utf-8'), hashlib.sha256).hexdigest()

if signature != auth_header:
raise Exception("Calculated signature doesn't match contents of the Authorization header. This webhook may not have been sent from <Constant name="dbt" />.")

full_body = json.loads(raw_body)
hook_data = full_body['data']

if hook_data['runStatus'] == "Success":

#Authenticate with Tableau Server to get an authentication token
auth_url = f"{server_url}/api/{api_version}/auth/signin"
auth_data = {
    "credentials": {
        "personalAccessTokenName": pat_name,
        "personalAccessTokenSecret": pat_secret,
        "site": {
            "contentUrl": server_name
        }
    }
}
auth_headers = {
    "Accept": "application/json",
    "Content-Type": "application/json"
}
auth_response = requests.post(auth_url, data=json.dumps(auth_data), headers=auth_headers)

#Extract token to use for subsequent calls
auth_token = auth_response.json()["credentials"]["token"]
site_id = auth_response.json()["credentials"]["site"]["id"]

#Extract the workbook ID
workbooks_url = f"{server_url}/api/{api_version}/sites/{site_id}/workbooks"
workbooks_headers = {
    "Accept": "application/json",
    "Content-Type": "application/json",
    "X-Tableau-Auth": auth_token
}
workbooks_params = {
    "filter": f"name:eq:{workbook_name}"
}
workbooks_response = requests.get(workbooks_url, headers=workbooks_headers, params=workbooks_params)

#Assign workbook ID
workbooks_data = workbooks_response.json()
workbook_id = workbooks_data["workbooks"]["workbook"][0]["id"]

# Refresh the workbook
refresh_url = f"{server_url}/api/{api_version}/sites/{site_id}/workbooks/{workbook_id}/refresh"
refresh_data = {}
refresh_headers = {
    "Accept": "application/json",
    "Content-Type": "application/json",
    "X-Tableau-Auth": auth_token
}

refresh_trigger = requests.post(refresh_url, data=json.dumps(refresh_data), headers=refresh_headers)
return {"message": "Workbook refresh has been queued"}
Test and deploy
To make changes to your code, you can modify it and test it again. When you're happy with it, you can publish your Zap.
Was this page helpful?
This site is protected by reCAPTCHA and the Google Privacy Policy and Terms of Service apply.